GAS CONTROL | KNOB |
VALVE |
|
SCREW
|
| NUT |
WASHER | VARIABLE REGULATOR | |
| ||
|
| WASHER |
VARIABLE |
| SOLENOID |
REGULATOR |
|
|
FLAME CONTROL | VARIABLE | JAM NUT |
SOLENOID | REGULATOR | PLUNGER |
| ||
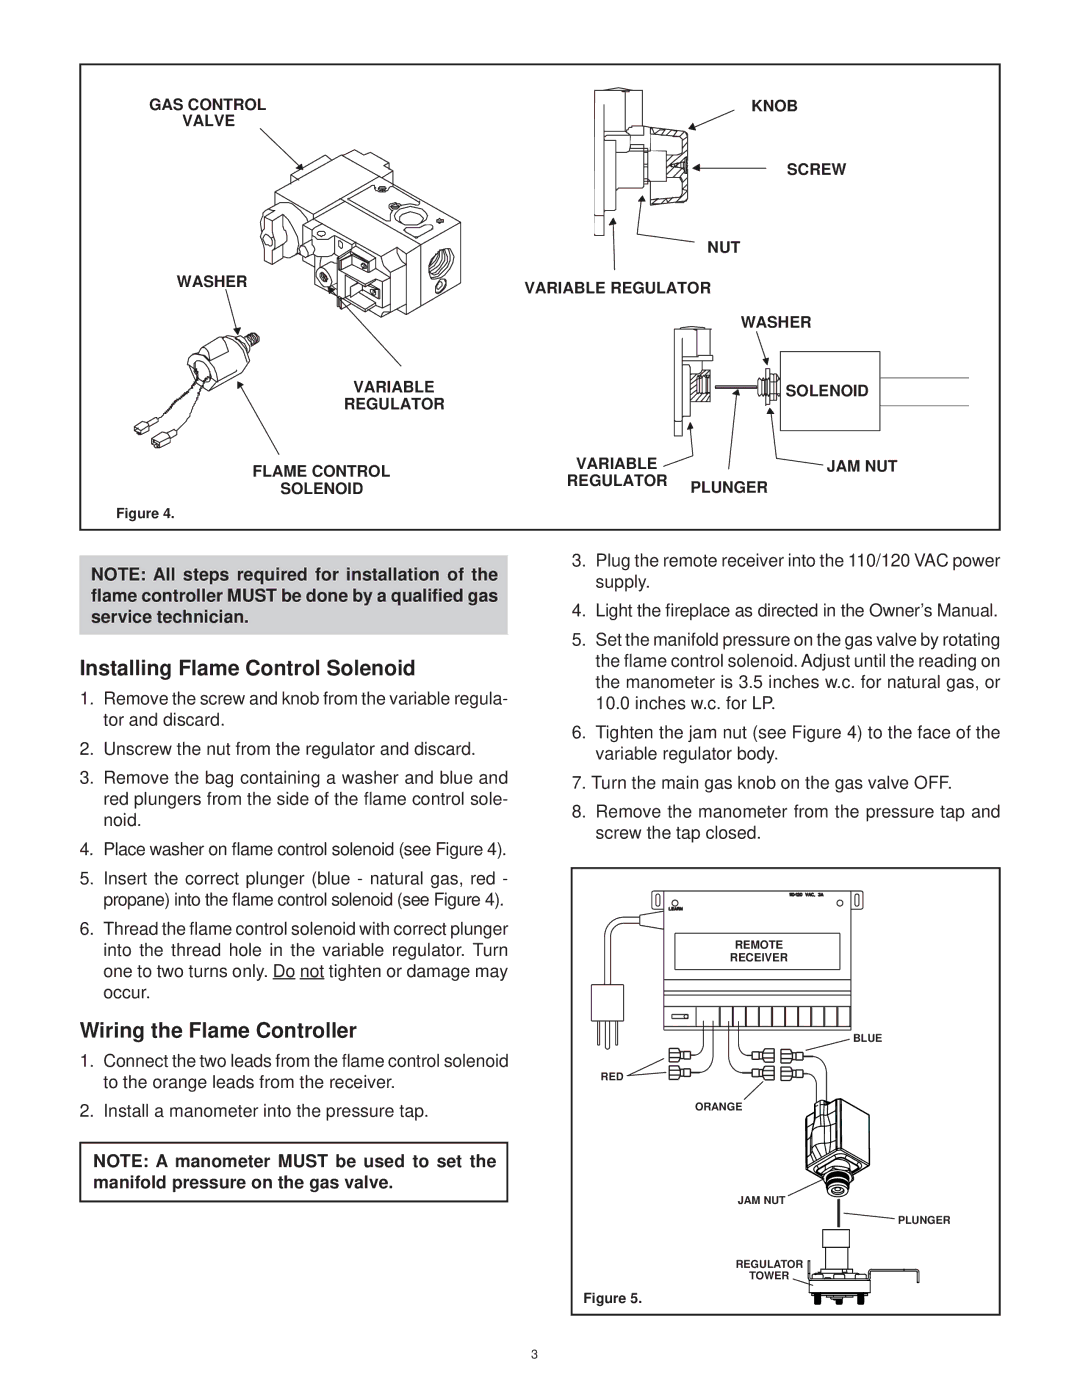
Figure 4.
NOTE: All steps required for installation of the flame controller MUST be done by a qualified gas service technician.
Installing Flame Control Solenoid
1.Remove the screw and knob from the variable regula- tor and discard.
2.Unscrew the nut from the regulator and discard.
3.Remove the bag containing a washer and blue and red plungers from the side of the flame control sole- noid.
4.Place washer on flame control solenoid (see Figure 4).
5.Insert the correct plunger (blue - natural gas, red - propane) into the flame control solenoid (see Figure 4).
6.Thread the flame control solenoid with correct plunger into the thread hole in the variable regulator. Turn one to two turns only. Do not tighten or damage may occur.
Wiring the Flame Controller
1.Connect the two leads from the flame control solenoid to the orange leads from the receiver.
2.Install a manometer into the pressure tap.
NOTE: A manometer MUST be used to set the manifold pressure on the gas valve.
3.Plug the remote receiver into the 110/120 VAC power supply.
4.Light the fireplace as directed in the Owner’s Manual.
5.Set the manifold pressure on the gas valve by rotating the flame control solenoid. Adjust until the reading on the manometer is 3.5 inches w.c. for natural gas, or 10.0 inches w.c. for LP.
6.Tighten the jam nut (see Figure 4) to the face of the variable regulator body.
7.Turn the main gas knob on the gas valve OFF.
8.Remove the manometer from the pressure tap and screw the tap closed.
REMOTE |
RECEIVER |
BLUE |
RED |
ORANGE |
JAM NUT |
PLUNGER |
REGULATOR |
TOWER |
Figure 5. |
3
