
SL-5653 specifications
The Heath Zenith SL-5653 is a versatile and robust outdoor motion sensor light designed to enhance security and provide convenience around homes and businesses. Featuring a sleek design, this motion-activated light combines functionality with aesthetic appeal, making it an ideal addition to various exterior settings.One of the standout features of the SL-5653 is its advanced motion sensor technology. The integrated PIR (Passive Infrared) sensor detects movement within a specified range, triggering the light to illuminate when someone approaches. This is particularly useful for homeowners wanting to deter potential intruders or simply illuminate pathways for safety. The adjustable sensitivity settings allow users to customize the detection range, ensuring that the light activates under the desired conditions.
The SL-5653 boasts a durable construction designed to withstand the elements. The weather-resistant materials ensure that it functions effectively, regardless of rain, snow, or extreme temperatures. This durability makes it an excellent choice for outdoor applications in varied climates.
Another impressive characteristic of the SL-5653 is its energy efficiency. The light is equipped with LED technology, which not only consumes less power but also has a longer lifespan compared to traditional bulbs. This means lower electricity bills and reduced frequency in bulb replacements, ultimately leading to more sustainable energy consumption. The efficient LED light provides ample illumination while contributing to environmental conservation efforts.
The SL-5653 also features a series of customizable settings. Users can select different modes, including manual operation and timed duration settings, allowing the light to remain on for a predetermined period after activation. This is particularly useful for planned outdoor gatherings or when extra lighting is needed without the motion sensor's automatic step.
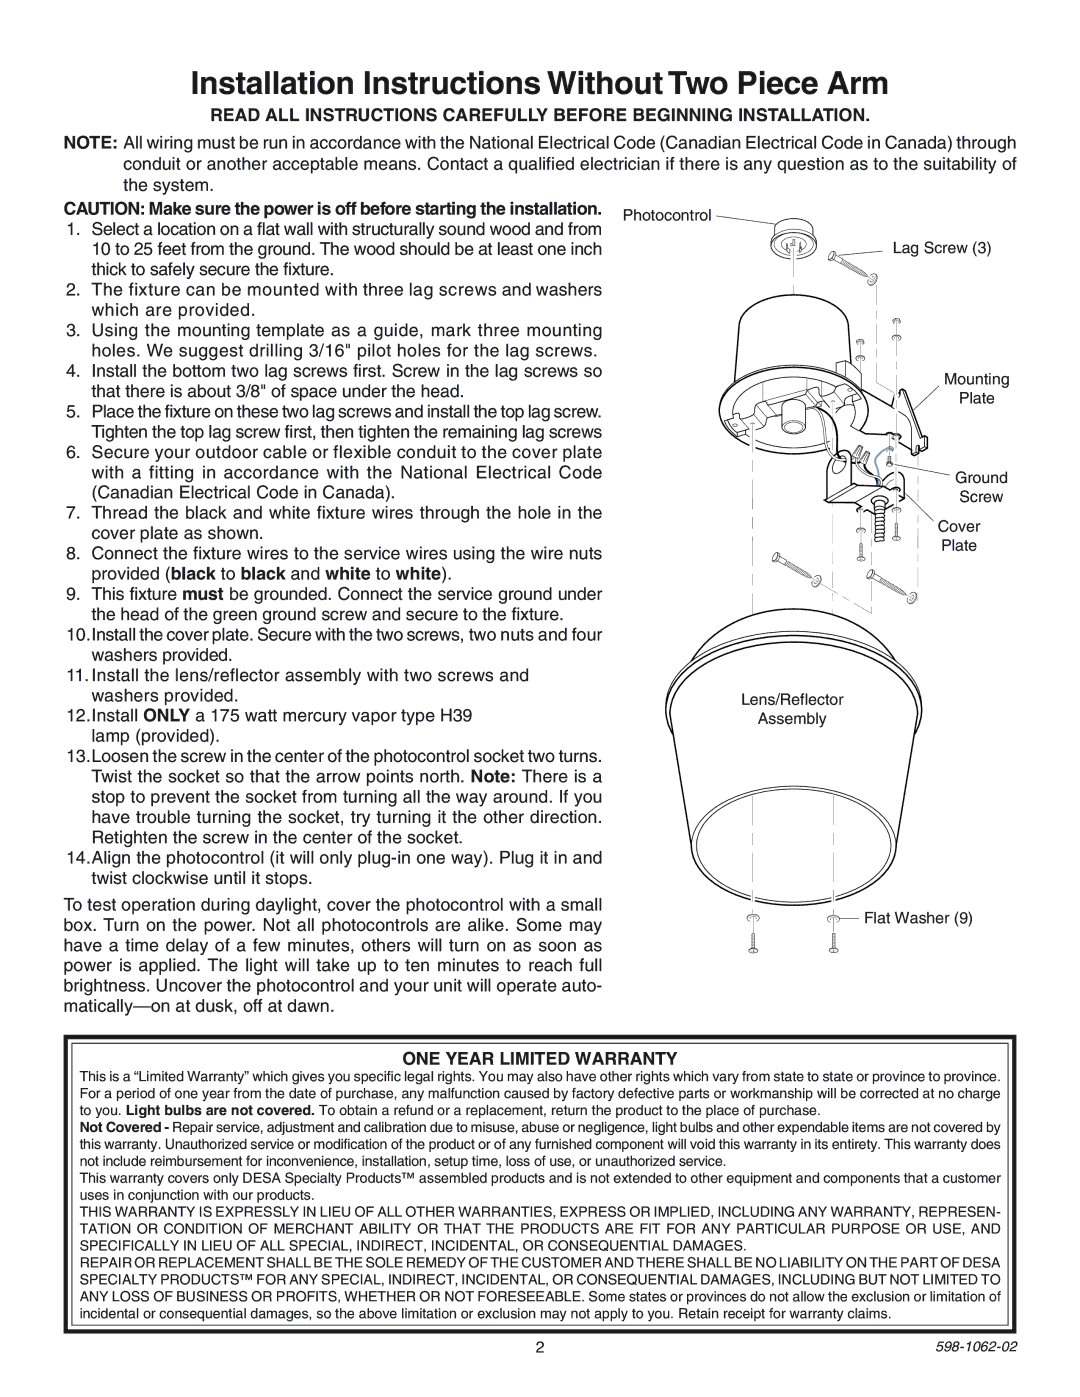
Easy installation is another highlight of the Heath Zenith SL-5653. The light comes with straightforward instructions and mounting hardware, enabling quick setup even for those with minimal DIY experience. With its attractive sleek design and versatile functionality, the SL-5653 is a practical choice for enhancing safety, security, and convenience in outdoor environments. In summary, the Heath Zenith SL-5653 is a feature-rich, reliable, and efficient solution for anyone looking to improve their outdoor lighting and security measures.