
UT-5105-WH, UT-5105-BZ specifications
The Heath Zenith UT-5105-WH and UT-5105-BZ are two innovative outdoor motion sensor lights that combine modern design with advanced technology to enhance security and convenience around homes and properties. Both models are an excellent choice for homeowners seeking reliable outdoor lighting solutions that not only illuminate spaces but also provide peace of mind.One of the standout features of the Heath Zenith UT-5105 series is its motion detection capability. Equipped with a high-performance sensor, these lights can detect movement within a specified range, typically up to 30 feet, making them ideal for driveways, entrances, and backyards. The adjustable sensor allows users to customize detection sensitivity and coverage area, ensuring that the light activates only when necessary, thus conserving energy and prolonging the lifespan of the bulb.
Another significant advantage of the UT-5105-WH and UT-5105-BZ is their versatile design. Offered in two finishes—white and bronze—these lights can seamlessly blend with various architectural styles and color palettes. The sleek, contemporary look makes them a stylish addition to any exterior decor, whether on a modern home or a classic-style building.
The products feature a durable weather-resistant construction, ensuring they can withstand outdoor elements such as rain, snow, and extreme temperature fluctuations. This resilience is vital for maintaining functionality and appearance over time, making them a long-lasting investment.
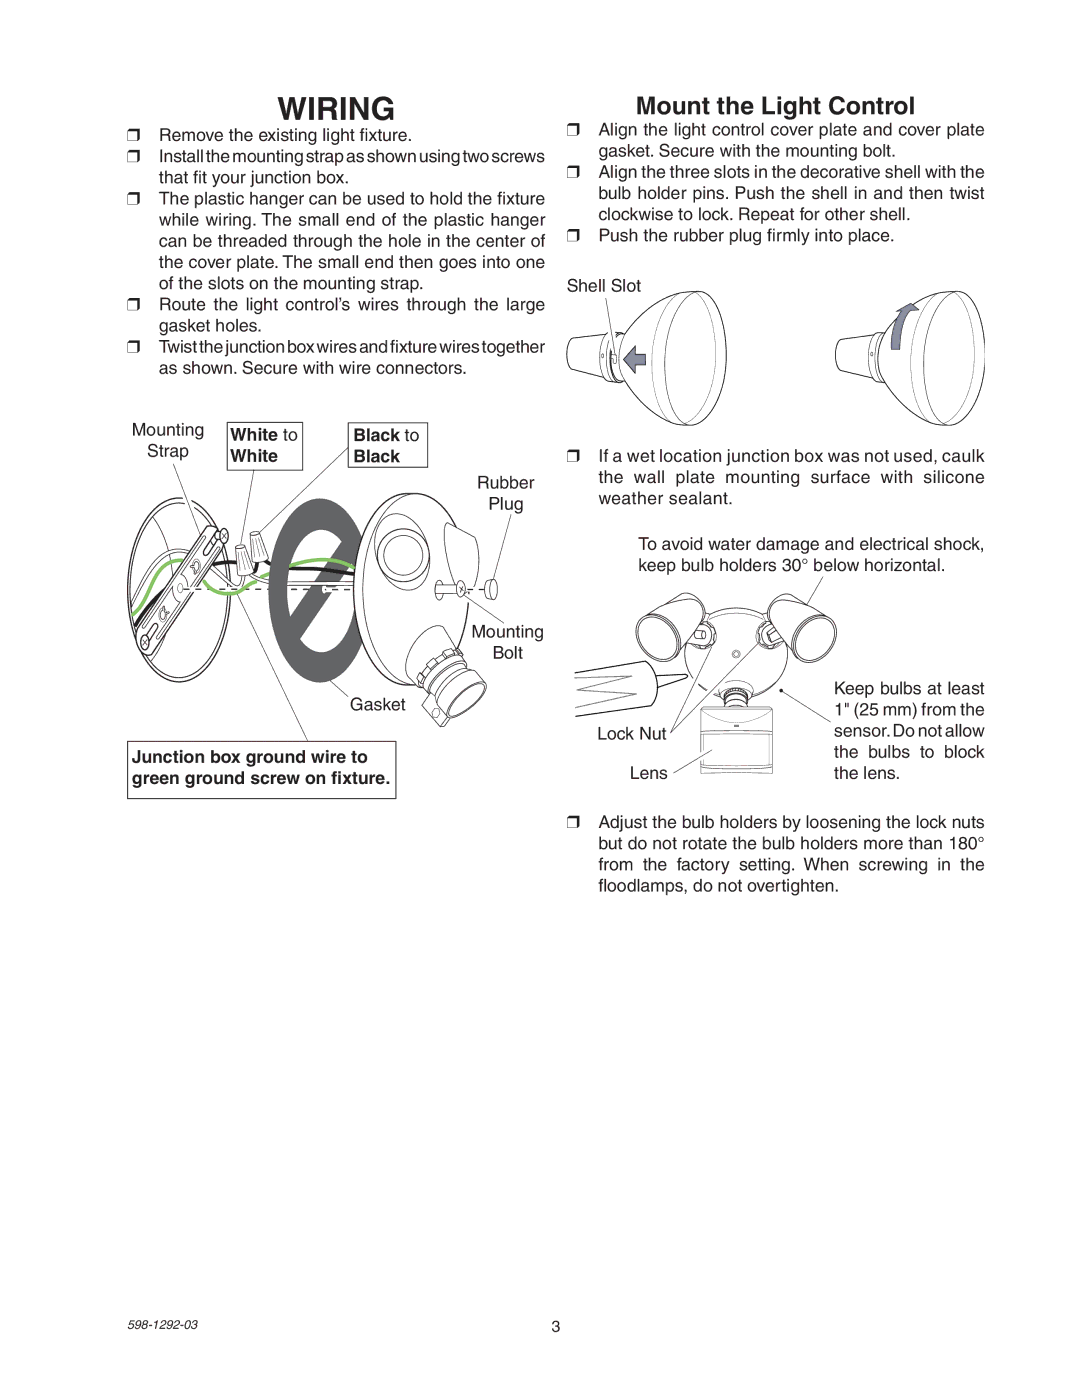
In terms of installation, the UT-5105 lights are designed with user-friendliness in mind. They are easy to mount and come with detailed instructions, enabling homeowners to set them up without the need for professional assistance. The adjustable swivel design allows users to direct the light precisely where it is needed, enhancing safety and visibility in outdoor spaces.
Furthermore, the Heath Zenith UT-5105 series utilizes energy-efficient LED technology, which not only provides bright and effective illumination but also reduces energy consumption. This eco-friendly approach aligns with modern sustainability practices, offering homeowners not just savings on electricity bills but also a lower carbon footprint.
In summary, the Heath Zenith UT-5105-WH and UT-5105-BZ outdoor motion sensor lights deliver a robust combination of functionality, durability, and aesthetic appeal. With features such as adjustable motion detection, weather-resistant construction, and energy-efficient LEDs, these lights represent an ideal solution for enhancing outdoor security and visibility. Whether illuminating pathways, driveways, or entryways, the UT-5105 series stands out as a reliable choice for modern homeowners.