Mode Switching Summary
TEST ![]() Move
Move
AUTO 
Flip light switch
off for one second
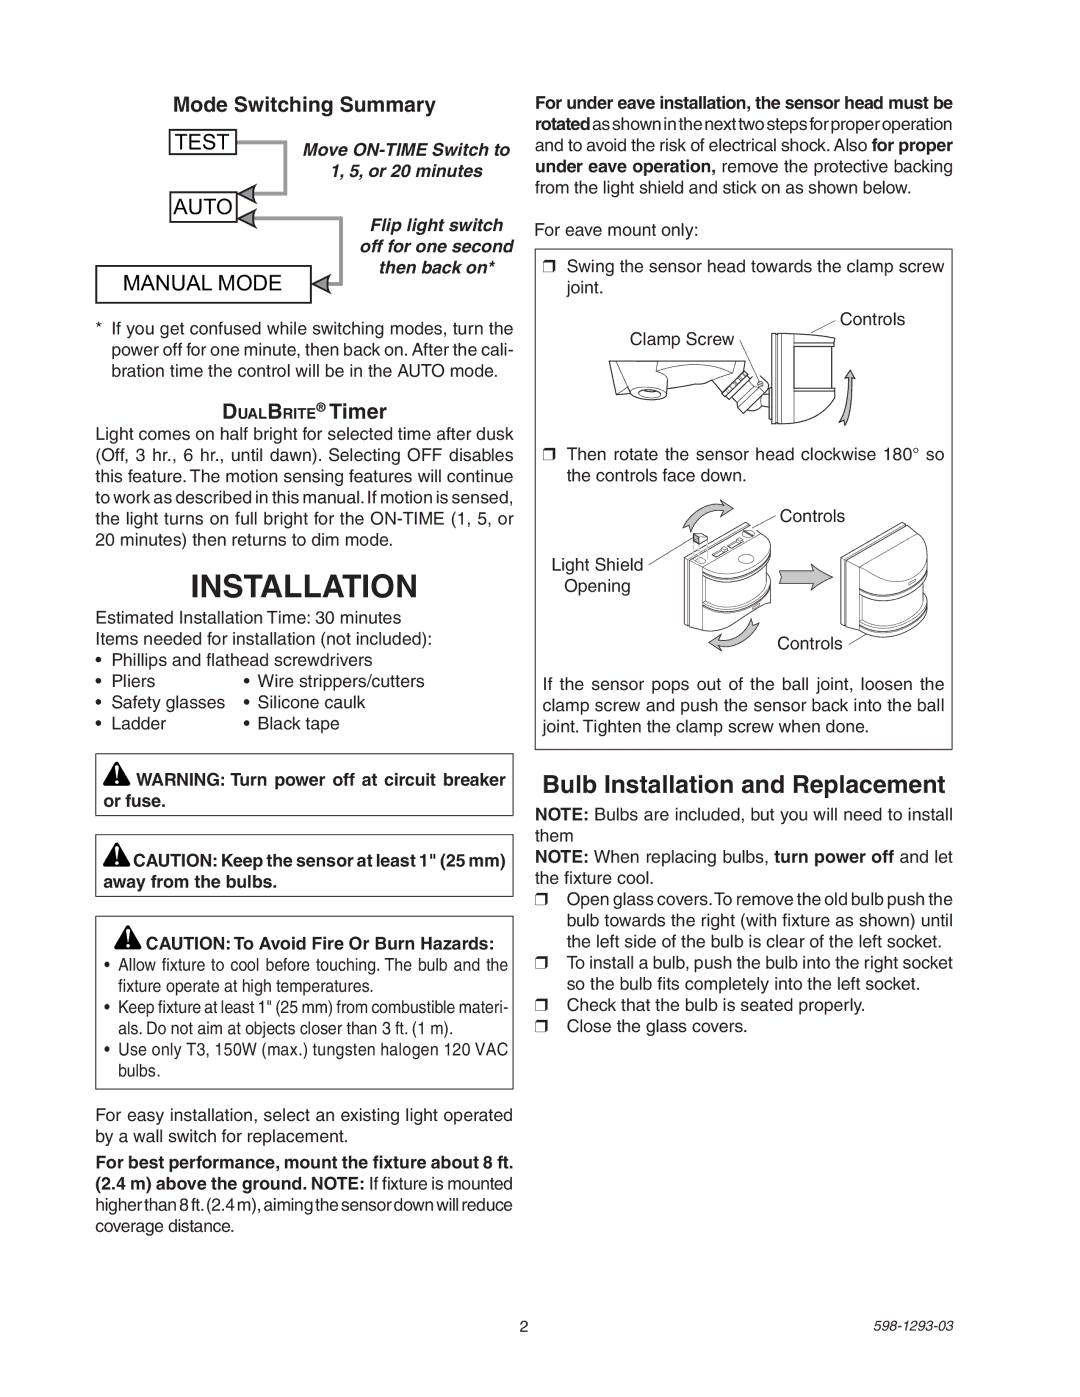
For under eave installation, the sensor head must be rotatedasshowninthenexttwostepsforproperoperation and to avoid the risk of electrical shock. Also for proper under eave operation, remove the protective backing from the light shield and stick on as shown below.
For eave mount only:
MANUAL MODE
then back on*
❒Swing the sensor head towards the clamp screw joint.
*If you get confused while switching modes, turn the power off for one minute, then back on. After the cali- bration time the control will be in the AUTO mode.
DualBrite® Timer
Light comes on half bright for selected time after dusk (Off, 3 hr., 6 hr., until dawn). Selecting OFF disables this feature. The motion sensing features will continue to work as described in this manual. If motion is sensed, the light turns on full bright for the
INSTALLATION
Estimated Installation Time: 30 minutes Items needed for installation (not included):
• | Phillips and flathead screwdrivers | |
• | Pliers | • Wire strippers/cutters |
• | Safety glasses | • Silicone caulk |
• | Ladder | • Black tape |
![]() WARNING: Turn power off at circuit breaker or fuse.
WARNING: Turn power off at circuit breaker or fuse.
![]() CAUTION: Keep the sensor at least 1" (25 mm) away from the bulbs.
CAUTION: Keep the sensor at least 1" (25 mm) away from the bulbs.
![]() CAUTION: To Avoid Fire Or Burn Hazards:
CAUTION: To Avoid Fire Or Burn Hazards:
•Allow fixture to cool before touching. The bulb and the fixture operate at high temperatures.
•Keep fixture at least 1" (25 mm) from combustible materi- als. Do not aim at objects closer than 3 ft. (1 m).
•Use only T3, 150W (max.) tungsten halogen 120 VAC bulbs.
For easy installation, select an existing light operated by a wall switch for replacement.
For best performance, mount the fixture about 8 ft. (2.4 m) above the ground. NOTE: If fixture is mounted higher than 8 ft.(2.4 m), aiming the sensor down will reduce coverage distance.
Controls
Clamp Screw
❒Then rotate the sensor head clockwise 180° so the controls face down.
![]() Controls
Controls
Light Shield ![]()
![]()
Opening
Controls ![]()
If the sensor pops out of the ball joint, loosen the clamp screw and push the sensor back into the ball joint. Tighten the clamp screw when done.
Bulb Installation and Replacement
NOTE: Bulbs are included, but you will need to install them
NOTE: When replacing bulbs, turn power off and let the fixture cool.
❒Open glass covers.To remove the old bulb push the bulb towards the right (with fixture as shown) until the left side of the bulb is clear of the left socket.
❒To install a bulb, push the bulb into the right socket so the bulb fits completely into the left socket.
❒Check that the bulb is seated properly.
❒Close the glass covers.