
BRZ3000.1D PRO, BRZ2100.1D, BRZ1700.1D, BRZ1200.1D, BRZ2400.1D specifications
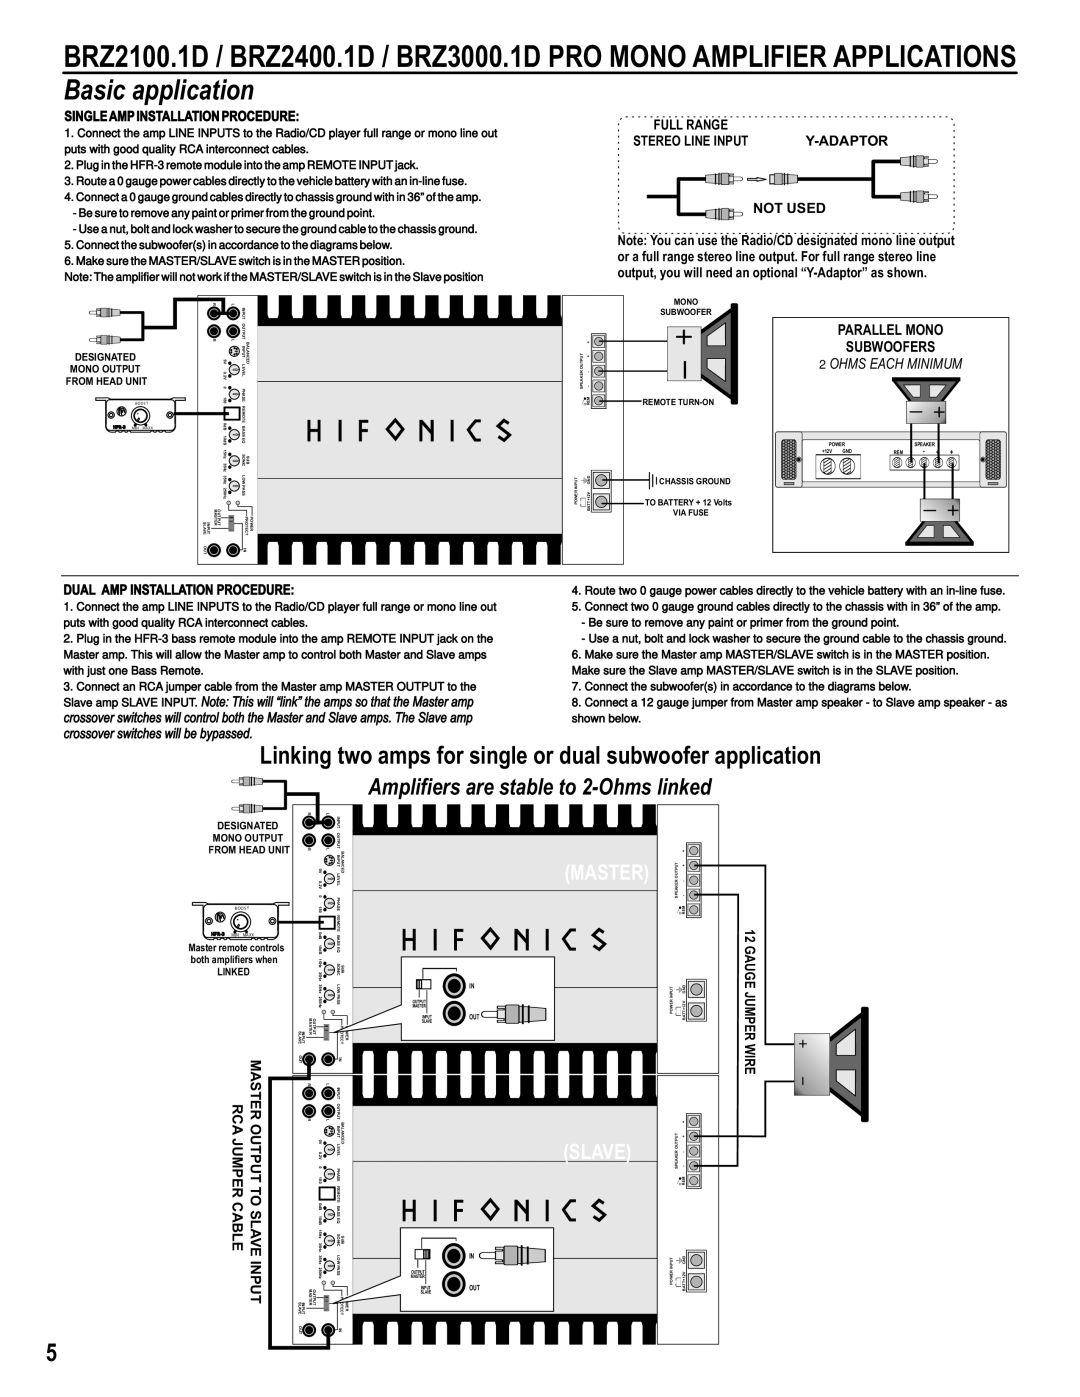
Hifonics has established itself as a formidable player in the world of car audio with its BRZ series amplifiers, specifically designed to deliver exceptional power and performance. Among these models are the BRZ2400.1D, BRZ1200.1D, BRZ1700.1D, BRZ2100.1D, and BRZ3000.1D PRO, each catering to different needs and preferences for audiophiles and casual listeners alike.The BRZ2400.1D boasts an impressive power output, delivering 2400 watts RMS at 1 ohm. This powerhouse amplifier employs advanced Class D technology, which maximizes power efficiency while minimizing heat production. Its advanced circuit design not only enhances reliability but also ensures that users experience crisp, clear audio across a wide frequency range.
The BRZ1200.1D offers a balanced solution for users needing substantial power without overwhelming their system. With a 1200 watts RMS output at 1 ohm, it maintains high efficiency and performance. The compact design allows easy installation in various vehicles, making it an attractive option for those seeking quality in a smaller package.
For those desiring a middle ground, the BRZ1700.1D delivers 1700 watts RMS at 1 ohm. This model is particularly notable for its innovative features, including a low-pass filter, bass boost, and adjustable input sensitivity, allowing users to customize their listening experience to fit their unique audio preferences.
The BRZ2100.1D further amplifies the performance, providing 2100 watts RMS at 1 ohm. This model includes a subsonic filter that helps to eliminate unwanted low frequencies, ensuring that the bass remains tight and controlled.
Finally, the BRZ3000.1D PRO represents the pinnacle of Hifonics power amplifiers, with an astounding 3000 watts RMS at 1 ohm. This model is ideal for enthusiasts looking to push the limits of their audio systems. Increased capacitance and advanced thermal management allow it to handle high power loads without risk of overheating, making it perfect for high-performance setups.
Each amplifier in the BRZ series features a sophisticated protection circuit to safeguard against short circuits, overheating, and overcurrent, providing peace of mind to users. Moreover, with RCA inputs, wire gauge terminals, and adjustable controls, installation and tuning are hassle-free.
The Hifonics BRZ series amplifiers combine power, efficiency, and flexibility, making them an appealing choice for anyone looking to enhance their car audio experience. These amplifiers represent a complete package for sound enthusiasts, ensuring that every note and beat is heard with depth and clarity.