
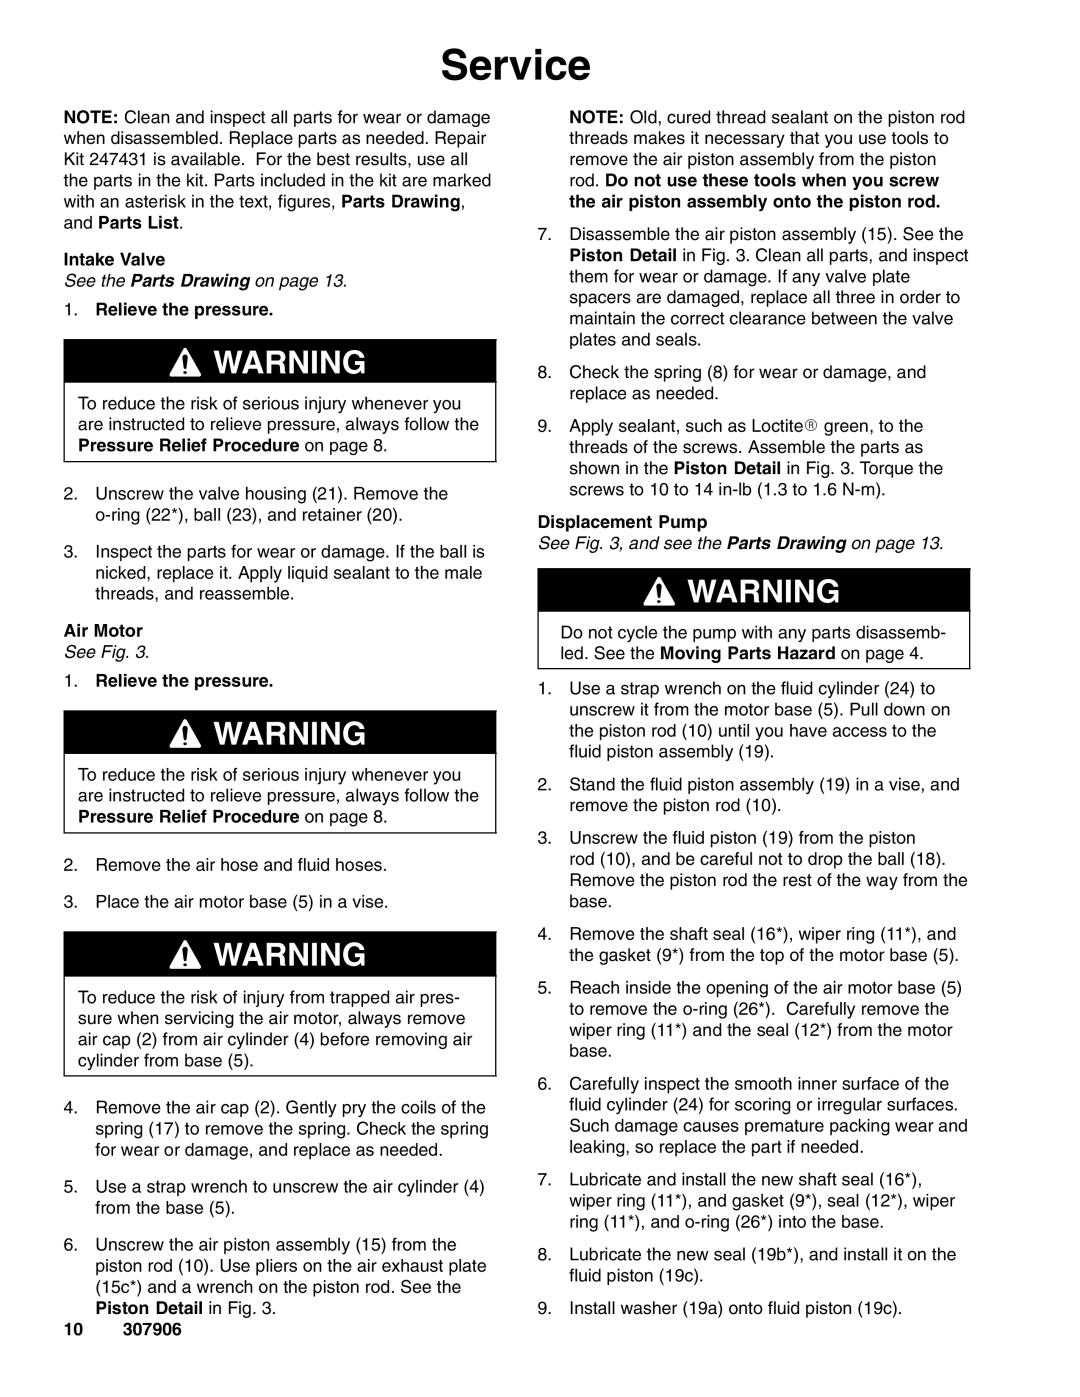
222104 specifications
The Hitachi 222104 is a powerful and versatile piece of machinery widely recognized for its robust features and impressive technological capabilities. Tailored for industrial applications, this model exemplifies Hitachi's commitment to quality, efficiency, and durability.One of the standout features of the Hitachi 222104 is its powerful engine, designed to deliver top-notch performance while maintaining exceptional fuel efficiency. This allows operators to maximize productivity without incurring high operational costs, making it an economical choice for businesses. The engine's advanced technology minimizes emissions, aligning with global environmental standards and promoting sustainable practices in the industry.
The Hitachi 222104 is equipped with state-of-the-art hydraulic systems that enhance its operational capabilities. These hydraulic systems provide precise control for various functions, allowing for smooth and effective maneuvering in diverse working environments. The intelligent hydraulic features enable the machine to adapt to different loads and tasks, thus improving its overall efficiency and productivity.
The machine's design emphasizes operator comfort and safety. The spacious cabin is ergonomically designed, providing ample room for movement and reducing fatigue during long working hours. Additionally, it is equipped with advanced climate control systems to ensure a comfortable working environment, regardless of external conditions. Safety features such as anti-slip surfaces and reinforced structures also contribute to a secure working experience.
Another significant characteristic of the Hitachi 222104 is its versatility. Designed to handle a wide range of applications, from excavation and lifting to material handling, this machine is an excellent choice for contractors and businesses in various sectors. Its compatibility with numerous attachments and tools further enhances its functionality, making it adaptable to changing operational needs.
Moreover, the Hitachi 222104 features advanced diagnostic and monitoring technologies that offer real-time feedback on machine performance. This capability allows for proactive maintenance and timely interventions, minimizing downtime and extending the machine's lifespan. The intuitive control systems simplify operation, enabling users to operate the machine with ease, even if they are not seasoned operators.
In conclusion, the Hitachi 222104 stands out as a reliable and efficient machine. Its powerful engine, sophisticated hydraulic systems, operator-centric design, and versatility make it an ideal choice for various industrial applications. With a focus on safety, efficiency, and sustainability, this model reflects Hitachi's dedication to delivering high-quality solutions that meet the evolving demands of the industry.