←・→ : The input characters can be edited by using the arrow symbols.

1)Set the flashing cursor to either of the arrow symbols and Press SET button. The flashing cursor shifts in the arrow direction. Press the SET button repeatedly to where the flashing cursor overlaps the character to be changed.

2)Select the character to be inserted with the UP and DOWN buttons, then press SET to change the character.

RESET

: To delete all characters from the display, shift the


flashing cursor to “RESET”, then press SET. After


deleting, the flashing cursor returns to the start of


the input character select table.

RET

: Position the flashing cursor to “RET” and press SET


to exit the “CAMERA TITLE MENU” and return to


the “MAIN MENU”.

END

: Shift the cursor to “END” and press the SET button to


close the menu and return to the normal screen.

Title positioning setting POSITION

Use when the display position on the screen has been determined.

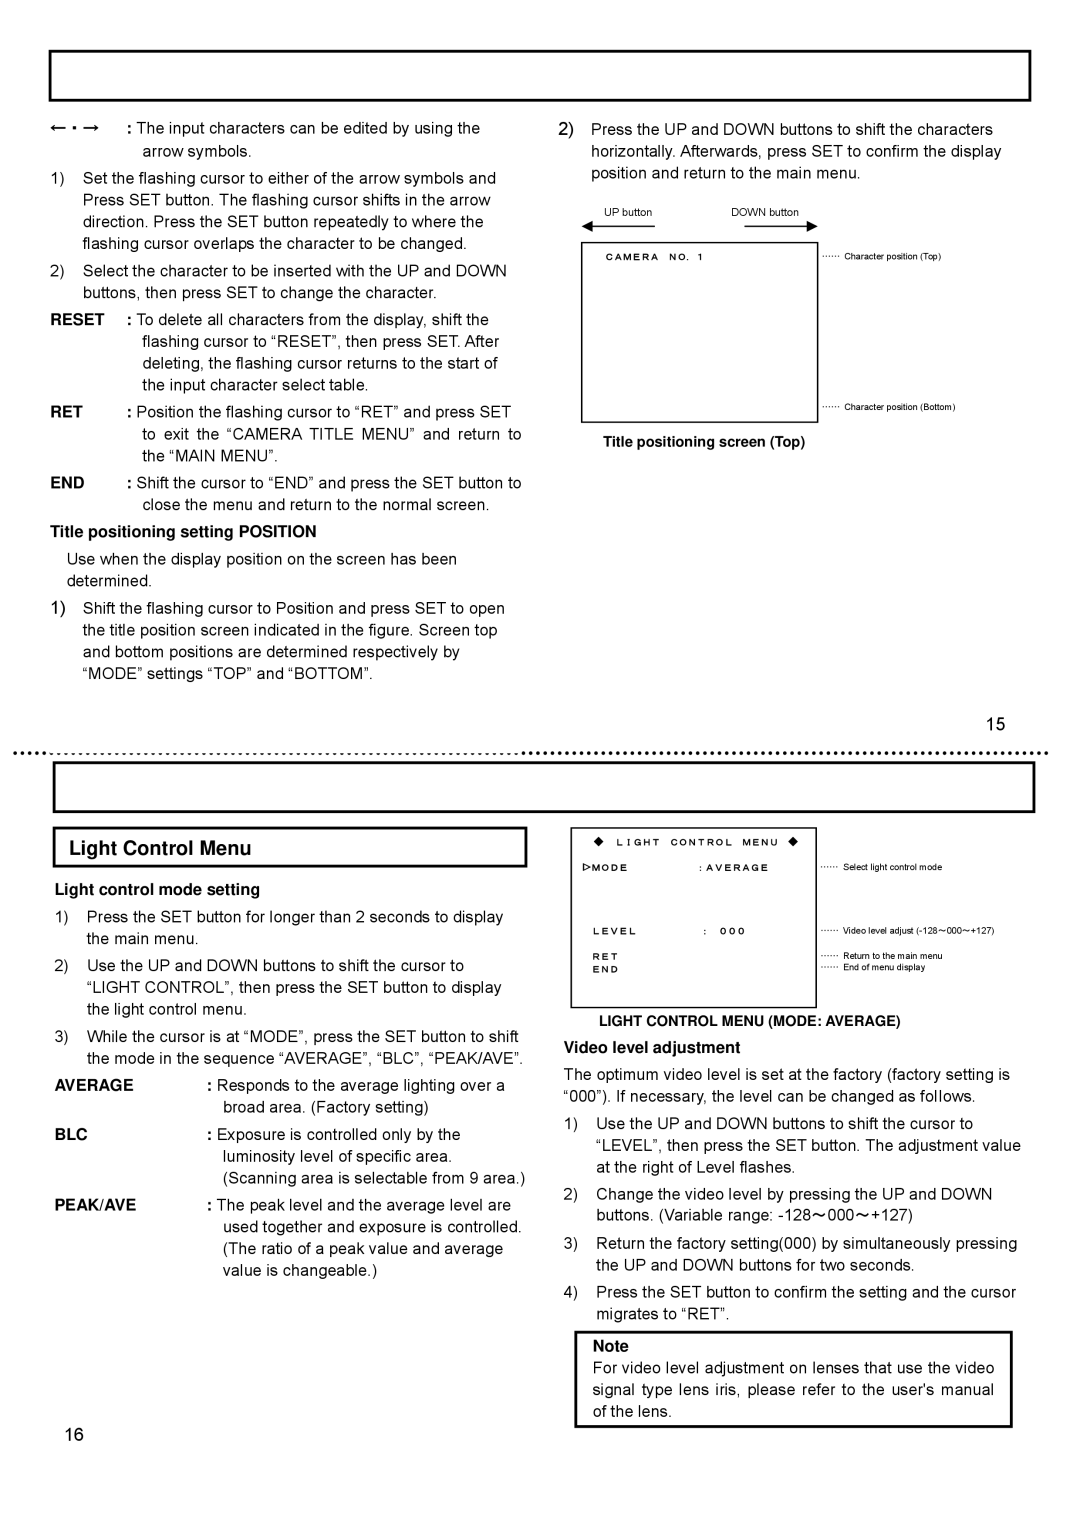
1)Shift the flashing cursor to Position and press SET to open the title position screen indicated in the figure. Screen top and bottom positions are determined respectively by “MODE” settings “TOP” and “BOTTOM”.

2)Press the UP and DOWN buttons to shift the characters horizontally. Afterwards, press SET to confirm the display position and return to the main menu.

UP button


DOWN button


…… Character position (Top)

CAMERA

NO.1


…… Character position (Bottom)

Title positioning screen (Top)

15

Light Control Menu

Light control mode setting

1)Press the SET button for longer than 2 seconds to display the main menu.

2)Use the UP and DOWN buttons to shift the cursor to “LIGHT CONTROL”, then press the SET button to display the light control menu.

3)While the cursor is at “MODE”, press the SET button to shift the mode in the sequence “AVERAGE”, “BLC”, “PEAK/AVE”.

AVERAGE

: Responds to the average lighting over a


broad area. (Factory setting)

BLC

: Exposure is controlled only by the


luminosity level of specific area.


(Scanning area is selectable from 9 area.)

PEAK/AVE

: The peak level and the average level are


used together and exposure is controlled.


(The ratio of a peak value and average


value is changeable.)

16

LIGHT

CONTROL MENU


>MODE

:AVERAGE

…… Select light control mode

LEVEL

: 000

…… Video level adjust (-128000+127)

RET


…… Return to the main menu

END


…… End of menu display


LIGHT CONTROL MENU (MODE: AVERAGE)

Video level adjustment

The optimum video level is set at the factory (factory setting is “000”). If necessary, the level can be changed as foIIows.

1)Use the UP and DOWN buttons to shift the cursor to “LEVEL”, then press the SET button. The adjustment value at the right of Level flashes.

2)Change the video level by pressing the UP and DOWN buttons. (Variable range: -128000+127)

3)Return the factory setting(000) by simultaneously pressing the UP and DOWN buttons for two seconds.

4)Press the SET button to confirm the setting and the cursor migrates to “RET”.

Note

For video level adjustment on lenses that use the video signal type lens iris, please refer to the user's manual of the lens.

Page 10
Image 10
Hitachi KP-DE500, CCD Camera, KP-E500 operation manual Light Control Menu

CCD Camera, KP-DE500, KP-E500 specifications

The Hitachi KP-E500 and KP-DE500 are innovative cameras designed for professional applications in broadcast and industrial environments. These two models are particularly recognized for their high performance, reliability, and advanced technology, catering to the evolving needs of video production and surveillance.

The Hitachi KP-E500 is a compact and lightweight CCD camera that excels in delivering exceptional image quality. It features a 2/3-inch CCD sensor that produces vivid colors and precise details, making it suitable for various applications such as studio production, live events, and ENG (Electronic News Gathering). The camera supports a standard resolution of 1080i, offering high-definition video that meets the industry's expectations.

One of the standout features of the KP-E500 is its high sensitivity, allowing for operation in low light conditions. This capability is critical for capturing high-quality footage in challenging environments. The camera also includes a dynamic range that ensures excellent performance in scenes with varying brightness levels. Furthermore, the KP-E500 is equipped with advanced noise reduction technology, which minimizes unwanted noise and enhances the overall clarity of the images.

On the other hand, the Hitachi KP-DE500 is an innovative digital camera that leverages state-of-the-art digital signal processing. This model is designed for versatility in applications such as corporate video production, academic settings, and outdoor events. The KP-DE500 boasts a similar 2/3-inch CCD sensor but goes a step further with its enhanced digital features.

The KP-DE500 includes a variety of customizable settings, enabling users to fine-tune the camera's performance according to specific shooting conditions. This digital camera also offers real-time image processing capabilities, making it an excellent choice for applications that require immediate feedback, such as live broadcasts. Both models support a broad range of lenses, allowing users to select the ideal lens for their particular shooting requirements.

Moreover, the KP-DE500 is designed with user-friendly interfaces, simplifying the operation for camera operators and technicians alike. With robust connectivity options, these models can seamlessly integrate into existing video production workflows. Overall, the Hitachi KP-E500 and KP-DE500 represent a significant advancement in camera technology, providing professionals with the tools needed to create stunning video content with ease and efficiency.