English
APPLICATIONS
◯Drilling of brick and concrete block, etc.
◯Driving and removing of machine screws, wood screws, tapping screws, etc.
◯Drilling of various metals.
◯Drilling of various woods.
BATTERY REMOVAL/INSTALLATION
1.Battery removal
Hold the handle tightly and push the battery latch to remove the battery (see Figs. 1 and 2).
CAUTION
Never
2.Battery installation
Insert the battery while observing its polarities (see Fig. 2).
NOTE
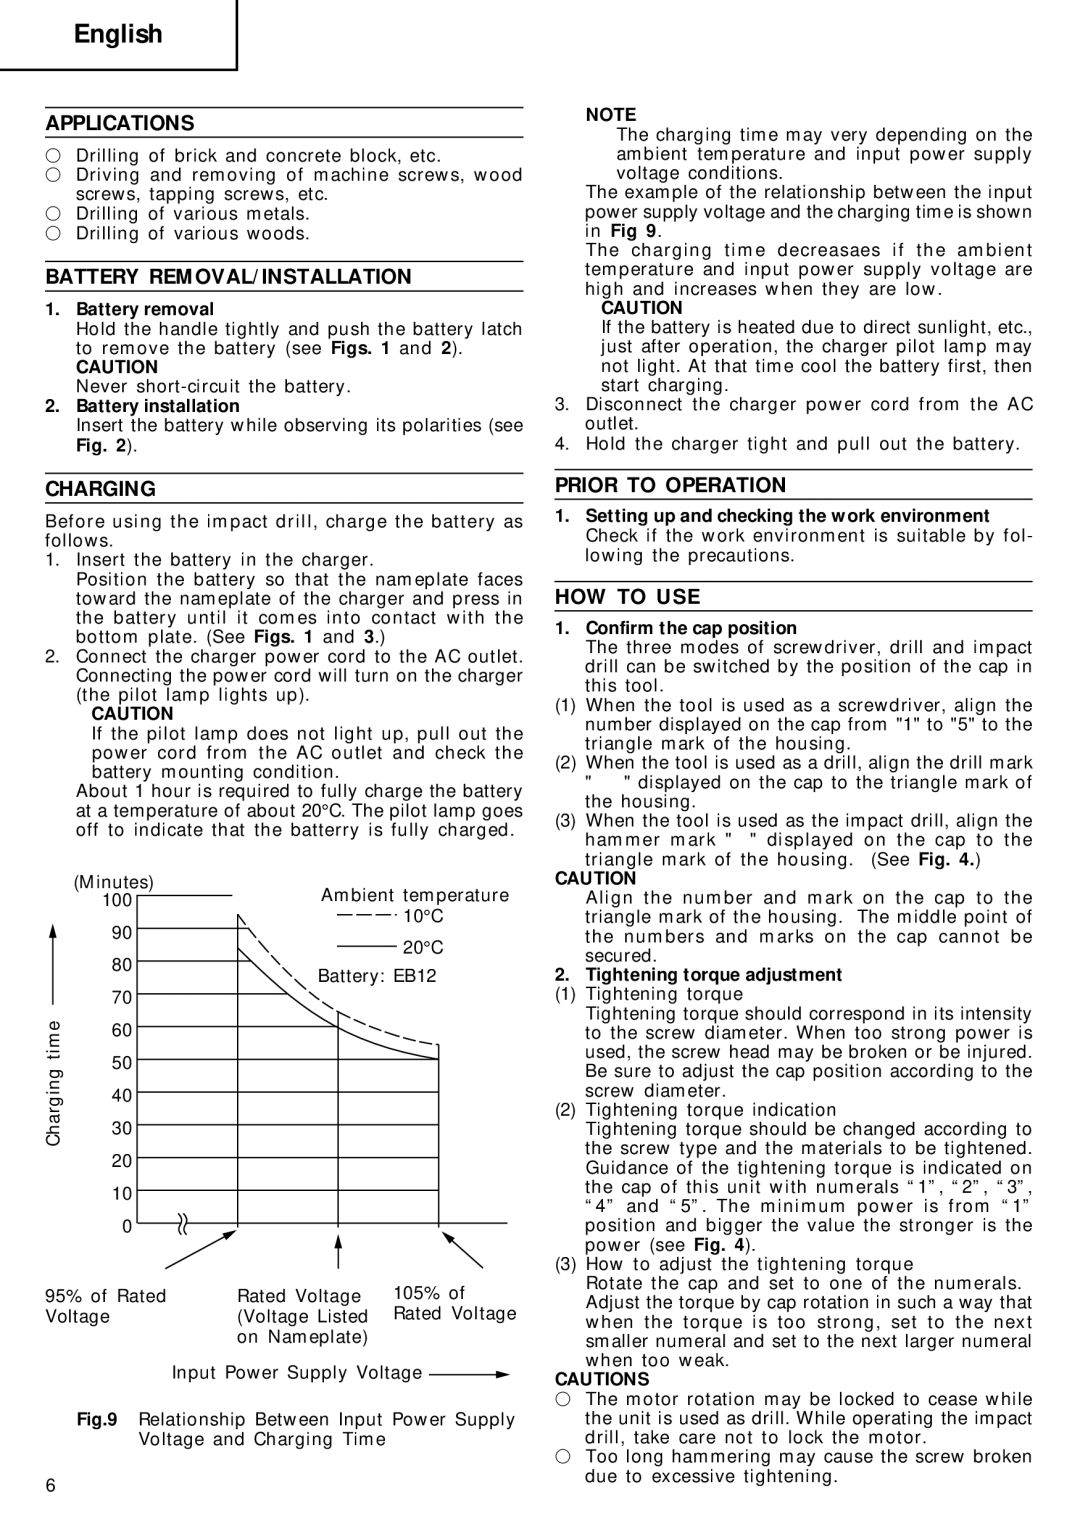
The charging time may very depending on the ambient temperature and input power supply voltage conditions.
The example of the relationship between the input power supply voltage and the charging time is shown in Fig 9.
The charging time decreasaes if the ambient temperature and input power supply voltage are high and increases when they are low.
CAUTION
If the battery is heated due to direct sunlight, etc., just after operation, the charger pilot lamp may not light. At that time cool the battery first, then start charging.
3.Disconnect the charger power cord from the AC outlet.
4.Hold the charger tight and pull out the battery.
CHARGING
Before using the impact drill, charge the battery as follows.
1.Insert the battery in the charger.
Position the battery so that the nameplate faces toward the nameplate of the charger and press in the battery until it comes into contact with the bottom plate. (See Figs. 1 and 3.)
2.Connect the charger power cord to the AC outlet. Connecting the power cord will turn on the charger (the pilot lamp lights up).
CAUTION
If the pilot lamp does not light up, pull out the power cord from the AC outlet and check the battery mounting condition.
About 1 hour is required to fully charge the battery at a temperature of about 20°C. The pilot lamp goes off to indicate that the batterry is fully charged.
PRIOR TO OPERATION
1.Setting up and checking the work environment Check if the work environment is suitable by fol- lowing the precautions.
HOW TO USE
1.Confirm the cap position
The three modes of screwdriver, drill and impact
drill can be switched by the position of the cap in this tool.
(1)When the tool is used as a screwdriver, align the number displayed on the cap from "1" to "5" to the triangle mark of the housing.
(2)When the tool is used as a drill, align the drill mark "![]() " displayed on the cap to the triangle mark of the housing.
" displayed on the cap to the triangle mark of the housing.
(3)When the tool is used as the impact drill, align the hammer mark "![]() " displayed on the cap to the
" displayed on the cap to the
triangle mark of the housing. (See Fig. 4.)
(Minutes)
| 100 | |
| 90 | |
| 80 | |
time | 70 | |
60 | ||
| ||
Charging | 50 | |
40 | ||
| ||
| 30 | |
| 20 |
10
0
95% of Rated Voltage
Ambient temperature 10°C
20°C
Battery: EB12
Rated Voltage | 105% of |
(Voltage Listed | Rated Voltage |
on Nameplate) |
|
CAUTION
Align the number and mark on the cap to the triangle mark of the housing. The middle point of the numbers and marks on the cap cannot be secured.
2. | Tightening torque adjustment |
(1) | Tightening torque |
| Tightening torque should correspond in its intensity |
| to the screw diameter. When too strong power is |
| used, the screw head may be broken or be injured. |
| Be sure to adjust the cap position according to the |
| screw diameter. |
(2) | Tightening torque indication |
| Tightening torque should be changed according to |
| the screw type and the materials to be tightened. |
| Guidance of the tightening torque is indicated on |
| the cap of this unit with numerals “1”, “2”, “3”, |
| “4” and “5”. The minimum power is from “1” |
| position and bigger the value the stronger is the |
| power (see Fig. 4). |
(3) | How to adjust the tightening torque |
| Rotate the cap and set to one of the numerals. |
| Adjust the torque by cap rotation in such a way that |
| when the torque is too strong, set to the next |
| smaller numeral and set to the next larger numeral |
| when too weak. |
Input Power Supply Voltage ![]()
Fig.9 Relationship Between Input Power Supply Voltage and Charging Time
6
CAUTIONS |
◯ The motor rotation may be locked to cease while |
the unit is used as drill. While operating the impact |
drill, take care not to lock the motor. |
◯ Too long hammering may cause the screw broken |
due to excessive tightening. |