Press the DISC NAVIGATION button. Select the scene to be divided.
Press the MENU button.

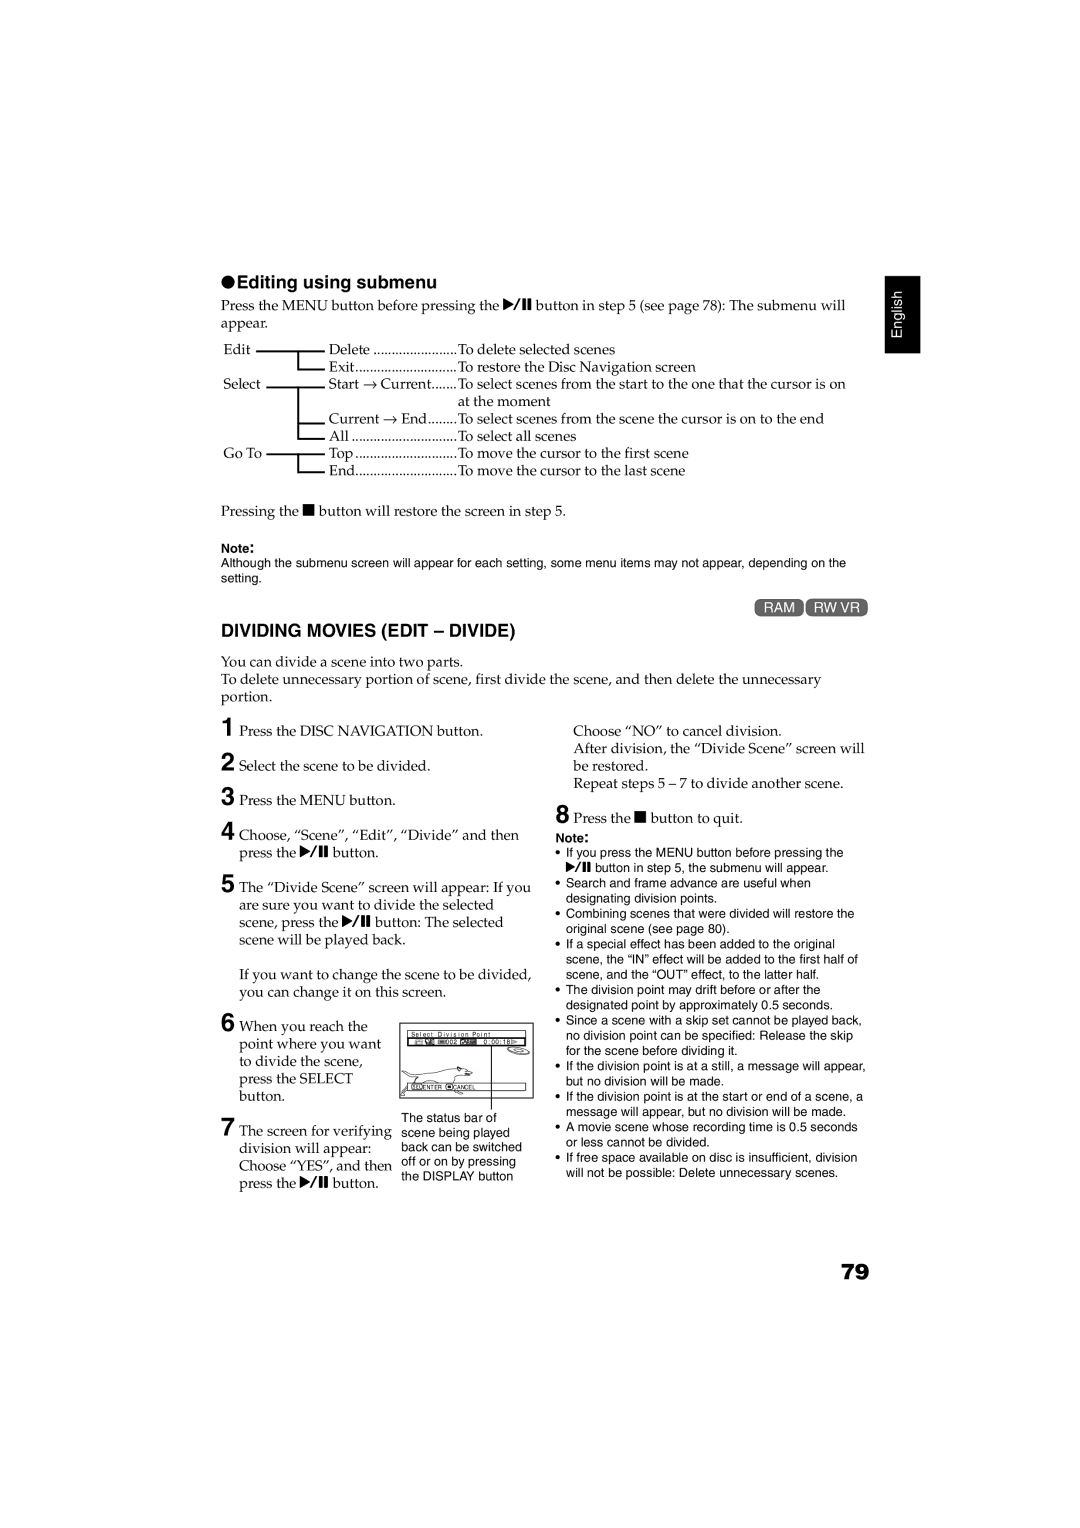
Editing using submenu

Press the MENU button before pressing the button in step 5 (see page 78): The submenu will appear.

Edit


Delete

To delete selected scenes


Exit

To restore the Disc Navigation screen


Select


Start → Current

To select scenes from the start to the one that the cursor is on


Current → End

at the moment


To select scenes from the scene the cursor is on to the end


All

To select all scenes


Go To


Top

To move the cursor to the first scene


End

To move the cursor to the last scene


Pressing the button will restore the screen in step 5.

Note:

Although the submenu screen will appear for each setting, some menu items may not appear, depending on the setting.


DIVIDING MOVIES (EDIT – DIVIDE)

You can divide a scene into two parts.

To delete unnecessary portion of scene, first divide the scene, and then delete the unnecessary portion.

English

1

2

3

4 Choose, “Scene”, “Edit”, “Divide” and then press the button.

5 The “Divide Scene” screen will appear: If you are sure you want to divide the selected scene, press the button: The selected scene will be played back.

If you want to change the scene to be divided, you can change it on this screen.

6 When you reach the

Se l e c t D i v i s i o n Po i n t

point where you want


002

0 : 00 : 18

to divide the scene,


press the SELECT

S E L ENTER

CANCEL


button.


The status bar of

7 The screen for verifying scene being played

division will appear: back can be switched Choose “YES”, and then off or on by pressing

press the button. the DISPLAY button

Choose “NO” to cancel division.

After division, the “Divide Scene” screen will be restored.

Repeat steps 5 – 7 to divide another scene.

8 Press the button to quit.

Note:

If you press the MENU button before pressing the button in step 5, the submenu will appear.

Search and frame advance are useful when designating division points.

Combining scenes that were divided will restore the original scene (see page 80).

If a special effect has been added to the original scene, the “IN” effect will be added to the first half of scene, and the “OUT” effect, to the latter half.

The division point may drift before or after the designated point by approximately 0.5 seconds.

Since a scene with a skip set cannot be played back, no division point can be specified: Release the skip for the scene before dividing it.

If the division point is at a still, a message will appear, but no division will be made.

If the division point is at the start or end of a scene, a message will appear, but no division will be made.

A movie scene whose recording time is 0.5 seconds or less cannot be divided.

If free space available on disc is insufficient, division will not be possible: Delete unnecessary scenes.

79

Page 79
Image 79
Hitachi DZ-GX5060SW, DZ-GX5100SW instruction manual Editing using submenu, Dividing Movies Edit Divide

DZ-GX5100SW, DZ-GX5060SW specifications

The Hitachi DZ-GX5060SW and DZ-GX5100SW are compact and versatile camcorders that combine cutting-edge technology with user-friendly design, making them ideal for both amateur and experienced videographers. These models are part of Hitachi's impressive lineup, highlighting features that cater to a wide range of recording needs, from family gatherings to professional projects.

One of the standout features of both models is their ability to record high-quality video, with the DZ-GX5060SW supporting DVD-RAM and DVD-R recording. This ensures that users have flexible options for storing and sharing their footage. The DZ-GX5100SW enhances this capability, allowing for double-layer DVD recording, effectively doubling the storage capacity. Both camcorders utilize a 1/6 inch CCD sensor, which offers a resolution of 680,000 pixels for sharp and vibrant images.

The optical zoom feature in these models is particularly impressive. The DZ-GX5060SW is equipped with a 10x optical zoom, which allows users to capture subjects from afar without compromising image quality. The DZ-GX5100SW takes this a step further with a 16x optical zoom, making it perfect for wildlife filming or events where the subject may not always be close to the camera. Moreover, the use of image stabilization technology in both models helps to counteract jitter and shake during handheld recording, ensuring smooth and professional-looking videos.

Another distinguishing characteristic is the intuitive user interface. With a 2.7-inch LCD screen, both camcorders make it easy for users to frame their shots and navigate through menus without hassle. The screen is designed for easy viewing in various lighting conditions, ensuring that users can capture the perfect shot, even in challenging environments.

Beyond video recording, the DZ-GX5060SW and DZ-GX5100SW also feature snapshot capabilities, allowing users to take high-resolution still photos. This is particularly advantageous when a moment arises that you want to capture as a photo rather than a video.

Both models offer a plethora of connectivity options, including USB and RCA outputs, which facilitate easy transfer of videos to computers or television sets. With these camcorders, Hitachi has struck a balance between performance, usability, and innovative technology, making them excellent choices for anyone looking to capture special moments with reliability and ease.