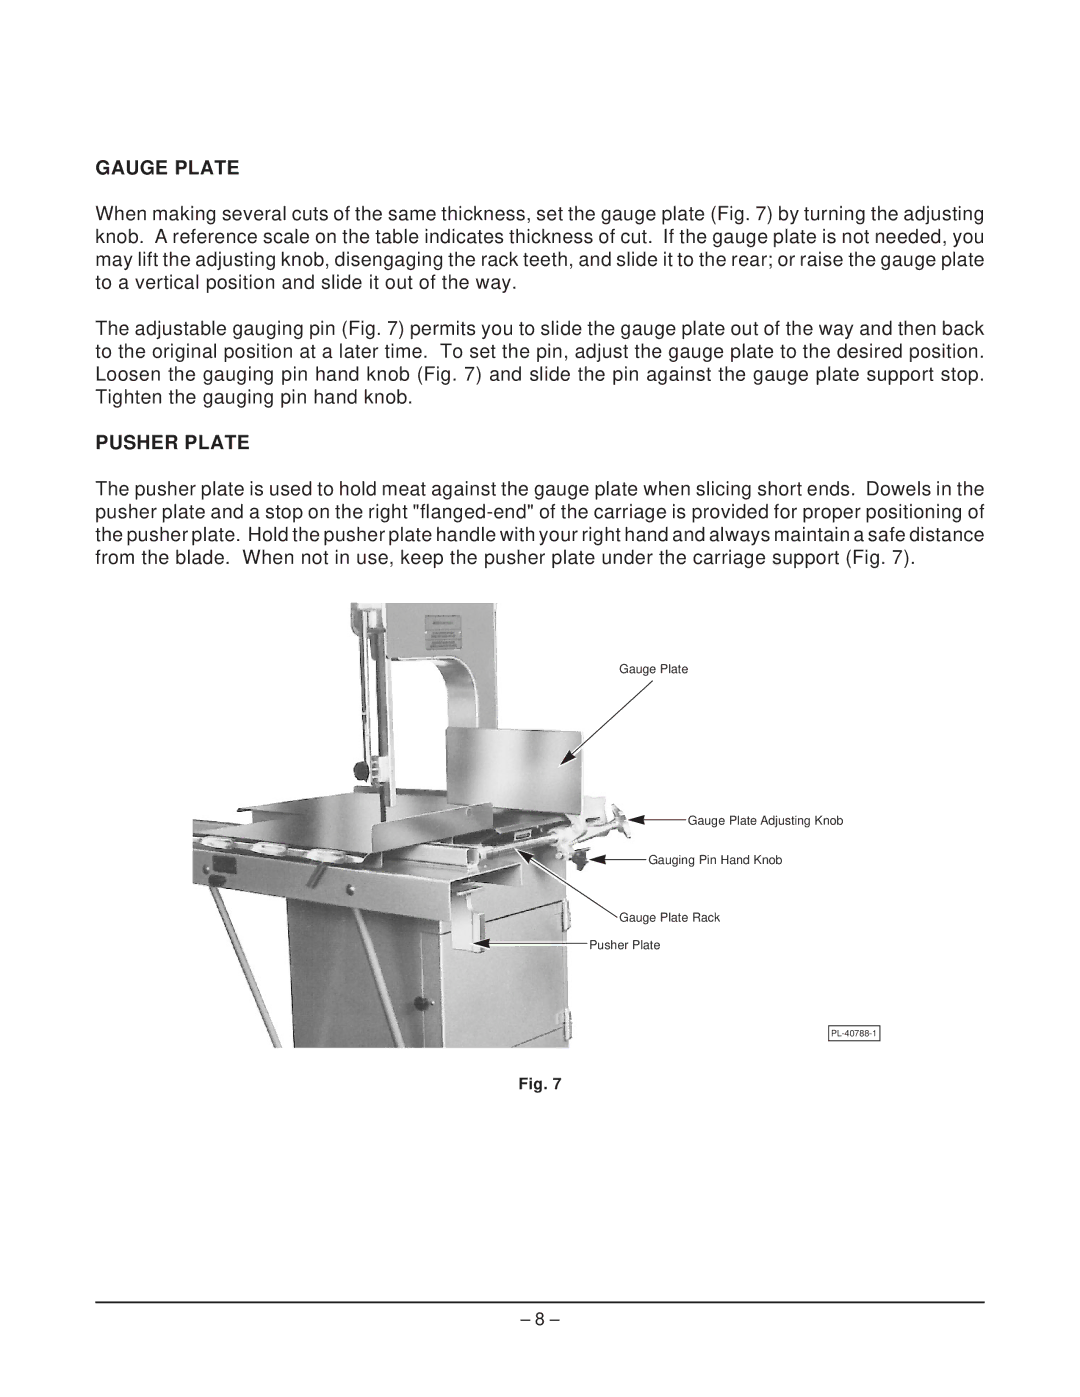
GAUGE PLATE
When making several cuts of the same thickness, set the gauge plate (Fig. 7) by turning the adjusting knob. A reference scale on the table indicates thickness of cut. If the gauge plate is not needed, you may lift the adjusting knob, disengaging the rack teeth, and slide it to the rear; or raise the gauge plate to a vertical position and slide it out of the way.
The adjustable gauging pin (Fig. 7) permits you to slide the gauge plate out of the way and then back to the original position at a later time. To set the pin, adjust the gauge plate to the desired position. Loosen the gauging pin hand knob (Fig. 7) and slide the pin against the gauge plate support stop. Tighten the gauging pin hand knob.
PUSHER PLATE
The pusher plate is used to hold meat against the gauge plate when slicing short ends. Dowels in the pusher plate and a stop on the right
Gauge Plate
![]() Gauge Plate Adjusting Knob
Gauge Plate Adjusting Knob
![]() Gauging Pin Hand Knob
Gauging Pin Hand Knob
Gauge Plate Rack
Pusher Plate
Fig. 7
– 8 –