
ML-18887, ML-19689 specifications
Hobart ML-19689 and ML-18887 are two advanced models in the Hobart series of commercial food equipment, specifically designed for food service operations such as restaurants, catering companies, and institutional kitchens. Known for their reliability, efficiency, and robust construction, these models stand out in the market due to their innovative features and user-friendly technologies.The Hobart ML-19689 is a versatile food slicer that boasts a powerful, high-performance motor. This model incorporates a stainless-steel blade that ensures precision slicing and long-lasting sharpness. Its adjustable thickness control allows operators to precisely set the slice thickness, ranging from paper-thin to thick cuts. This feature is particularly useful for achieving consistency in food preparation, a critical requirement in professional kitchens. The built-in safety features, including a blade guard and an automatic shut-off when the slicer is not in use, enhance the operator's safety and protection.
In contrast, Hobart ML-18887 is a heavy-duty mixer that excels in high-volume dough preparation. With its three available mixing speeds, this model is engineered to handle everything from light batters to dense doughs. The stainless-steel mixing bowl, along with the robust planetary mixing action, ensures thorough mixing and optimal incorporation of ingredients. An integrated timer adds to the convenience, allowing chefs to focus on other tasks while the mixer operates.
Both models incorporate advanced technologies that enhance usability and maintenance. The Hobart ML-19689 features a removable blade and easy-to-access parts, simplifying the cleaning process and ensuring compliance with health standards. Similarly, the ML-18887's bowl-lift design allows for effortless loading and unloading of ingredients, while the sealed gear transmission minimizes wear and extends the mixer’s lifespan.
In terms of energy efficiency, both models are designed to consume less power without compromising performance. This sustainable design aligns with modern kitchen practices, where reducing energy costs is a priority.
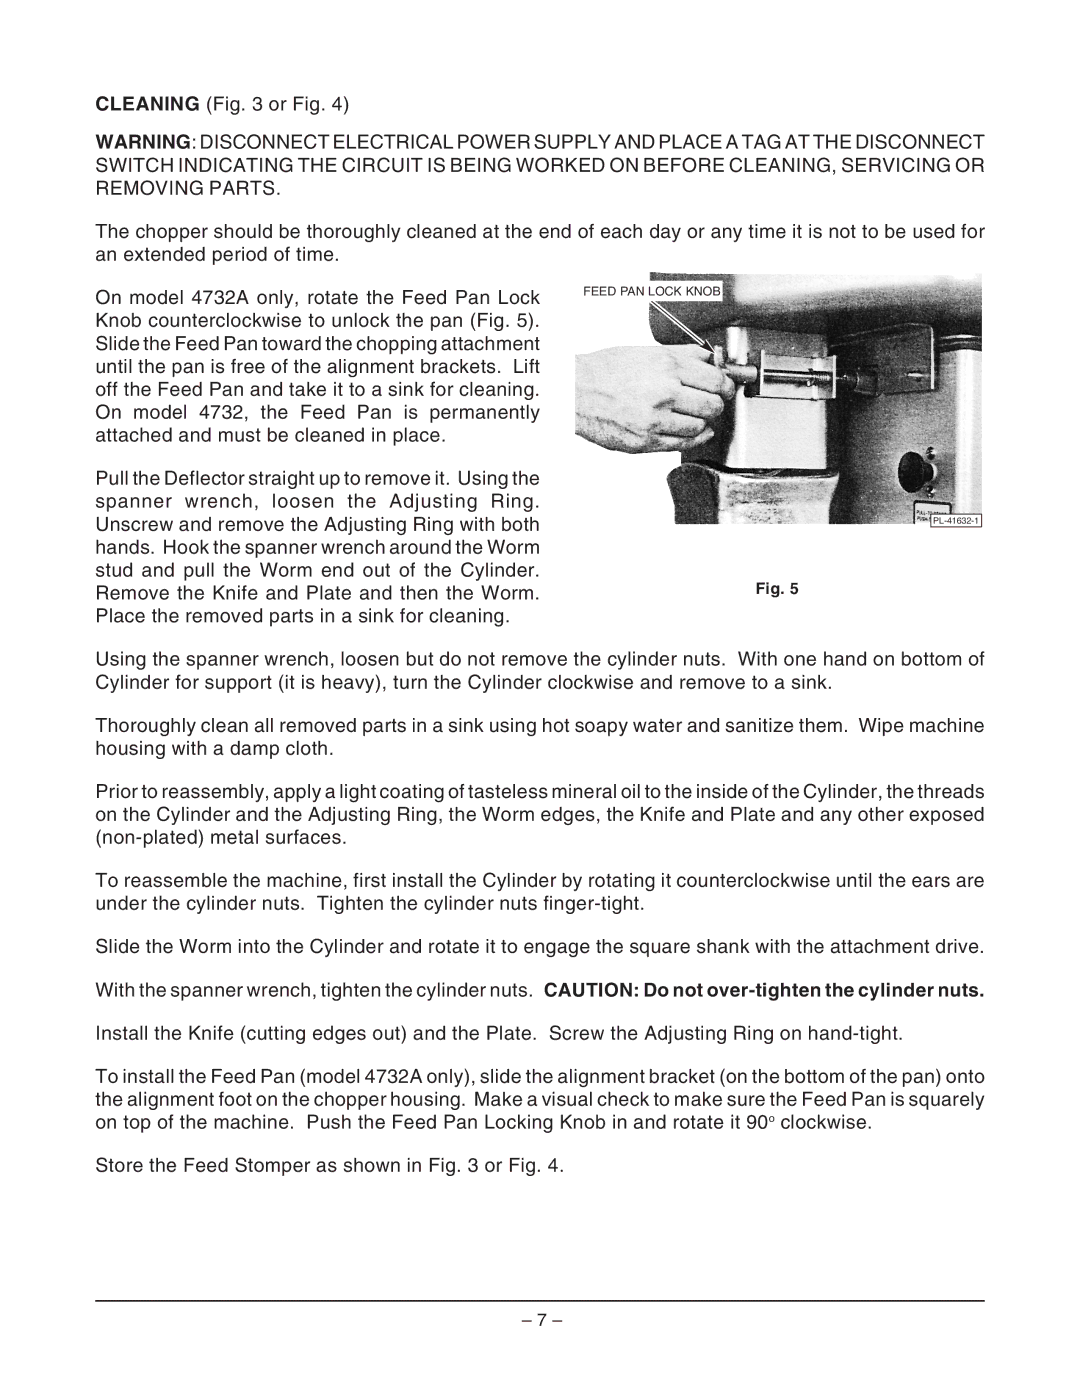
Overall, Hobart ML-19689 and ML-18887 are exemplary of Hobart's commitment to quality and innovation. With their distinctive features, robust construction, and user-friendly technologies, they are exceptional choices for food service operations aiming to enhance productivity while maintaining the highest standards of food quality and safety.