
60 specifications
The Hobie 60, a remarkable advancement in sailing technology, represents the epitome of performance and versatility in the world of catamarans. Designed with both casual sailors and competitive racers in mind, the Hobie 60 combines innovative engineering with the rich heritage of the Hobie brand, known for producing high-quality watercraft.One of the standout features of the Hobie 60 is its impressive size. With a length of 60 feet, it offers ample space for both relaxation and performance sailing. Its generous beam ensures stability, allowing it to glide effortlessly over waves, making it an ideal choice for those seeking exhilarating sailing experiences. The spacious deck layout promotes comfort, enabling crew members to move around freely while enjoying the open waters.
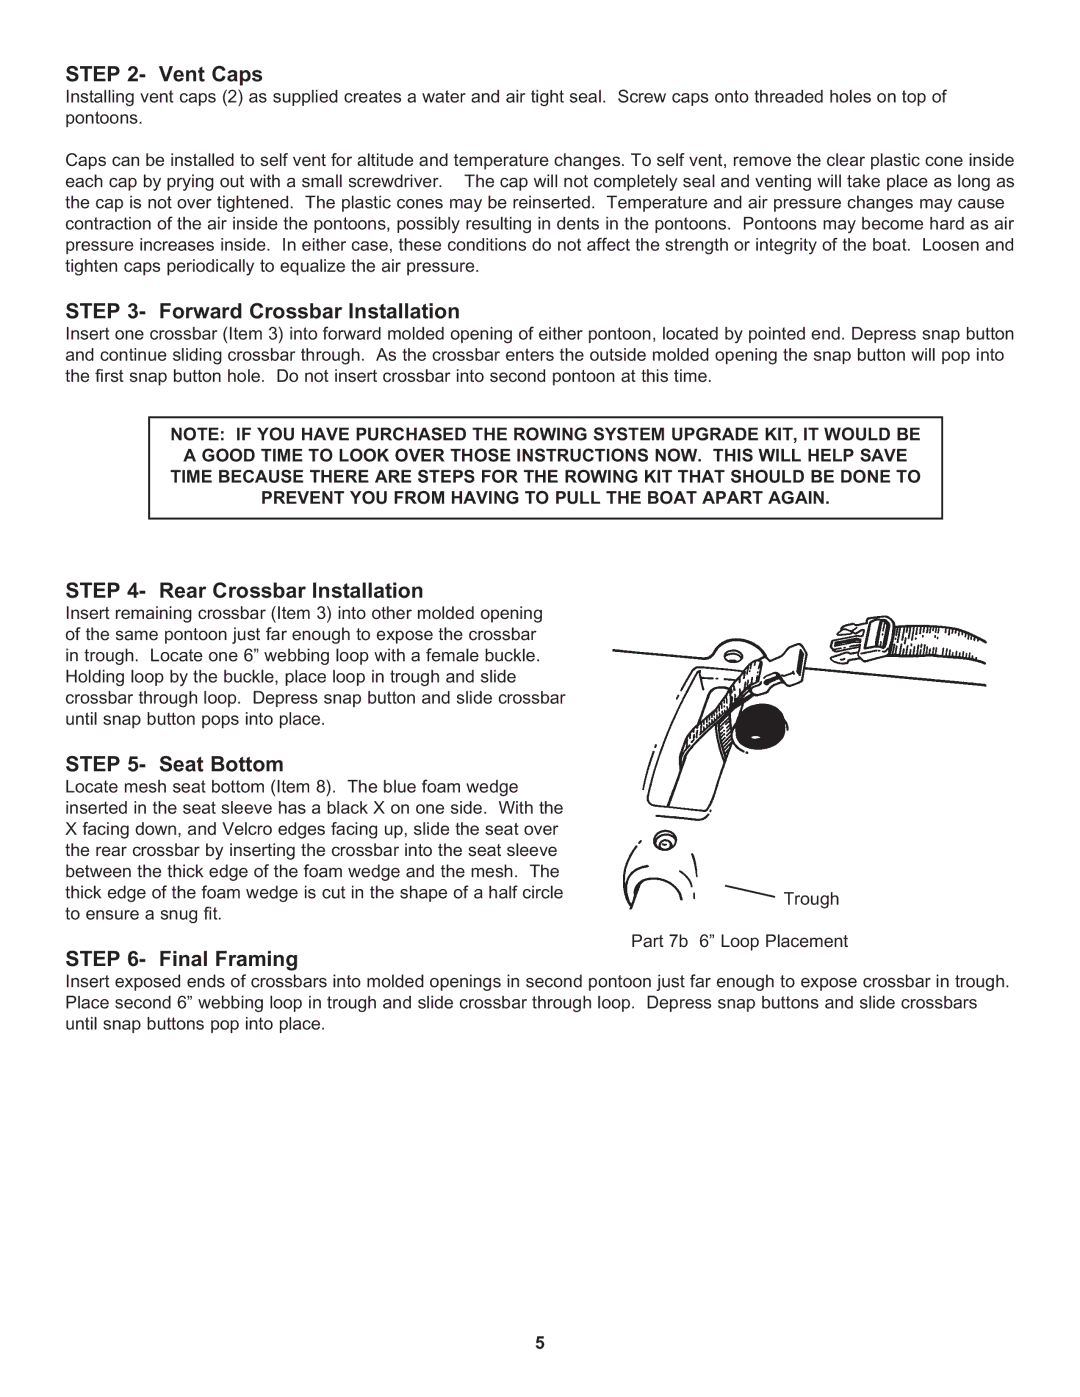
Performance is at the heart of the Hobie 60, equipped with a powerful rig that optimizes sail area and enhances speed. The advanced sail design incorporates modern materials that are lightweight yet durable, allowing the vessel to achieve impressive velocities in various wind conditions. Additionally, the Hobie 60 features a state-of-the-art rigging system that allows for quick adjustments, ensuring effortless handling, even for novice sailors.
Technologically, the Hobie 60 showcases an advanced hull design that reduces drag and enhances buoyancy. The catamaran's dual hulls, crafted from high-quality fiberglass or composite materials, provide not only strength but also agility, enabling sharp turns and quick accelerations. The hulls are designed to cut through the water efficiently, delivering a smooth sailing experience while maintaining stability in choppy conditions.
Another notable characteristic of the Hobie 60 is its user-friendly design. The boat is equipped with intuitive controls and ergonomic seating, making it accessible for sailors of all skill levels. The large cockpit area promotes social interactions, making it perfect for gatherings and celebrations on the water. Moreover, the vessel's storage solutions ensure that all essential gear can be easily stowed, keeping the deck clutter-free.
In conclusion, the Hobie 60 is a remarkable sailing vessel that blends performance, comfort, and cutting-edge technology. With its impressive dimensions, innovative design, and user-friendly features, it appeals to a broad range of sailing enthusiasts. Whether embarking on a leisurely cruise or competing in races, the Hobie 60 stands out as a symbol of excellence in the world of sailing.