Inflating Your Hobie Mirage Kayak
Follow the instructions below for valve operation and correct inflation and deflation procedures.
Valve Operation Your kayak is equipped with three differ- ent chambers that need to be inflated. All of the valves are located near the rear of the boat. There is one valve on each of the tube sides and one valve on the floor.
To close off the valve for inflation, make sure that the center valve pin is in the "up" position. If it is in the "down" position, press down on the valve pin and turn it counterclockwise until it pops up.
To open the valve for deflation, press down on the valve pin and turn it clock- wise so it locks down. Be careful of any sand or debris around the valve area when deflating as small particles could become airborne with the release of air pressure!
Always lock the valve cover over the valve stem when in use. This will prevent accidental air release and entrance of any particles into the air chambers.
Kayak Inflation Steps
1.Make sure that all of the valves are in the closed position (valve pin up) so they hold the air inside the tubes.
2.Open up the forward hatch on the firewall.
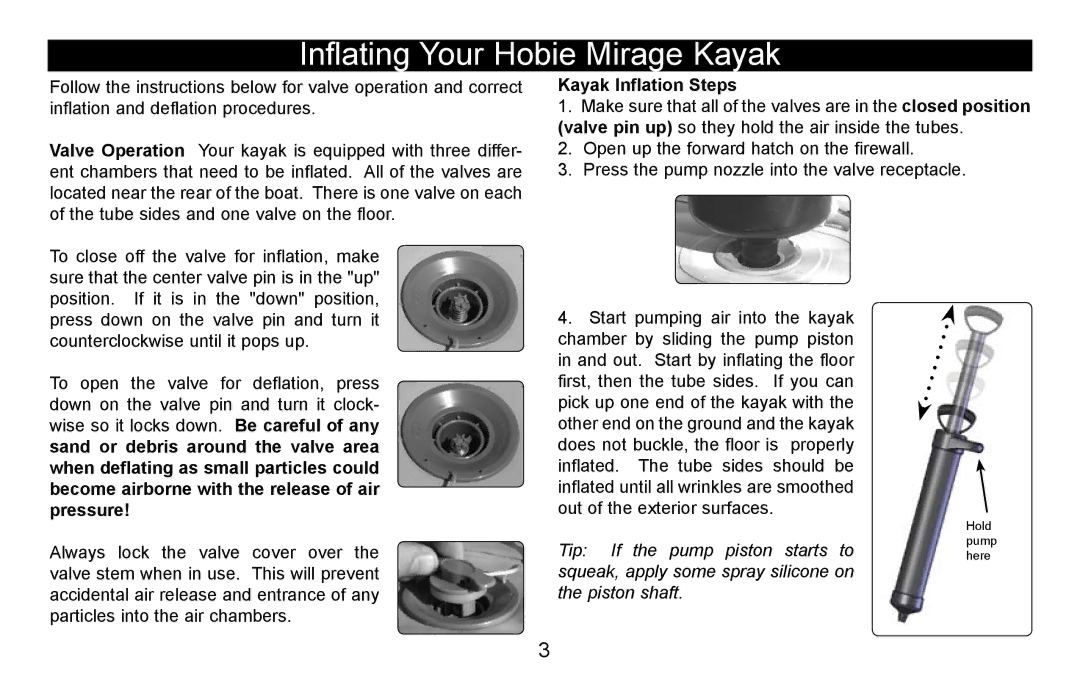
3.Press the pump nozzle into the valve receptacle.
4. Start pumping air into the kayak chamber by sliding the pump piston in and out. Start by inflating the floor first, then the tube sides. If you can pick up one end of the kayak with the other end on the ground and the kayak does not buckle, the floor is properly inflated. The tube sides should be inflated until all wrinkles are smoothed out of the exterior surfaces.
Hold
Tip: If the pump piston starts topump
here
squeak, apply some spray silicone on the piston shaft.
3