Hobie Mirage Drive
Drive Assembly
The Hobie Mirage Drives for the inflatable kayaks have the pedal cranks removed from the drums and can be done in the future for more compact packing. The following steps will guide you in how to install the pedal cranks.
1.Locate the pedal that has a number followed by the letter "R" on the backside of the pedal. This is the right pedal. Squeeze the adjuster handle and slide the end of the pedal crank into the slot on the right drum.
2.Align the hole in the crank so that you can slide the bolt all the way through the outer part of the drum and the crank. Use the wrench provided with this kit to thread in the bolt. Tighten the bolt so that it is snug, but not so tight that it prevent the crank from moving back and forth to allow for adjustment.
3.Follow this same procedure with the left pedal.
Drive Installation/Removal
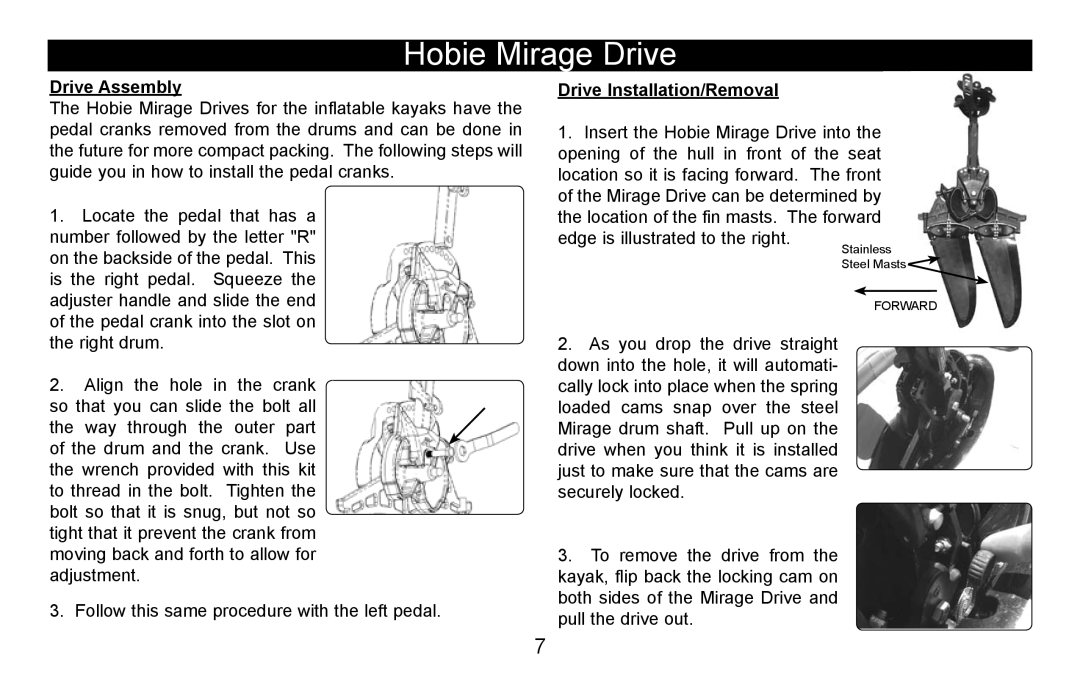
1.Insert the Hobie Mirage Drive into the opening of the hull in front of the seat location so it is facing forward. The front of the Mirage Drive can be determined by the location of the fin masts. The forward
edge is illustrated to the right.
Stainless
Steel Masts ![]()
FORWARD
2.As you drop the drive straight down into the hole, it will automati- cally lock into place when the spring loaded cams snap over the steel Mirage drum shaft. Pull up on the drive when you think it is installed just to make sure that the cams are securely locked.
3.To remove the drive from the kayak, flip back the locking cam on both sides of the Mirage Drive and pull the drive out.
7