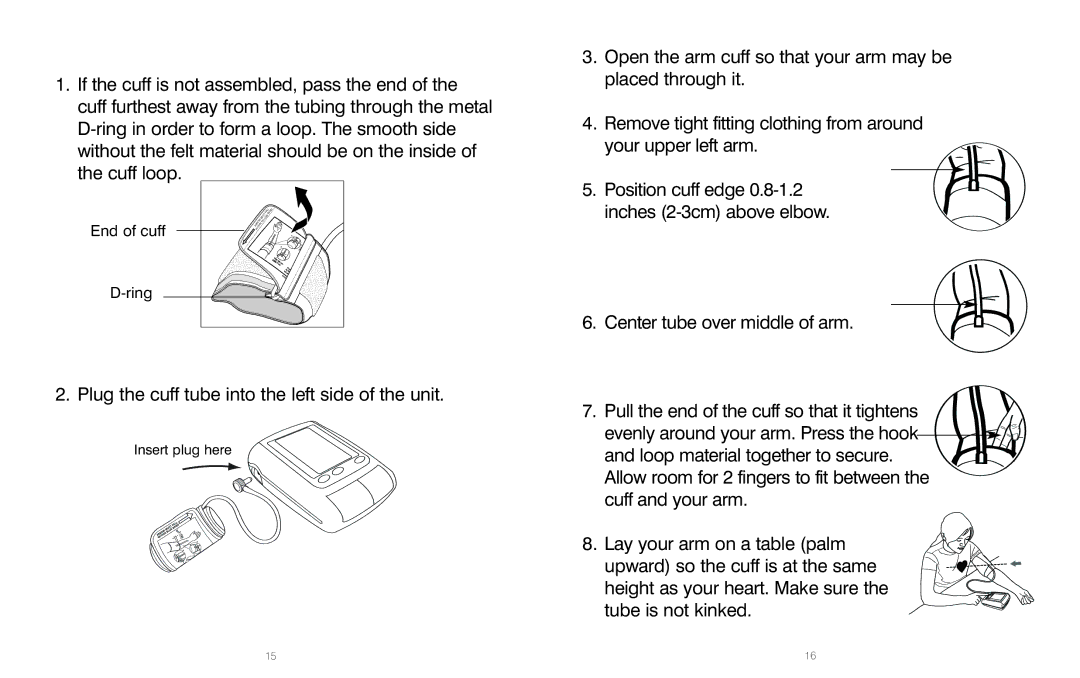
1.If the cuff is not assembled, pass the end of the cuff furthest away from the tubing through the metal
|
|
|
|
|
|
|
| F A | L L | A N | D | |
|
|
|
|
|
|
| S T | B |
| |||
|
|
|
|
|
| U | O | W |
|
| ||
|
|
|
|
| M | L L |
|
|
| |||
End of cuff |
|
| O | W |
| Y E |
|
|
|
|
|
|
| R R |
| IN |
|
|
|
|
|
|
| ||
A | W | IT H |
|
|
|
|
|
|
|
| ||
|
|
|
|
|
|
|
|
|
|
| ||
|
|
|
|
|
|
|
|
|
|
|
| |
2. Plug the cuff tube into the left side of the unit.
Insert plug here
( |
|
|
0 |
|
|
. |
|
|
8”~2~ |
|
|
13 |
|
|
.c |
|
|
2m |
|
|
”) |
|
|
|
| a.0Pos |
|
| |
|
| 8 |
|
| bov. |
|
| 1o |
|
| e2nc |
|
| elincuf |
|
| bhf |
|
| owees |
|
| .(dg |
|
| 2 |
|
| |
|
| cm |
|
| ) |
| F |
|
Ai |
| |
tollt | Ce | |
anfowcu | ||
d it | ff | midnt |
3.Open the arm cuff so that your arm may be placed through it.
4.Remove tight fitting clothing from around
your upper left arm.
5. Position cuff edge
6. Center tube over middle of arm.
7. Pull the end of the cuff so that it tightens
evenly around your arm. Press the hook![]()
![]()
![]()
![]()
![]()
![]() and loop material together to secure.
and loop material together to secure. ![]() Allow room for 2 fingers to fit between the
Allow room for 2 fingers to fit between the
cuff and your arm.
8. Lay your arm on a table (palm upward) so the cuff is at the same height as your heart. Make sure the tube is not kinked.
15 | 16 |