SETTING UP THE WINE CHILLER
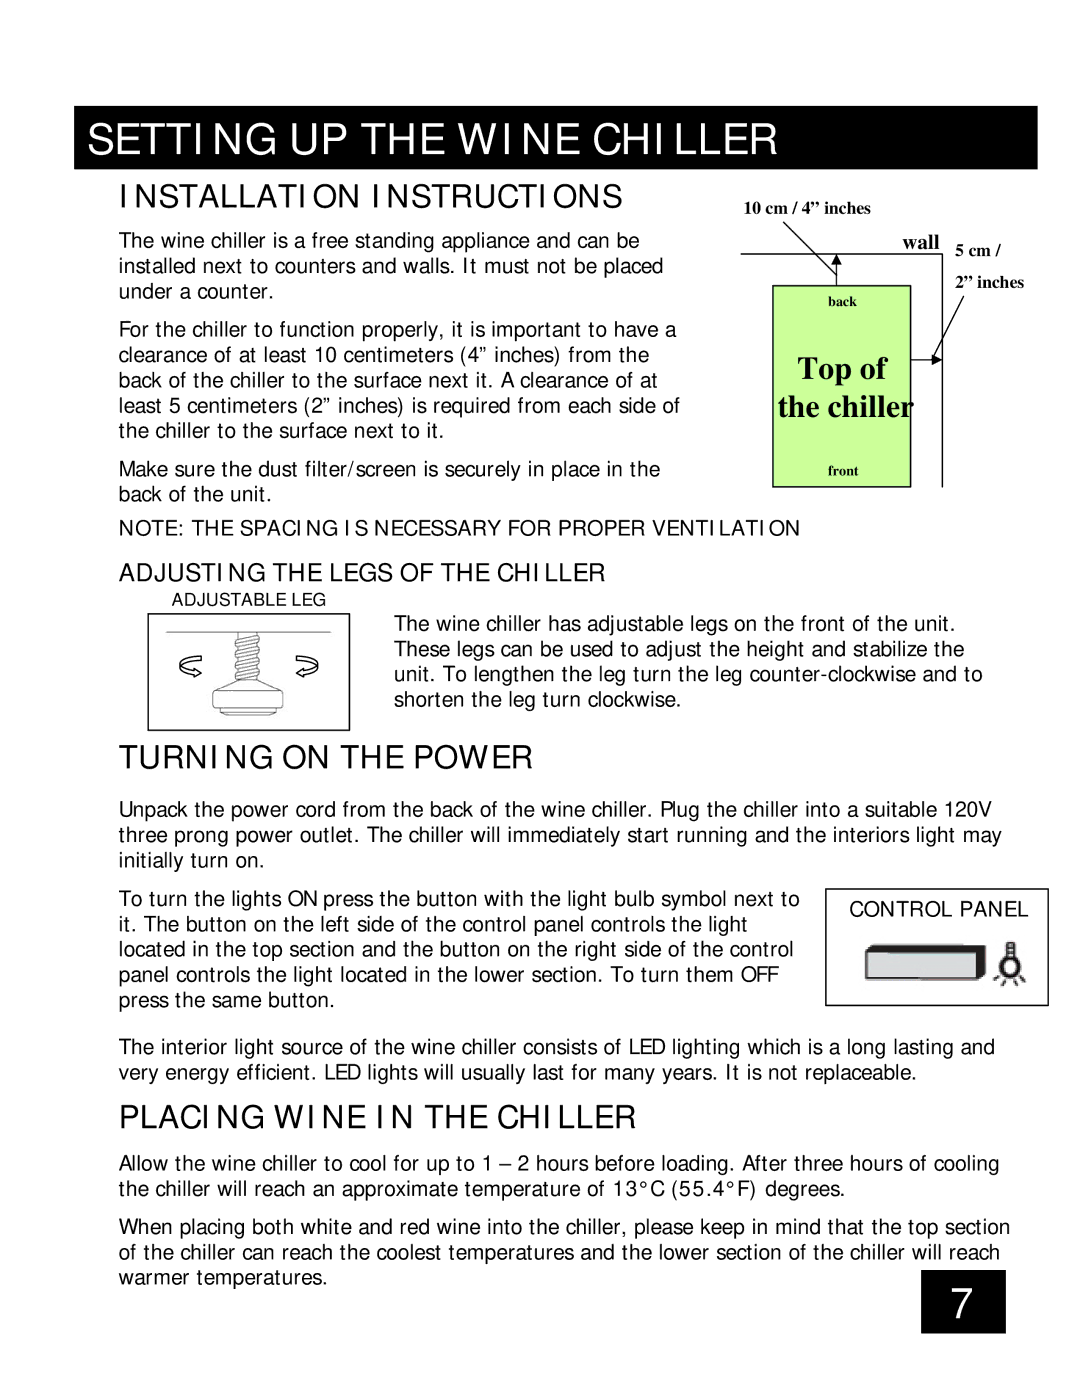
INSTALLATION INSTRUCTIONS | 10 cm / 4” inches | |||
The wine chiller is a free standing appliance and can be |
| wall 5 cm / | ||
installed next to counters and walls. It must not be placed |
|
|
| 2” inches |
under a counter. |
|
|
| |
| back | |||
|
|
| ||
|
|
|
| |
For the chiller to function properly, it is important to have a |
|
|
|
|
clearance of at least 10 centimeters (4” inches) from the |
| Top of |
|
|
back of the chiller to the surface next it. A clearance of at |
|
|
| |
least 5 centimeters (2” inches) is required from each side of |
| the chiller |
|
|
the chiller to the surface next to it. |
|
|
|
|
Make sure the dust filter/screen is securely in place in the |
| front |
|
|
back of the unit. |
|
|
|
|
|
|
|
| |
NOTE: THE SPACING IS NECESSARY FOR PROPER VENTILATION
ADJUSTING THE LEGS OF THE CHILLER
ADJUSTABLE LEG
The wine chiller has adjustable legs on the front of the unit. These legs can be used to adjust the height and stabilize the unit. To lengthen the leg turn the leg
TURNING ON THE POWER
Unpack the power cord from the back of the wine chiller. Plug the chiller into a suitable 120V three prong power outlet. The chiller will immediately start running and the interiors light may initially turn on.
To turn the lights ON press the button with the light bulb symbol next to it. The button on the left side of the control panel controls the light located in the top section and the button on the right side of the control panel controls the light located in the lower section. To turn them OFF press the same button.
CONTROL PANEL
The interior light source of the wine chiller consists of LED lighting which is a long lasting and very energy efficient. LED lights will usually last for many years. It is not replaceable.
PLACING WINE IN THE CHILLER
Allow the wine chiller to cool for up to 1 – 2 hours before loading. After three hours of cooling the chiller will reach an approximate temperature of 13°C (55.4°F) degrees.
When placing both white and red wine into the chiller, please keep in mind that the top section of the chiller can reach the coolest temperatures and the lower section of the chiller will reach warmer temperatures.
7