G
D
EH
H
F
I
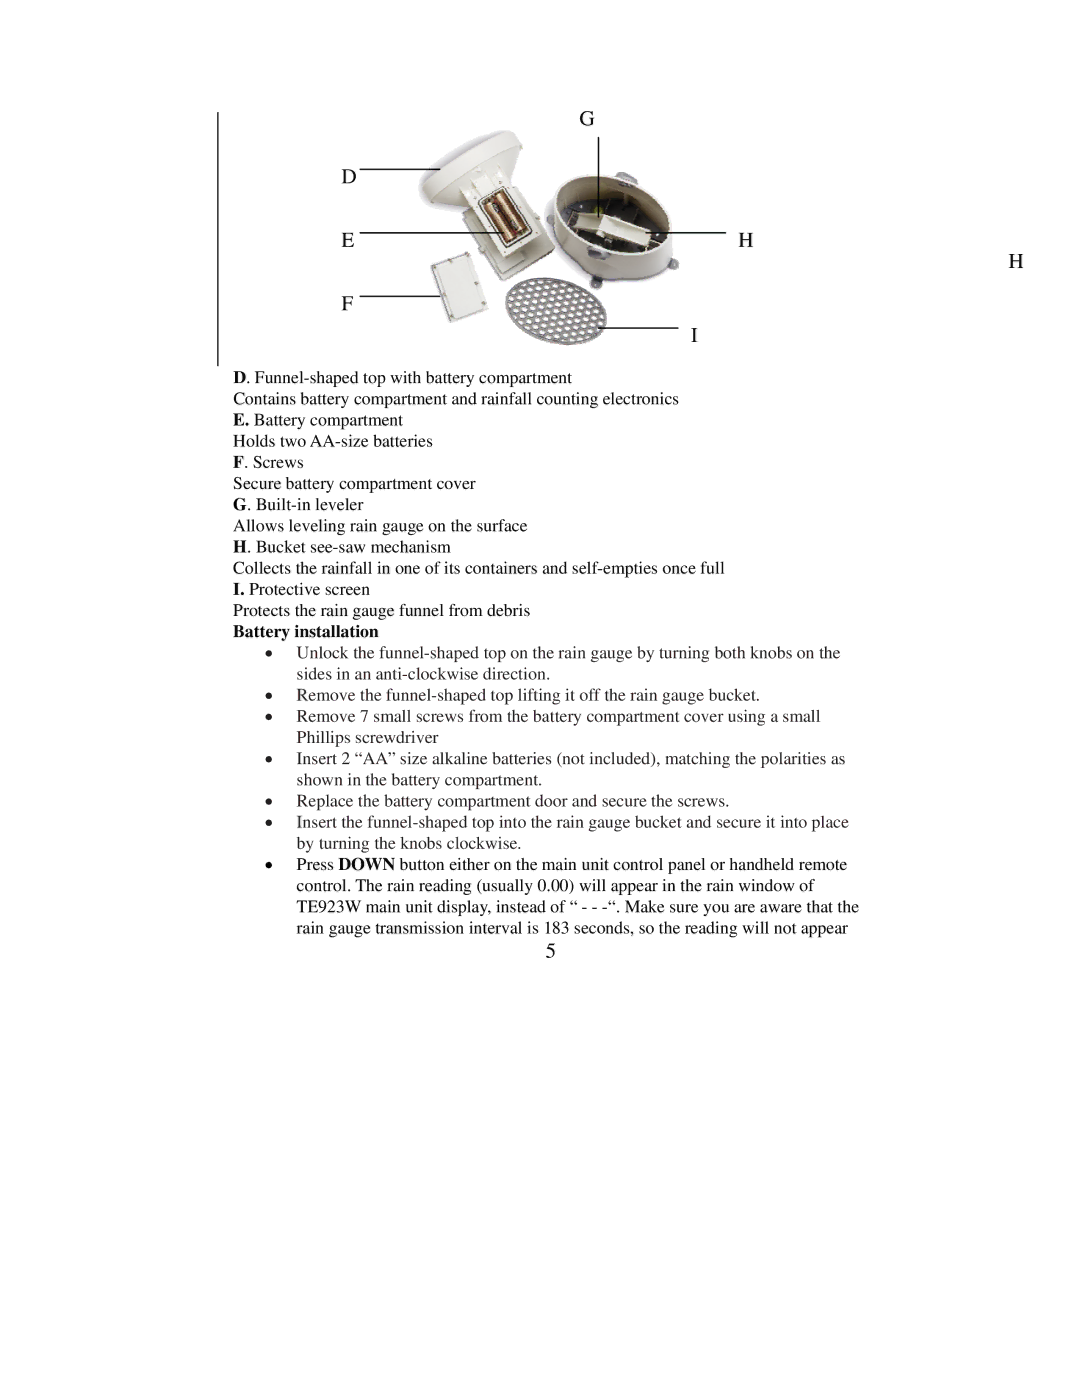
D.
Contains battery compartment and rainfall counting electronics
E. Battery compartment
Holds two
F. Screws
Secure battery compartment cover
G.
Allows leveling rain gauge on the surface
H. Bucket
Collects the rainfall in one of its containers and
I. Protective screen
Protects the rain gauge funnel from debris
Battery installation
•Unlock the
•Remove the
•Remove 7 small screws from the battery compartment cover using a small Phillips screwdriver
•Insert 2 “AA” size alkaline batteries (not included), matching the polarities as shown in the battery compartment.
•Replace the battery compartment door and secure the screws.
•Insert the
•Press DOWN button either on the main unit control panel or handheld remote control. The rain reading (usually 0.00) will appear in the rain window of TE923W main unit display, instead of “ - -
5
