Table of gas consumption


1 W 0,860 Kcal/h


G20

G30

GZ 350


G20 20mbar

G30 28-30mbar


G20 25mbar


G25 25mbar


G25

G31


G31 37mbar

GZ350 13mbar


G30 36mbar


G31 30mbar


Working

ù gas jet

ù gas jet

ù gas jet

Qn

Qmin

l/h

l/h

g/h

g/h

Qn

Qmin

l/h

g/h

Qn

Qmin

l/h

g/h

burner

1/100 mm

1/100 mm

1/100 mm

kW

W

G20

GZ350

G30

G31

kW

W

G20

G30

kW

W

G25

G31


little

76

50

104

1

230

95

132

73

71

1,2

260

114

87

0,9

230

100

64


large

101

66

132

1,75

360

167

232

127

125

2

410

190

145

1,6

360

177

114


medium

118

80

160

2,5

530

238

331

182

179

2,8

620

267

204

2,25

530

255

161


maxi

144

94

190

3,5

700

333

463

254

250

4

830

381

291

3,2

700

354

229


double ring

141

96

191

3,5

1750

333

463

254

250

4

1900

381

291

3,2

1750

354

229


REGULATING THE MINIMUM FLAME

After lighting the burners, turn the control knob to the minimum setting and then remo- ve the knob (this can easily be removed by apply a gentle pressure).

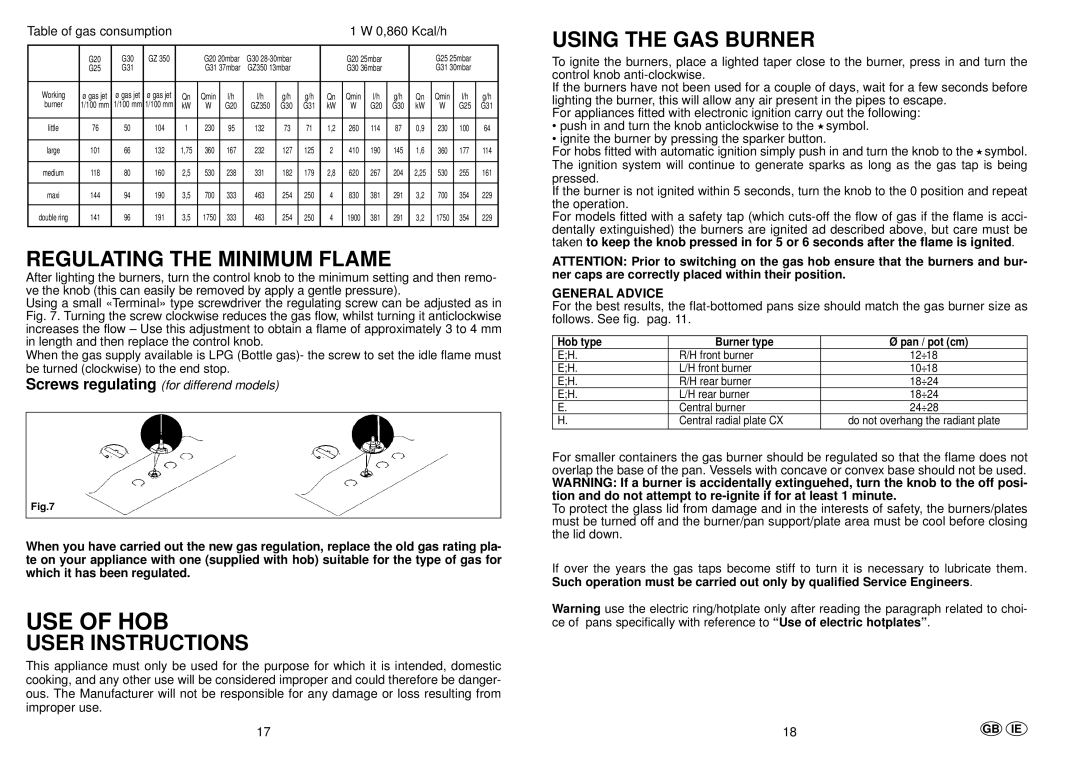
Using a small « Terminal» type screwdriver the regulating screw can be adjusted as in Fig. 7. Turning the screw clockwise reduces the gas flow, whilst turning it anticlockwise increases the flow ± Use this adjustment to obtain a flame of approximately 3 to 4 mm in length and then replace the control knob.

When the gas supply available is LPG (Bottle gas)- the screw to set the idle flame must be turned (clockwise) to the end stop.

Screws regulating (for differend models)

Fig.7

When you have carried out the new gas regulation, replace the old gas rating pla- te on your appliance with one (supplied with hob) suitable for the type of gas for which it has been regulated.

USE OF HOB

USER INSTRUCTIONS

This appliance must only be used for the purpose for which it is intended, domestic cooking, and any other use will be considered improper and could therefore be danger- ous. The Manufacturer will not be responsible for any damage or loss resulting from improper use.

17

USING THE GAS BURNER

To ignite the burners, place a lighted taper close to the burner, press in and turn the control knob anti-clockwise.

If the burners have not been used for a couple of days, wait for a few seconds before lighting the burner, this will allow any air present in the pipes to escape.

For appliances fitted with electronic ignition carry out the following:

push in and turn the knob anticlockwise to the H symbol.

ignite the burner by pressing the sparker button.

For hobs fitted with automatic ignition simply push in and turn the knob to the H symbol. The ignition system will continue to generate sparks as long as the gas tap is being pressed.

If the burner is not ignited within 5 seconds, turn the knob to the 0 position and repeat the operation.

For models fitted with a safety tap (which cuts-off the flow of gas if the flame is acci- dentally extinguished) the burners are ignited ad described above, but care must be taken to keep the knob pressed in for 5 or 6 seconds after the flame is ignited.

ATTENTION: Prior to switching on the gas hob ensure that the burners and bur- ner caps are correctly placed within their position.

GENERAL ADVICE

For the best results, the flat-bottomed pans size should match the gas burner size as follows. See fig. pag. 11.

Hob type

Burner type

Ø pan / pot (cm)

E;H.

R/H front burner

12÷18

E;H.

L/H front burner

10÷18

E;H.

R/H rear burner

18÷24

E;H.

L/H rear burner

18÷24

E.

Central burner

24÷28

H.

Central radial plate CX

do not overhang the radiant plate

For smaller containers the gas burner should be regulated so that the flame does not overlap the base of the pan. Vessels with concave or convex base should not be used.

WARNING: If a burner is accidentally extinguehed, turn the knob to the off posi- tion and do not attempt to re-ignite if for at least 1 minute.

To protect the glass lid from damage and in the interests of safety, the burners/plates must be turned off and the burner/pan support/plate area must be cool before closing the lid down.

If over the years the gas taps become stiff to turn it is necessary to lubricate them. Such operation must be carried out only by qualified Service Engineers.

Warning use the electric ring/hotplate only after reading the paragraph related to choi- ce of pans specifically with reference to “Use of electric hotplates”.

18

GB IE

Page 5
Image 5
Hoover PL73, PL74 manual USE of HOB, Regulating the Minimum Flame, User Instructions, Using the GAS Burner, General Advice

PL73, PL74 specifications

The Hoover PL74 and PL73 are advanced vacuum cleaner models that exemplify Hoover's commitment to blending power, efficiency, and user-friendly design. These models are tailored for those seeking a reliable cleaning solution without compromising on performance or convenience.

One of the standout features of the Hoover PL74 and PL73 is their impressive suction power, enabled by Hoover’s innovative motor technology. This technology not only ensures deep cleaning across various surfaces, including carpets and hard floors, but also enhances the longevity and durability of the vacuum. The models employ a cyclonic filtration system which separates dirt from air, preventing clogging and maintaining suction strength over time.

Another key characteristic of the PL74 and PL73 is their lightweight design. Weighing significantly less than many comparable models, these vacuums provide unparalleled maneuverability. Users can easily carry them up and down stairs or around the home without experiencing fatigue. This is complemented by a user-friendly handle and a flexible hose that enhances reach, allowing for easy cleaning of hard-to-reach areas like under furniture and along edges.

The Hoover PL74 and PL73 also incorporate advanced filtration systems that capture allergens and fine dust particles, making them an excellent choice for allergy sufferers. The HEPA filters used in these models ensure that air expelled back into the environment is cleaner than the air taken in, promoting a healthier home atmosphere.

For added convenience, both models come equipped with a range of attachments, including a crevice tool, dusting brush, and upholstery nozzle. These attachments are beneficial for tailored cleaning tasks, from detailed cleaning of furniture and delicate surfaces to targeted suction in narrow spaces.

Ease of use is further enhanced by features such as a large dust bin that minimizes the frequency of emptying, LED indicators that signal when the dust bin is full, and an easy-to-use power control system that allows users to adjust suction power as needed.

In summary, the Hoover PL74 and PL73 vacuum cleaners combine powerful suction, lightweight design, and advanced filtration technologies to deliver outstanding cleaning performance. These features make them not only effective cleaning tools but also convenient and practical choices for modern homes. Whether tackling pet hair, allergens, or everyday dirt, these Hoover models stand out as reliable solutions for maintaining a clean and healthy living environment.