1. Assembling cleaner
This cleaner was inspected and packaged carefully before being shipped from the factory. If you should happen to need assistance during assembly or operation,
Visit us online at www.hoover.com to find the service outlet nearest you (click on the “Service” button) OR
Call
Call
Carton contents
C |
B |
A |
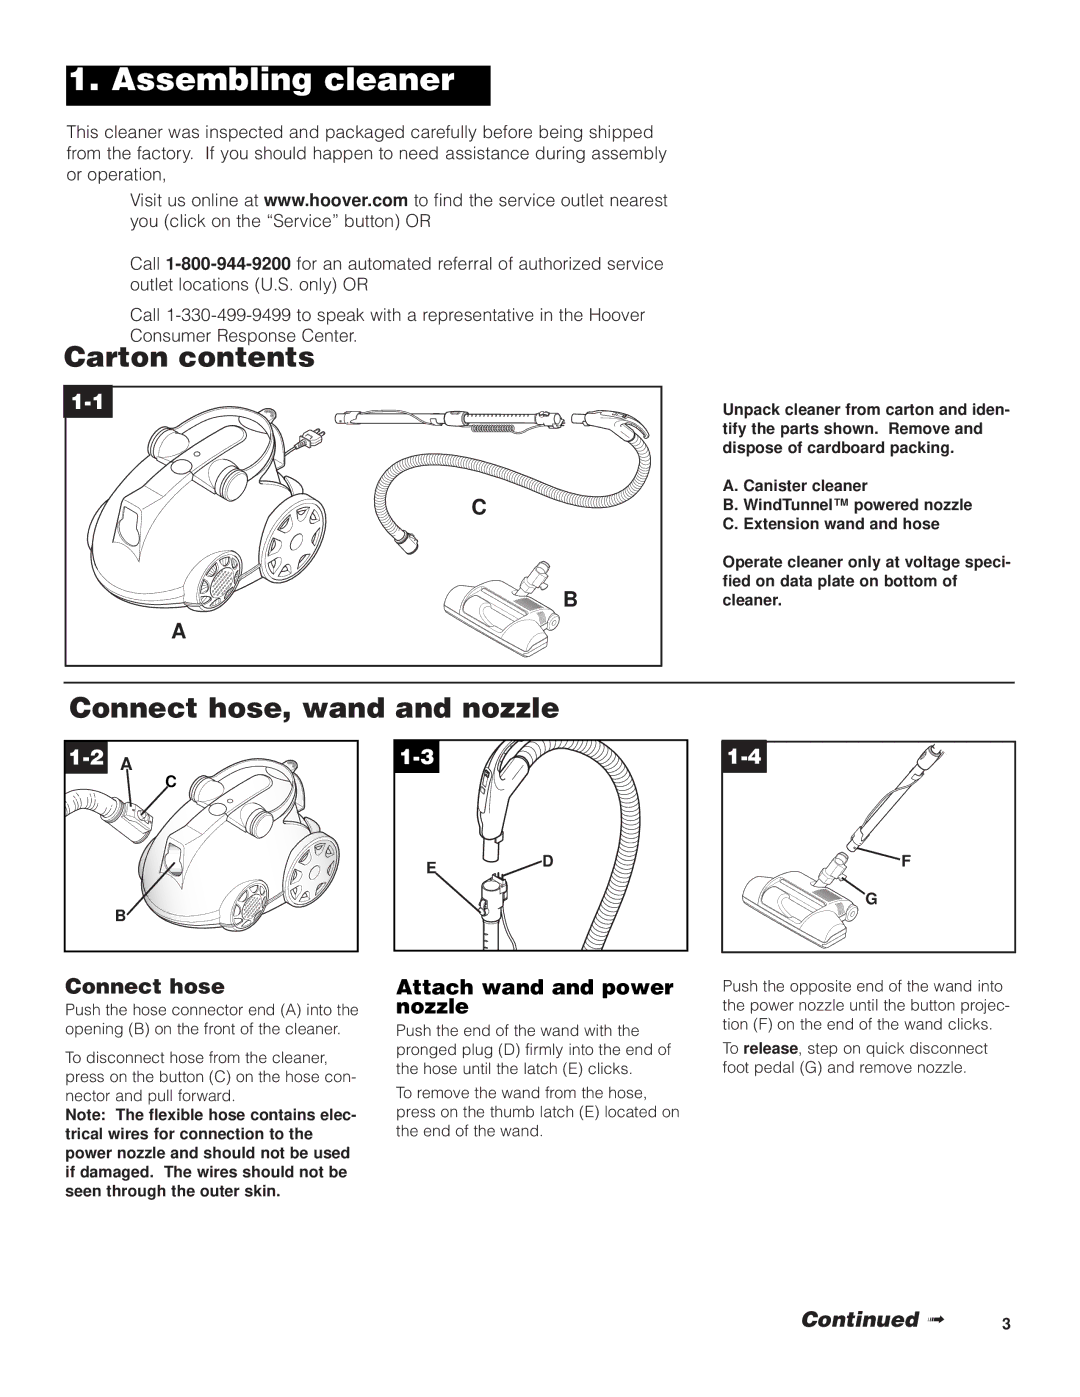
Unpack cleaner from carton and iden- tify the parts shown. Remove and dispose of cardboard packing.
A. Canister cleaner
B. WindTunnel™ powered nozzle C. Extension wand and hose
Operate cleaner only at voltage speci- fied on data plate on bottom of cleaner.
Connect hose, wand and nozzle
| C |
E ![]() D
D
B
F |
G |
Connect hose
Push the hose connector end (A) into the opening (B) on the front of the cleaner.
To disconnect hose from the cleaner, press on the button (C) on the hose con- nector and pull forward.
Note: The flexible hose contains elec- trical wires for connection to the power nozzle and should not be used if damaged. The wires should not be seen through the outer skin.
Attach wand and power nozzle
Push the end of the wand with the pronged plug (D) firmly into the end of the hose until the latch (E) clicks.
To remove the wand from the hose, press on the thumb latch (E) located on the end of the wand.
Push the opposite end of the wand into the power nozzle until the button projec- tion (F) on the end of the wand clicks.
To release, step on quick disconnect foot pedal (G) and remove nozzle.
Continued ➟ | 3 |
