2.Removal and Replacement of Extruding Head
1)Move the power switch to the "OFF" position, then unplug the unit from the electrical outlet.
2)Close the water supply line
3)Remove all ice from the storage bin.
4)While maintaining a hold on the door, remove the hinge stop pin from hinge (B). Pull out the bottom of the door slightly, then gently remove the door from hinge (A). See Fig. 10.
5)Remove the top panel.
6)Remove the spout.
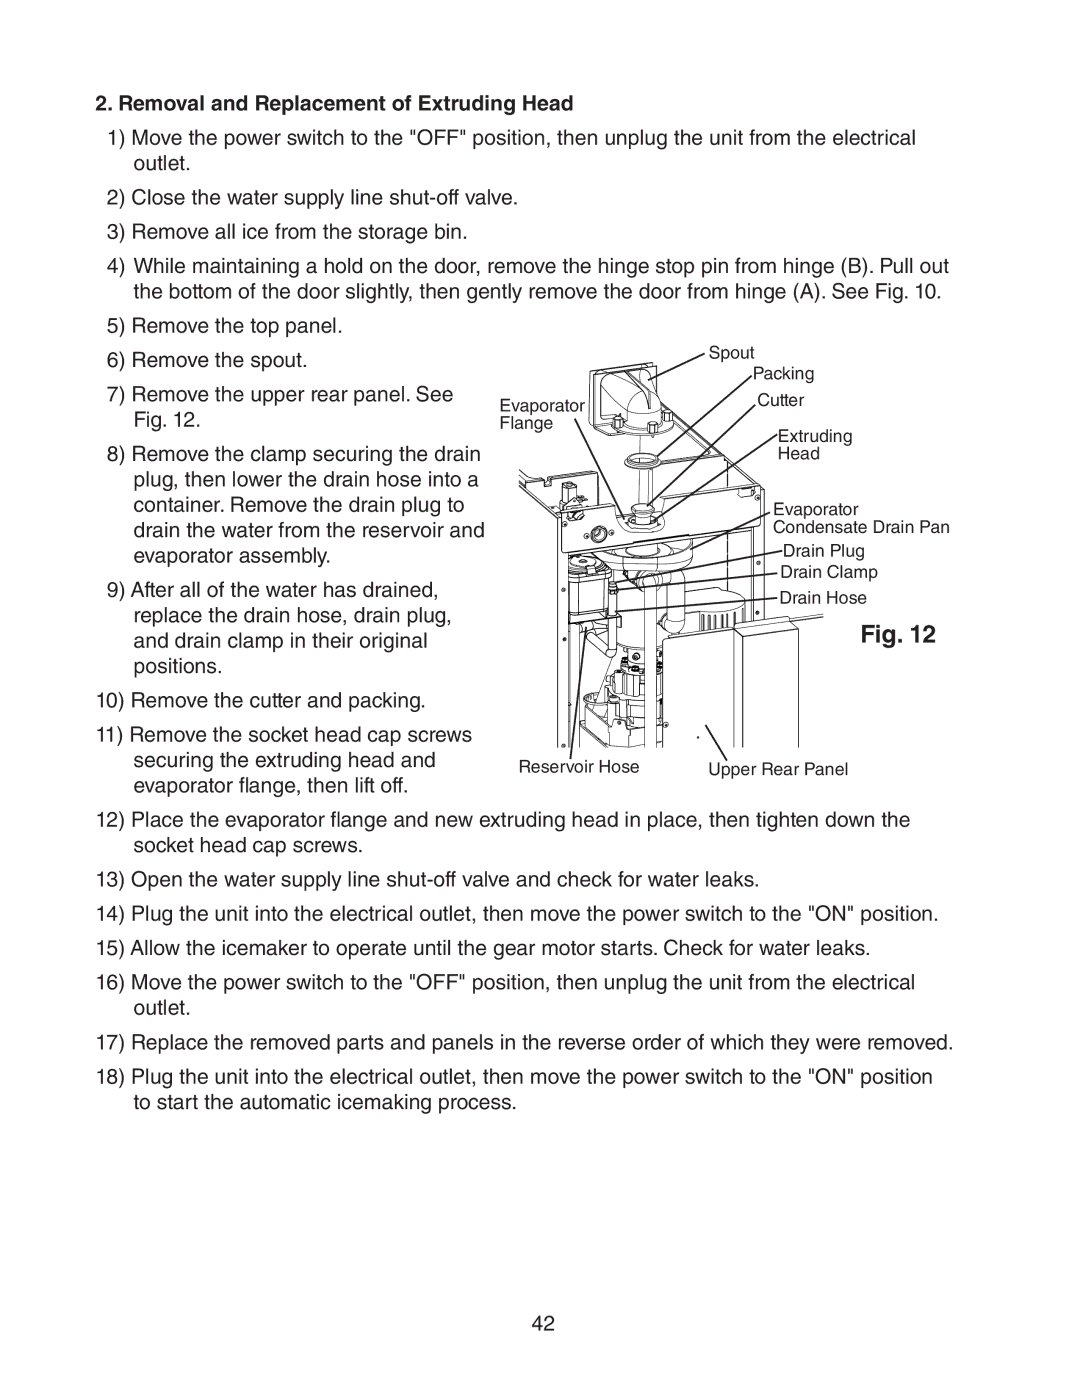
7)Remove the upper rear panel. See Fig. 12.
8)Remove the clamp securing the drain plug, then lower the drain hose into a container. Remove the drain plug to drain the water from the reservoir and evaporator assembly.
9)After all of the water has drained, replace the drain hose, drain plug, and drain clamp in their original positions.
10)Remove the cutter and packing.
11)Remove the socket head cap screws securing the extruding head and evaporator flange, then lift off.
Evaporator ![]()
![]()
![]()
![]()
![]()
![]()
![]() Flange
Flange ![]()
![]()
![]()
![]()
![]()
![]()
![]()
![]()
![]()
![]()
![]()
![]()
![]()
![]()
![]()
![]()
![]()
![]()
![]()
![]()
![]()
![]()
![]()
![]()
![]()
Reservoir Hose
Spout
Packing
Cutter
Extruding
Head
Evaporator
Condensate Drain Pan
Drain Plug
Drain Clamp
Drain Hose
Fig. 12
Upper Rear Panel
12)Place the evaporator flange and new extruding head in place, then tighten down the socket head cap screws.
13)Open the water supply line
14)Plug the unit into the electrical outlet, then move the power switch to the "ON" position.
15)Allow the icemaker to operate until the gear motor starts. Check for water leaks.
16)Move the power switch to the "OFF" position, then unplug the unit from the electrical outlet.
17)Replace the removed parts and panels in the reverse order of which they were removed.
18)Plug the unit into the electrical outlet, then move the power switch to the "ON" position to start the automatic icemaking process.
42
