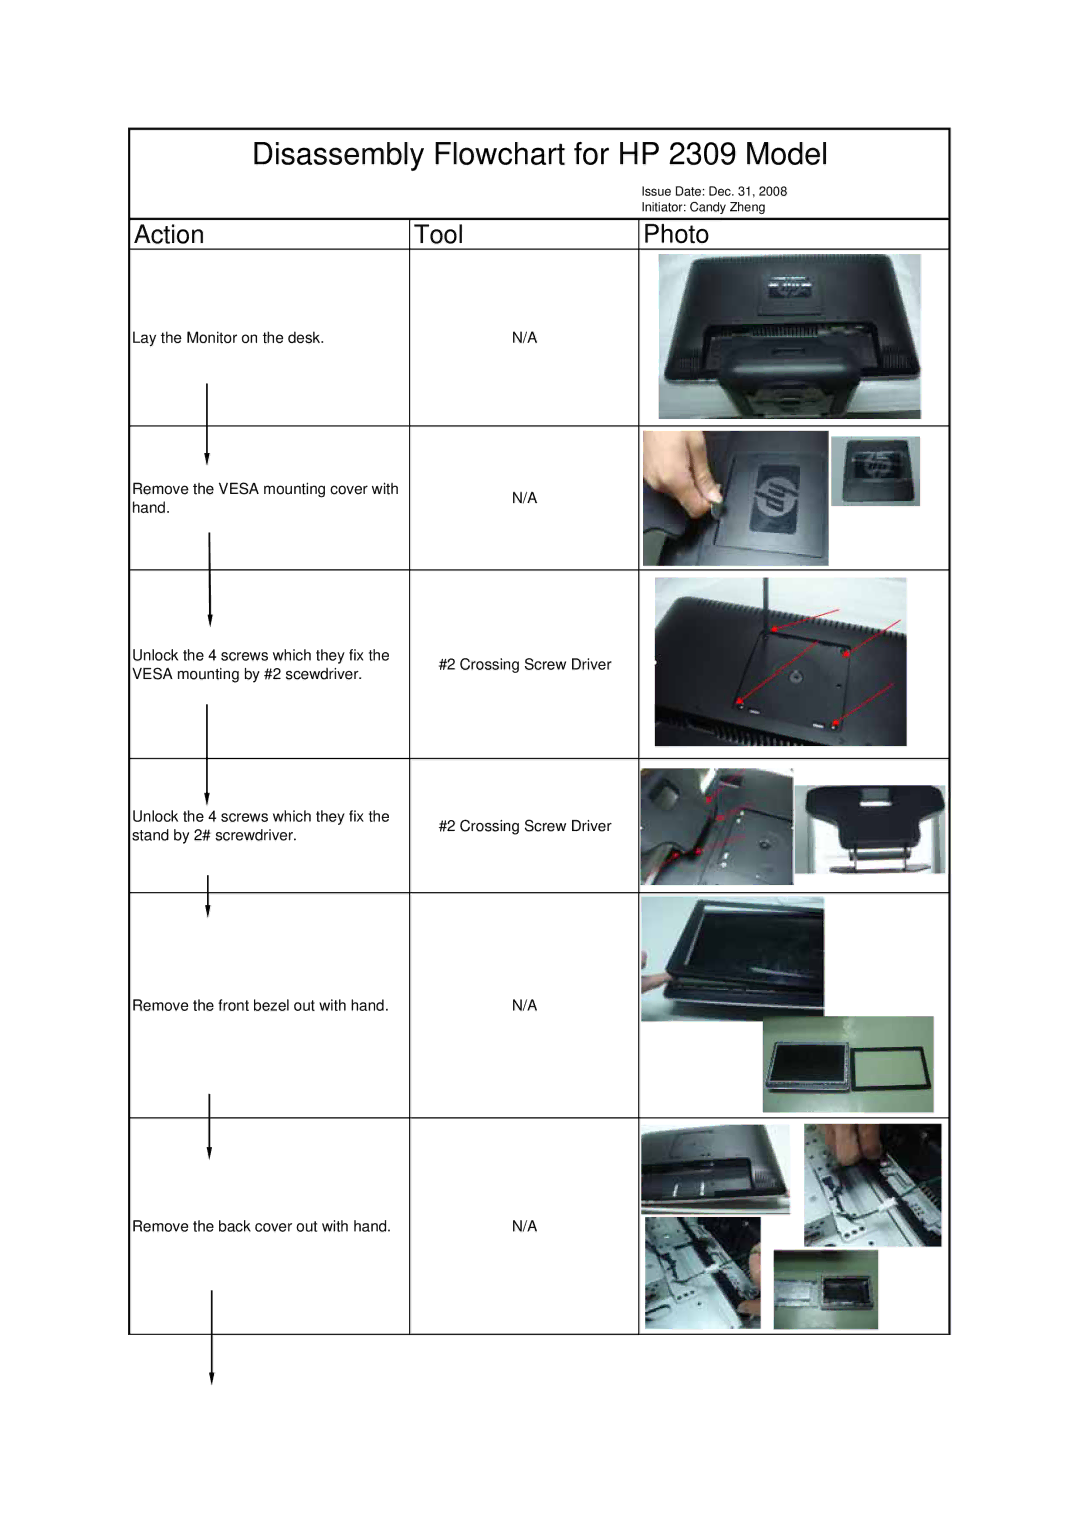
Disassembly Flowchart for HP 2309 Model
Issue Date: Dec. 31, 2008
Initiator: Candy Zheng
Action
Tool
Photo
Lay the Monitor on the desk.
N/A
Remove the VESA mounting cover with hand.
N/A
Unlock the 4 screws which they fix the VESA mounting by #2 scewdriver.
#2 Crossing Screw Driver
Unlock the 4 screws which they fix the stand by 2# screwdriver.
#2 Crossing Screw Driver
Remove the front bezel out with hand.
N/A
Remove the back cover out with hand.
N/A
