Quick Success 

See these pages of the User’s Guide for more information | hp photosmart 315 |
|
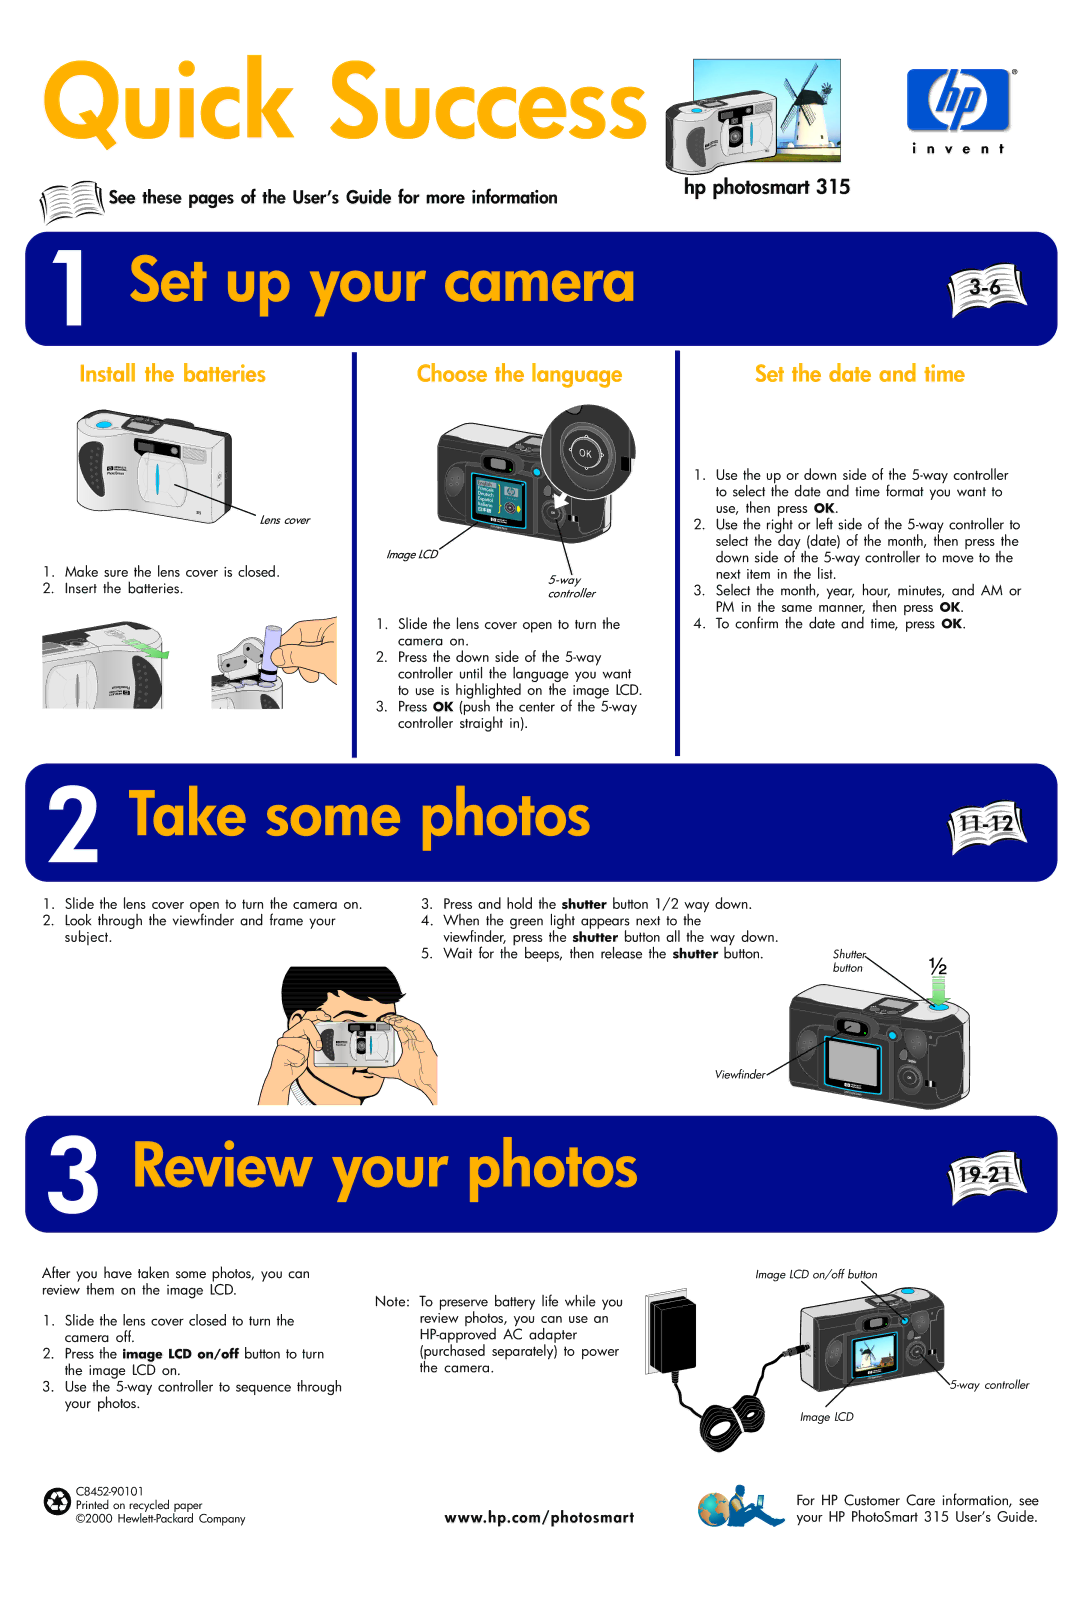
1Set up your camera
Install the batteries
Lens cover
1.Make sure the lens cover is closed.
2.Insert the batteries.
Choose the language
Image LCD
1.Slide the lens cover open to turn the camera on.
2.Press the down side of the
3.Press OK (push the center of the
Set the date and time
1.Use the up or down side of the
2.Use the right or left side of the
3.Select the month, year, hour, minutes, and AM or PM in the same manner, then press OK.
4.To confirm the date and time, press OK.
2 Take some photos |
|
|
1.Slide the lens cover open to turn the camera on.
2.Look through the viewfinder and frame your subject.
3.Press and hold the shutter button 1/2 way down.
4.When the green light appears next to the
viewfinder, press the shutter button all the way down.
5. Wait for the beeps, then release the shutter button. | Shutter |
| button |
Viewfinder
3Review your photos
After you have taken some photos, you can |
| |
review them on the image LCD. | Note: To preserve battery life while you | |
|
| |
1. | Slide the lens cover closed to turn the | review photos, you can use an |
| camera off. | |
2. | Press the image LCD on/off button to turn | (purchased separately) to power |
| the image LCD on. | the camera. |
3.Use the
| |
Printed on recycled paper | www.hp.com/photosmart |
©2000 |
 19-21
19-21
Image LCD on/off button
Image LCD
For HP Customer Care information, see your HP PhotoSmart 315 User’s Guide.