5250 REMOTE EMULATOR CARD
emulation choice for each cable address matches the device that the system operator has configured the host to expect.
•Printer Type: When you move the cursor to this column, a menu window listing the possible printer types appears. If the printer connected to the PC is not listed, a printer definition can be created by selecting Other, typing a new name, and then defining the printer as discussed in Section
•PC Port: Select the PC port to which the printer is physically attached. Choose an “LPT” port for parallel printers or a “COM” port for serial printers. Move the cursor to the PC Port column, and a window appears with the following choices: LPT 1, LPT 2, LPT 3, COM 1, or COM 2. If you choose a “COM” port for serial printers, a second window will appear on the screen to define communications protocol for data rate, data bits, stop bits, and parity.
6.2.2BASIC SETUP
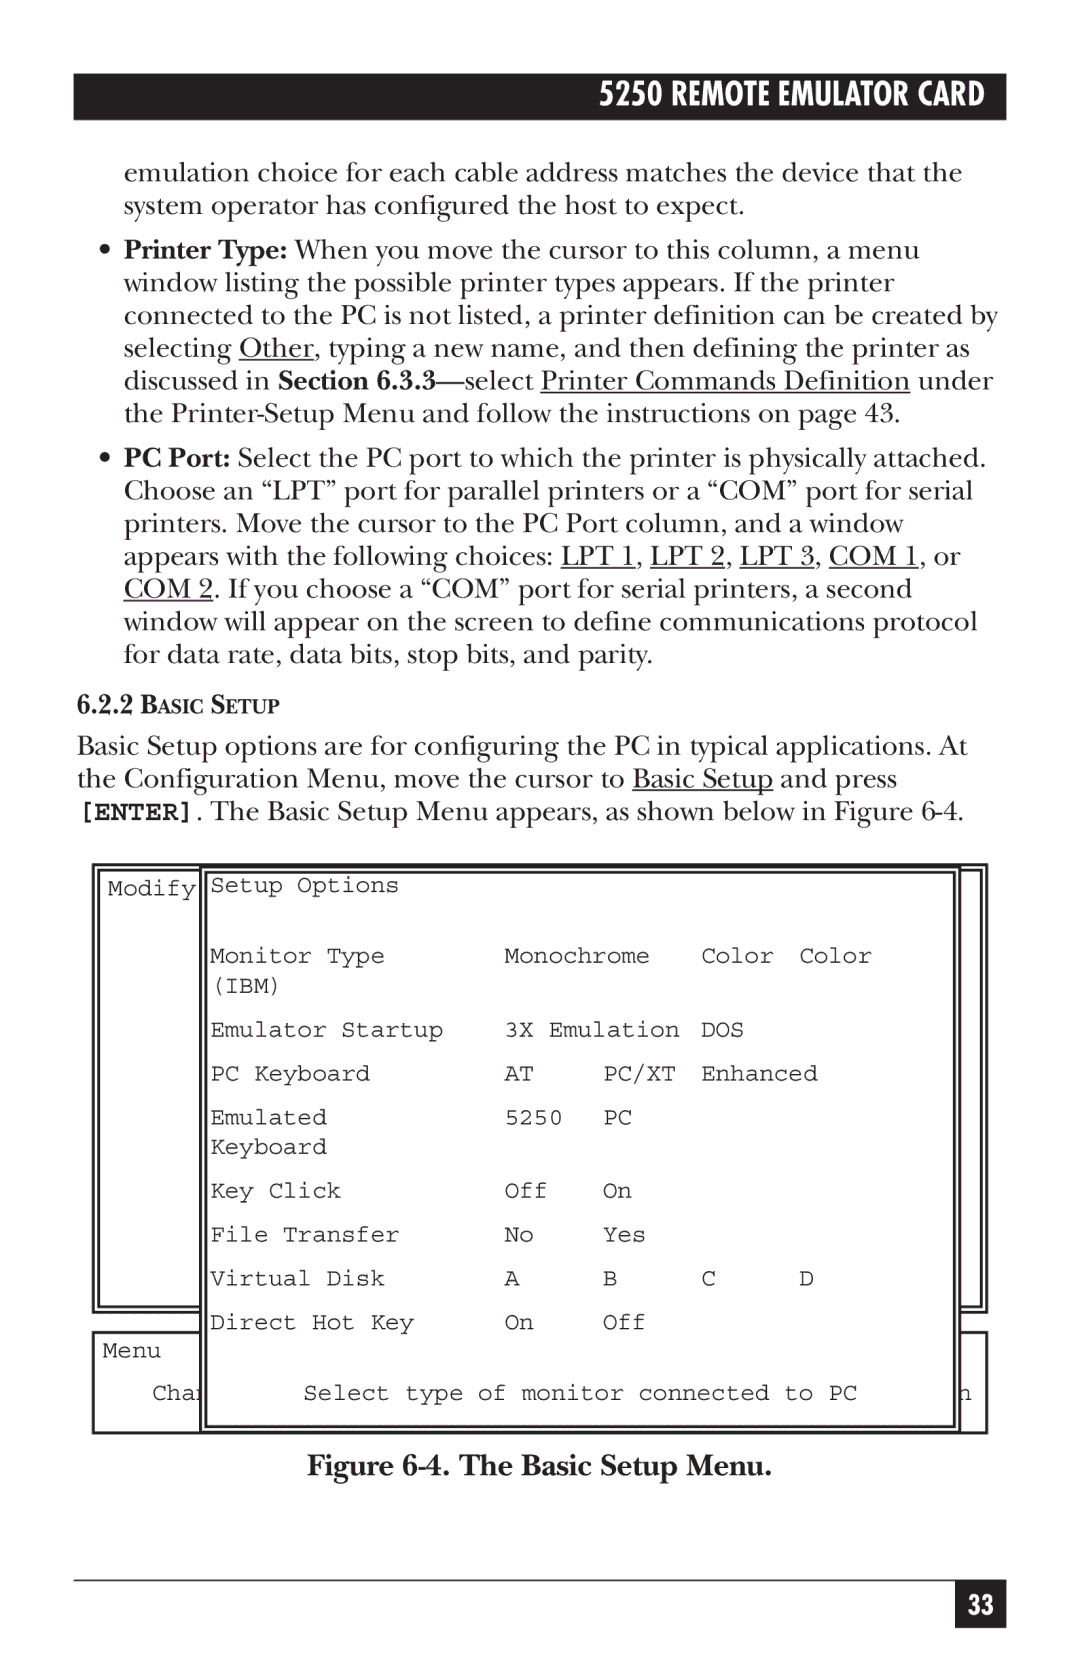
Basic Setup options are for configuring the PC in typical applications. At the Configuration Menu, move the cursor to Basic Setup and press [ENTER]. The Basic Setup Menu appears, as shown below in Figure
|
|
|
|
|
|
|
|
|
|
|
|
|
|
| Modify |
|
| Setup Options |
|
| File Name = EM5251R |
|
|
| |||
|
|
| / Create /Delete / Exit |
|
|
|
| ||||||
|
|
|
| Monitor Type | Monochrome | Color | Color |
|
|
| |||
|
|
|
| (IBM) |
|
|
|
|
|
|
|
|
|
|
|
|
| Emulator Startup | 3X | Emulation | DOS |
|
|
|
| ||
|
|
|
| PC Keyboard | AT |
| PC/XT | Enhanced |
|
|
| ||
|
|
|
| Emulated | 5250 | PC |
|
|
|
|
| ||
|
|
|
| Keyboard |
|
|
|
|
|
|
|
| |
|
|
|
| Key Click | Off |
| On |
|
|
|
|
| |
|
|
|
| File Transfer | No |
| Yes |
|
|
|
|
| |
|
|
|
| Virtual Disk | A |
| B | C | D |
|
|
| |
|
|
|
| Direct Hot Key | On |
| Off |
|
|
|
|
| |
|
|
|
|
|
|
|
|
|
| ||||
|
|
|
|
|
|
|
|
|
| ||||
| Menu |
|
|
|
|
|
|
|
|
|
|
|
|
| Change | Select type of monitor connectedPreviousto PC Screen |
|
| |||||||||
|
|
|
|
|
|
|
|
|
|
|
|
|
|
|
|
|
|
|
|
|
|
|
|
|
|
|
|
Figure 6-4. The Basic Setup Menu.
33