hp photosmart 7350
setup guide
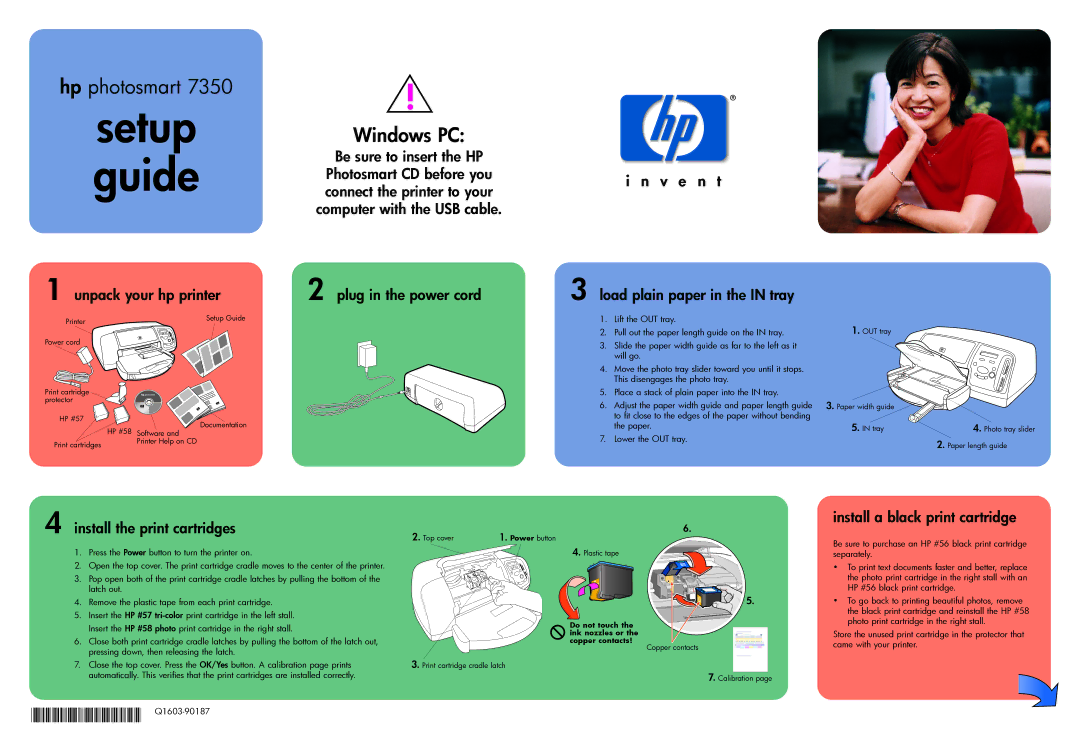
1 unpack your hp printer
!
Windows PC:
Be sure to insert the HP
Photosmart CD before you connect the printer to your computer with the USB cable.
2 plug in the power cord
3 load plain paper in the IN tray
Printer | Setup Guide |
|
Power cord
Print cartridge protector
HP #57 | Documentation | |
HP #58 | ||
Software and | ||
Print cartridges | Printer Help on CD | |
|
1.Lift the OUT tray.
2.Pull out the paper length guide on the IN tray.
3.Slide the paper width guide as far to the left as it will go.
4.Move the photo tray slider toward you until it stops. This disengages the photo tray.
5.Place a stack of plain paper into the IN tray.
6.Adjust the paper width guide and paper length guide to fit close to the edges of the paper without bending the paper.
7.Lower the OUT tray.
1.OUT tray
3. Paper width guide |
|
5. IN tray | 4. Photo tray slider |
| 2. Paper length guide |
4 install the print cartridges
1. | Press the Power button to turn the printer on. |
2. | Open the top cover. The print cartridge cradle moves to the center of the printer. |
3. | Pop open both of the print cartridge cradle latches by pulling the bottom of the |
2. Top cover |
| 1. | 6. |
| Power button | ||
|
|
| 4. Plastic tape |
| 56 | 58 |
|
install a black print cartridge
Be sure to purchase an HP #56 black print cartridge separately.
• To print text documents faster and better, replace |
the photo print cartridge in the right stall with an |
| latch out. |
4. | Remove the plastic tape from each print cartridge. |
5. | Insert the HP #57 |
| Insert the HP #58 photo print cartridge in the right stall. |
6. | Close both print cartridge cradle latches by pulling the bottom of the latch out, |
| pressing down, then releasing the latch. |
7. | Close the top cover. Press the OK/Yes button. A calibration page prints |
| automatically. This verifies that the print cartridges are installed correctly. |
57
3.Print cartridge cradle latch
Do not touch the ink nozzles or the copper contacts!
5. |
Copper contacts
7. Calibration page
HP #56 black print cartridge. |
• To go back to printing beautiful photos, remove |
the black print cartridge and reinstall the HP #58 |
photo print cartridge in the right stall. |
Store the unused print cartridge in the protector that came with your printer.