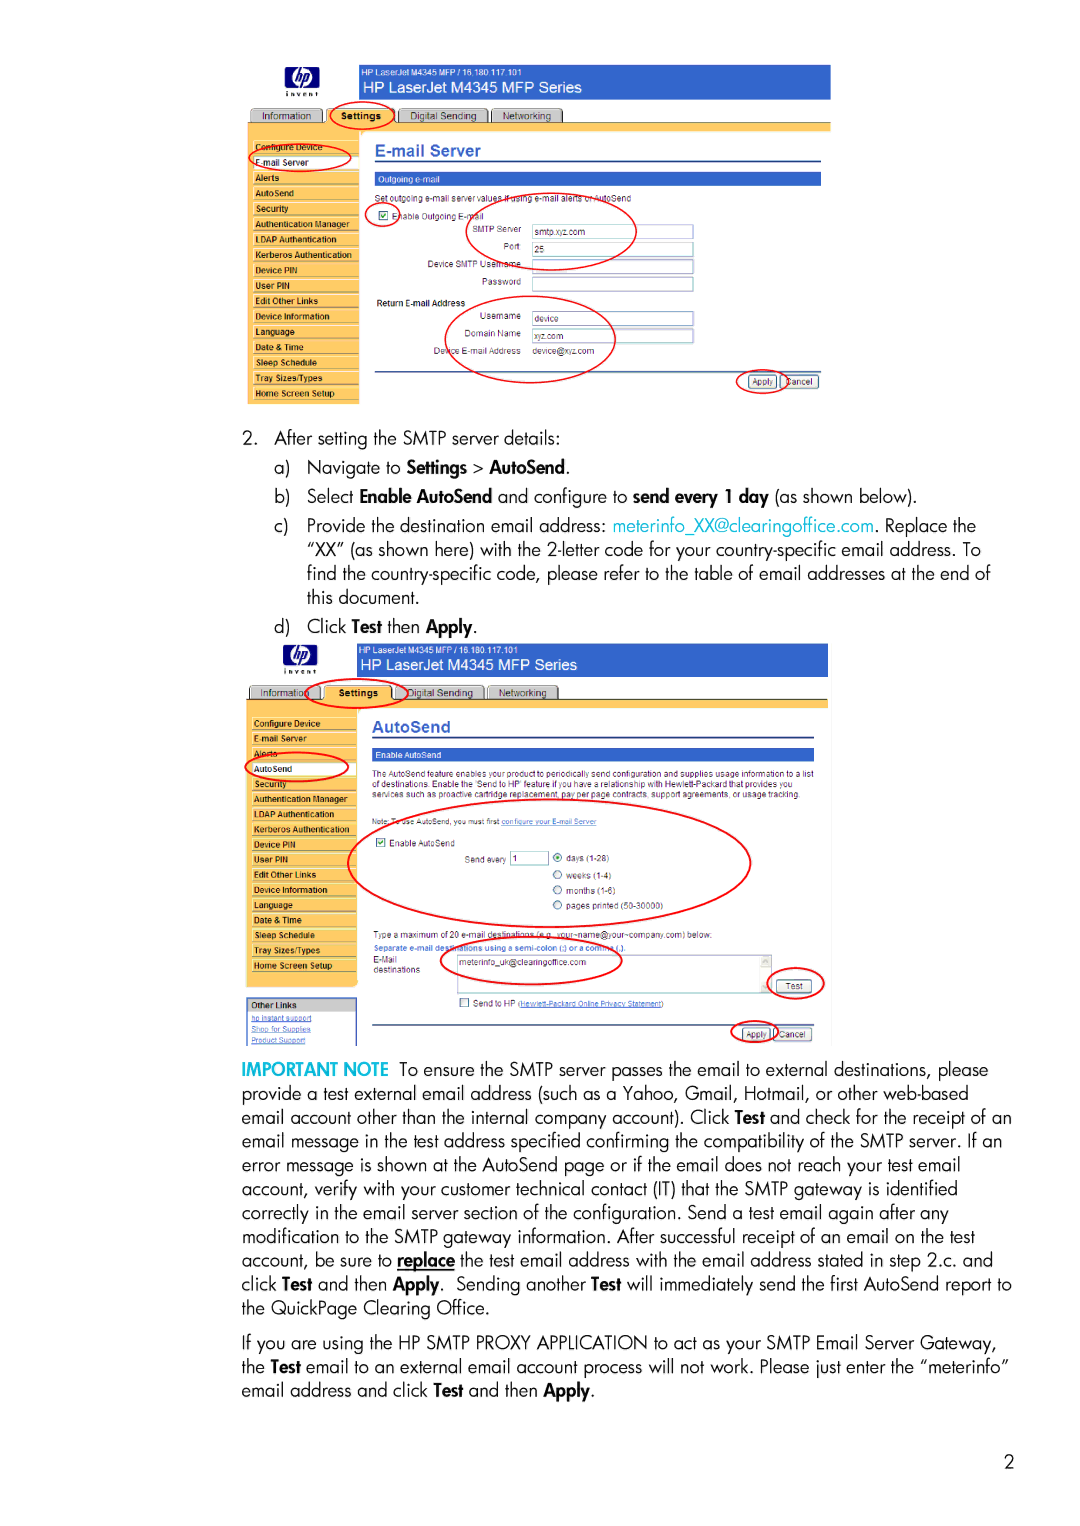
2.After setting the SMTP server details:
a)Navigate to Settings > AutoSend.
b)Select Enable AutoSend and configure to send every 1 day (as shown below).
c)Provide the destination email address: meterinfo_XX@clearingoffice.com. Replace the “XX” (as shown here) with the 2-letter code for your country-specific email address. To find the country-specific code, please refer to the table of email addresses at the end of this document.
d)Click Test then Apply.
IMPORTANT NOTE To ensure the SMTP server passes the email to external destinations, please provide a test external email address (such as a Yahoo, Gmail, Hotmail, or other web-based email account other than the internal company account). Click Test and check for the receipt of an email message in the test address specified confirming the compatibility of the SMTP server. If an error message is shown at the AutoSend page or if the email does not reach your test email account, verify with your customer technical contact (IT) that the SMTP gateway is identified correctly in the email server section of the configuration. Send a test email again after any modification to the SMTP gateway information. After successful receipt of an email on the test account, be sure to replace the test email address with the email address stated in step 2.c. and click Test and then Apply. Sending another Test will immediately send the first AutoSend report to the QuickPage Clearing Office.
If you are using the HP SMTP PROXY APPLICATION to act as your SMTP Email Server Gateway, the Test email to an external email account process will not work. Please just enter the “meterinfo” email address and click Test and then Apply.
2