Vp6111 specifications
The HP Vp6111 is a versatile and robust multimedia projector designed to meet the needs of both professional and educational environments. This model stands out for its impressive features, technologies, and characteristics that enhance its overall performance and usability.One of the key features of the HP Vp6111 is its high brightness output, making it suitable for use in various ambient lighting conditions. With a brightness rating of up to 3000 ANSI lumens, this projector can deliver vibrant and clear images even in well-lit rooms. This capability allows for flexibility, whether it’s used in a conference room, classroom, or for home entertainment purposes.
The Vp6111 utilizes DLP (Digital Light Processing) technology, offering superior color accuracy and exceptional image quality. DLP technology is known for its ability to produce sharp images with high contrast ratios, resulting in more pronounced details and vivid colors. This makes the Vp6111 an excellent choice for presentations that rely on visual content.
The resolution of the HP Vp6111 is another significant aspect, featuring a native XGA resolution of 1024 x 768 pixels. This resolution strikes a balance between clarity and compatibility, making it capable of projecting various types of media seamlessly, from slideshows to videos.
Additionally, the Vp6111 is equipped with multiple connectivity options, including HDMI, VGA, and USB ports. This diverse range of connections ensures compatibility with a wide array of devices such as laptops, desktops, and even smartphones. The inclusion of a USB port also enables easy file sharing directly from a flash drive, simplifying the presentation process.
Another noteworthy characteristic of the HP Vp6111 is its compact and lightweight design. Weighing around 6.5 pounds, it is portable, allowing users to easily transport it between locations. This portability, combined with its quick setup capabilities, makes it an ideal choice for traveling professionals and educators conducting sessions in different venues.
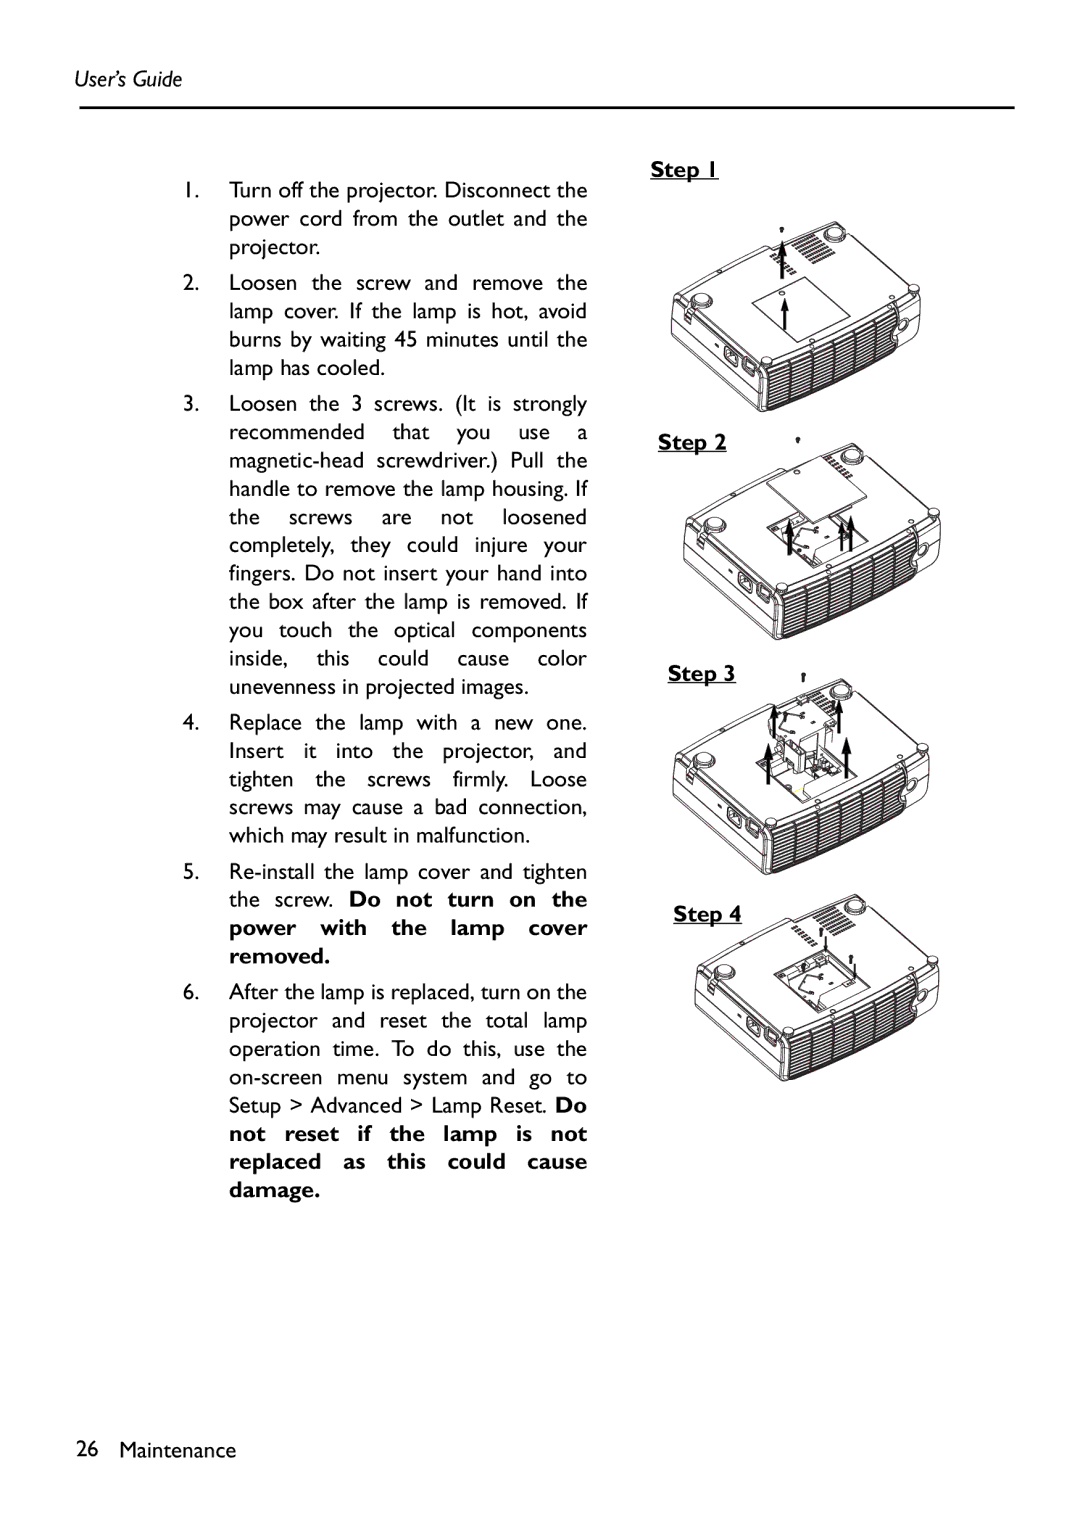
Finally, the Vp6111 offers extended lamp life, reducing maintenance costs and providing users with long-lasting performance. With an average lamp life of up to 5000 hours, users can enjoy the projector without frequent interruptions for lamp replacements.
In summary, the HP Vp6111 projector combines high brightness, outstanding image quality, versatile connectivity, portability, and durability. These features collectively make it a valuable tool for anyone looking to deliver impactful presentations or engaging visual content in various settings.

