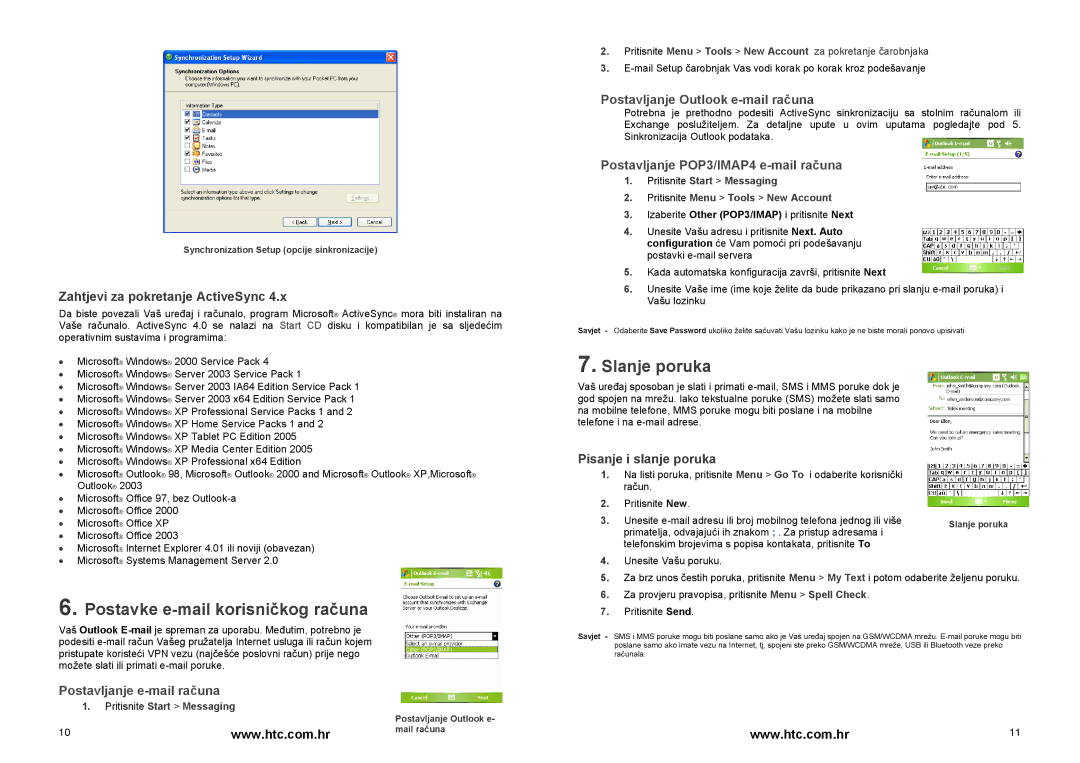
Synchronization Setup (opcije sinkronizacije)

Zahtjevi za pokretanje ActiveSync 4.x

Da biste povezali Vaš uređaj i računalo, program Microsoft® ActiveSync® mora biti instaliran na Vaše računalo. ActiveSync 4.0 se nalazi na Start CD disku i kompatibilan je sa sljedećim operativnim sustavima i programima:

Microsoft® Windows® 2000 Service Pack 4

Microsoft® Windows® Server 2003 Service Pack 1

Microsoft® Windows® Server 2003 IA64 Edition Service Pack 1

Microsoft® Windows® Server 2003 x64 Edition Service Pack 1

Microsoft® Windows® XP Professional Service Packs 1 and 2

Microsoft® Windows® XP Home Service Packs 1 and 2

Microsoft® Windows® XP Tablet PC Edition 2005

Microsoft® Windows® XP Media Center Edition 2005

Microsoft® Windows® XP Professional x64 Edition

Microsoft® Outlook® 98, Microsoft® Outlook® 2000 and Microsoft® Outlook® XP,Microsoft® Outlook® 2003

Microsoft® Office 97, bez Outlook-a

Microsoft® Office 2000

Microsoft® Office XP

Microsoft® Office 2003

Microsoft® Internet Explorer 4.01 ili noviji (obavezan)

Microsoft® Systems Management Server 2.0

2.Pritisnite Menu > Tools > New Account za pokretanje čarobnjaka

3.E-mail Setup čarobnjak Vas vodi korak po korak kroz podešavanje

Postavljanje Outlook e-mail računa

Potrebna je prethodno podesiti ActiveSync sinkronizaciju sa stolnim računalom ili Exchange poslužiteljem. Za detaljne upute u ovim uputama pogledajte pod 5. Sinkronizacija Outlook podataka.

Postavljanje POP3/IMAP4 e-mail računa

1.Pritisnite Start > Messaging

2.Pritisnite Menu > Tools > New Account

3.Izaberite Other (POP3/IMAP) i pritisnite Next

4.Unesite Vašu adresu i pritisnite Next. Auto configuration će Vam pomoći pri podešavanju postavki e-mail servera

5.Kada automatska konfiguracija završi, pritisnite Next

6.Unesite Vaše ime (ime koje želite da bude prikazano pri slanju e-mail poruka) i Vašu lozinku

Savjet - Odaberite Save Password ukoliko želite sačuvati Vašu lozinku kako je ne biste morali ponovo upisivati

7. Slanje poruka

Vaš uređaj sposoban je slati i primati e-mail, SMS i MMS poruke dok je god spojen na mrežu. Iako tekstualne poruke (SMS) možete slati samo na mobilne telefone, MMS poruke mogu biti poslane i na mobilne telefone i na e-mail adrese.

Pisanje i slanje poruka

1.

Na listi poruka, pritisnite Menu > Go To i odaberite korisnički


račun.


2.

Pritisnite New.


3.

Unesite e-mail adresu ili broj mobilnog telefona jednog ili više

Slanje poruka


primatelja, odvajajući ih znakom ; . Za pristup adresama i


telefonskim brojevima s popisa kontakata, pritisnite To

4.

Unesite Vašu poruku.

5.

Za brz unos čestih poruka, pritisnite Menu > My Text i potom odaberite željenu poruku.

6.

Za provjeru pravopisa, pritisnite Menu > Spell Check.

6. Postavke e-mail korisničkog računa

Vaš Outlook E-mailje spreman za uporabu. Međutim, potrebno je podesiti e-mail račun Vašeg pružatelja Internet usluga ili račun kojem pristupate koristeći VPN vezu (najčešće poslovni račun) prije nego možete slati ili primati e-mail poruke.

Postavljanje e-mail računa

1.Pritisnite Start > Messaging

10www.htc.com.hr

Postavljanje Outlook e- mail računa

7. Pritisnite Send.

Savjet - SMS i MMS poruke mogu biti poslane samo ako je Vaš uređaj spojen na GSM/WCDMA mrežu. E-mail poruke mogu biti poslane samo ako imate vezu na Internet, tj, spojeni ste preko GSM/WCDMA mreže, USB ili Bluetooth veze preko računala.

www.htc.com.hr11

Page 10
Image 10
HTC HTC P4350 manual Slanje poruka, Postavke e-mail korisničkog računa, Postavljanje Outlook e-mail računa

HTC P4350 specifications

The HTC P4350, also known as the HTC Star Trek, was a significant handheld device released in the mid-2000s that catered to the growing demand for mobile technology equipped with various features and functionalities. As a part of HTC's extensive lineup of smartphones at the time, the P4350 aimed to appeal to both business professionals and tech enthusiasts.

One of the most distinguishing characteristics of the HTC P4350 was its compact design, featuring a slide-out QWERTY keyboard that allowed users to easily type messages and emails. The device sported a 2.8-inch touchscreen display, providing a resolution of 240 x 320 pixels. This was a notable feature for its time, as it enabled an intuitive user interface that combined touch functionality with physical keys, thus catering to different user preferences.

The HTC P4350 operated on Windows Mobile 6, which provided an ecosystem that was familiar to many users, especially those in corporate environments. This operating system allowed for seamless integration with Microsoft Office applications, enhancing productivity on the go. The phone also supported email and calendar functionalities, making it suitable as a business tool.

In terms of connectivity, the HTC P4350 was equipped with Bluetooth and Wi-Fi capabilities. These features allowed users to stay connected to the internet and other devices, facilitating quick data transfers and access to online resources. Additionally, it had a built-in 2-megapixel camera, adding a multimedia aspect to the device. This camera, while basic by today’s standards, was a valuable feature for capturing quick snapshots.

Furthermore, the HTC P4350 featured expandable memory via a microSD card slot, allowing users to increase storage for applications, music, and documents. The device was powered by a 400 MHz processor, which, combined with the efficient operating system, delivered a performance that was adequate for typical tasks such as web browsing, emailing, and running business applications.

In summary, the HTC P4350 was a remarkable device for its time, blending a sleek design with practical features aimed at enhancing the user experience. Its combination of a touchscreen, physical keyboard, and multimedia capabilities made it a versatile choice for users looking for a reliable mobile phone that could keep up with their productivity needs. While the smartphone landscape has profoundly changed since its release, the HTC P4350 remains a noteworthy example of early smartphone technology.