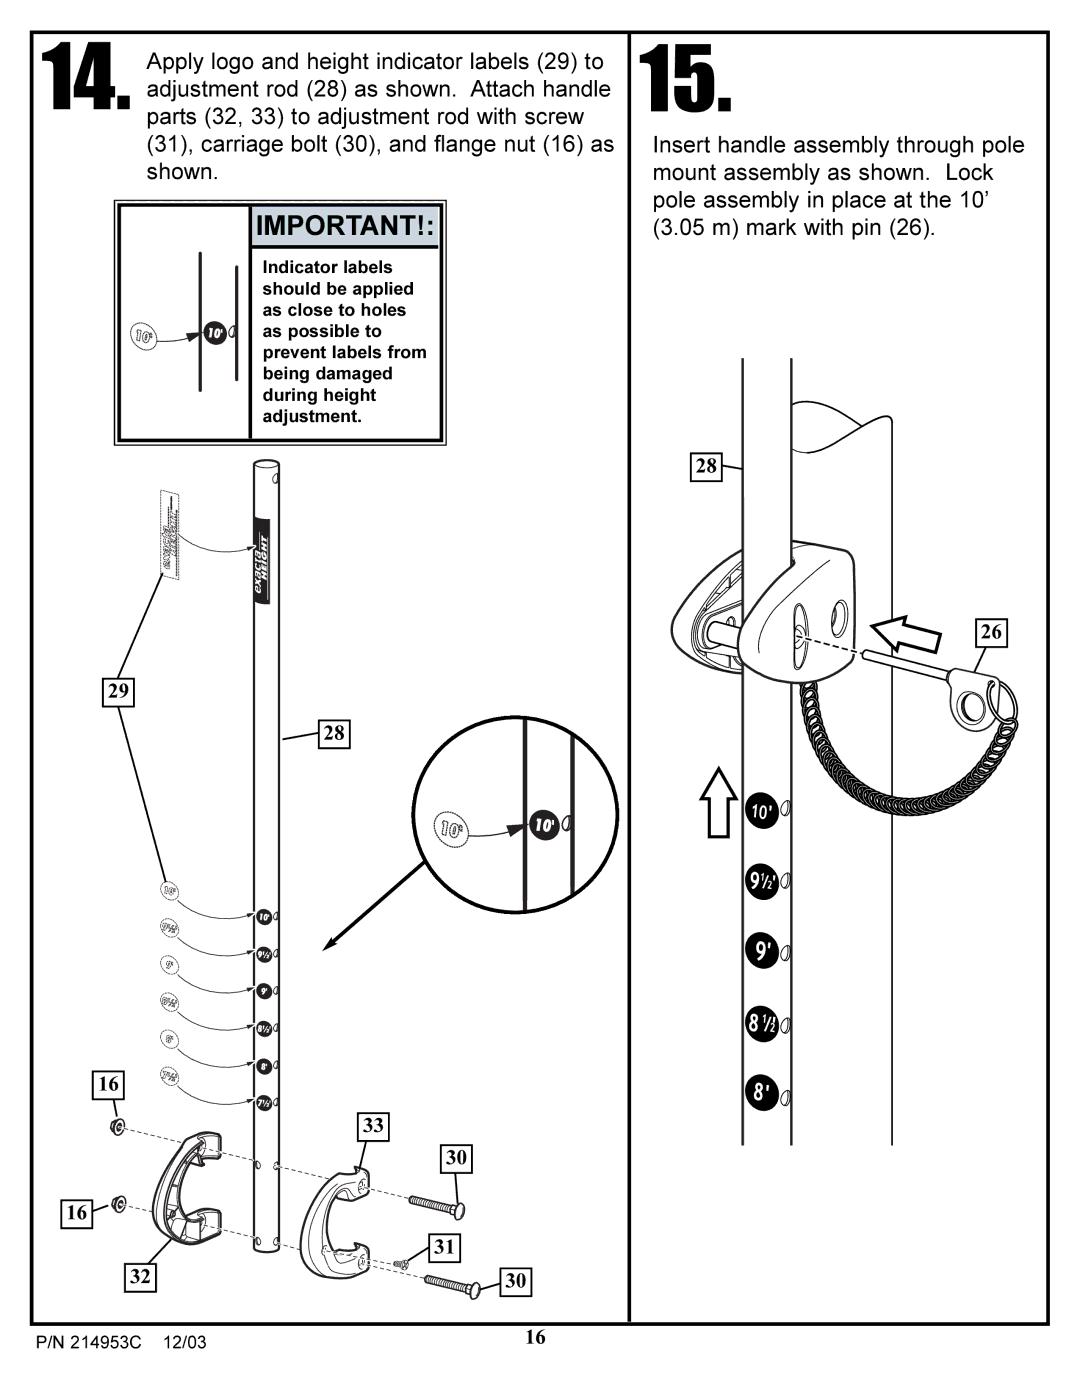
14. Apply logo and height indicator labels (29) to adjustment rod (28) as shown. Attach handle parts (32, 33) to adjustment rod with screw (31), carriage bolt (30), and flange nut (16) as shown.
IMPORTANT!:
Indicator labels should be applied as close to holes as possible to prevent labels from being damaged during height adjustment.
29
28
16
33
30
16
31
32 | 30 |
15.
Insert handle assembly through pole mount assembly as shown. Lock pole assembly in place at the 10’ (3.05 m) mark with pin (26).
28
26
P/N 214953C 12/03 | 16 |