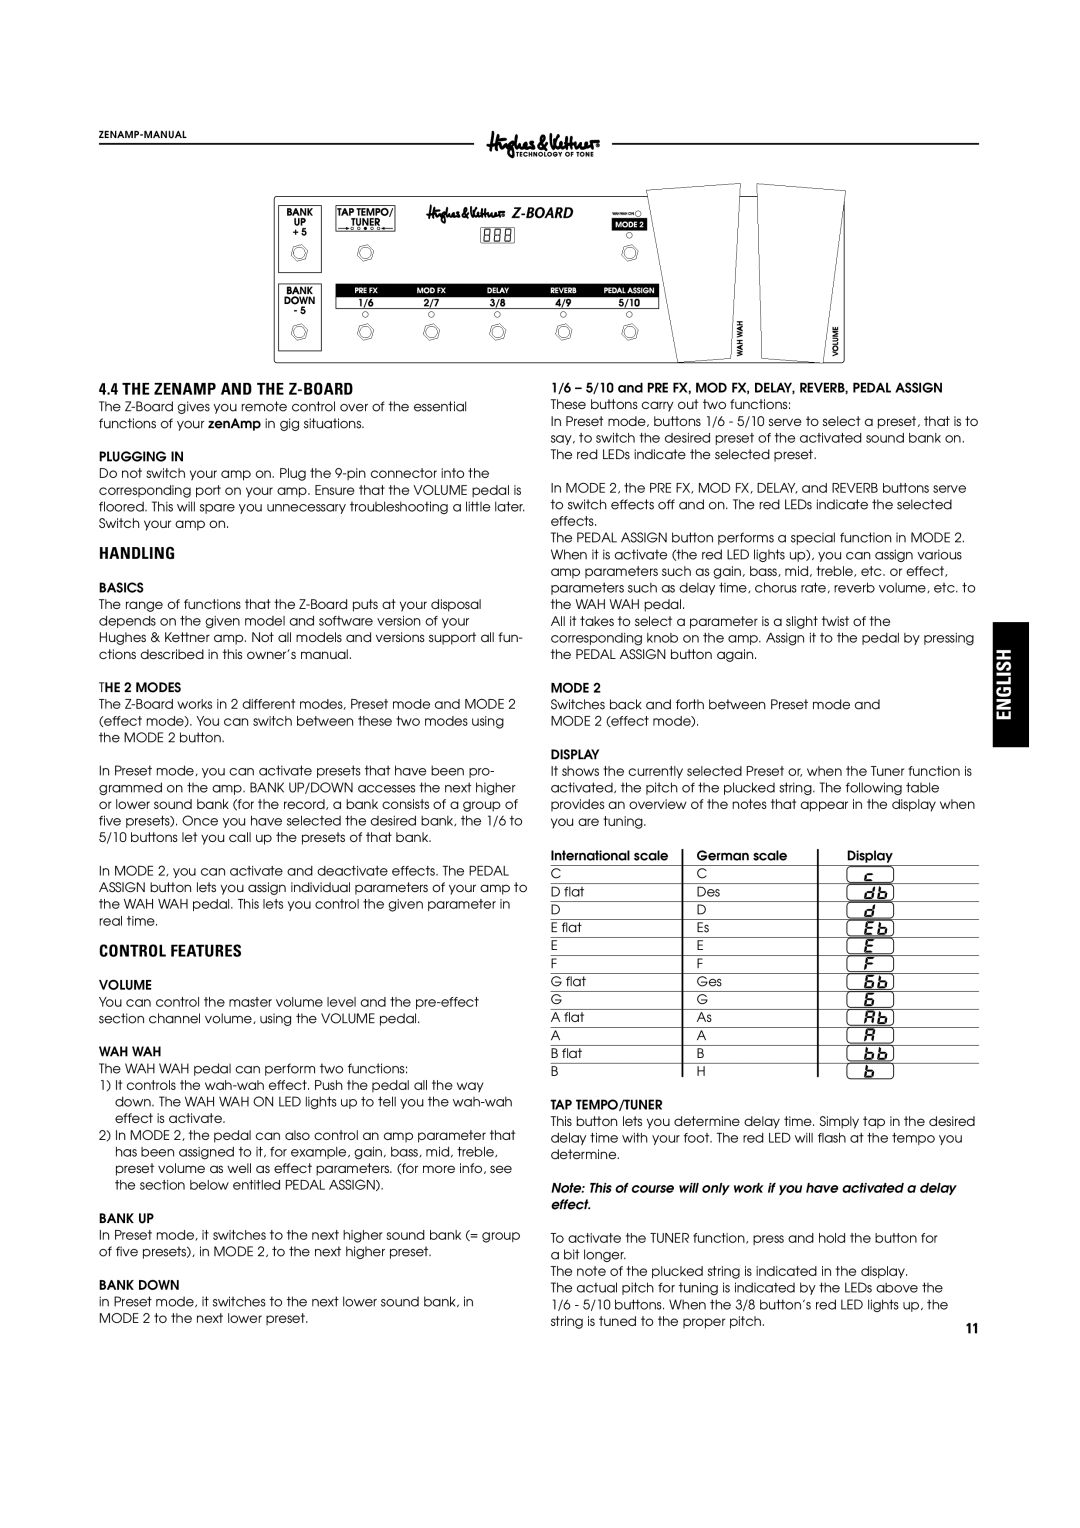
4.4 THE ZENAMP AND THE Z-BOARD
The
PLUGGING IN
Do not switch your amp on. Plug the
HANDLING
BASICS
The range of functions that the
THE 2 MODES
The
In Preset mode, you can activate presets that have been pro- grammed on the amp. BANK UP/DOWN accesses the next higher or lower sound bank (for the record, a bank consists of a group of five presets). Once you have selected the desired bank, the 1/6 to 5/10 buttons let you call up the presets of that bank.
In MODE 2, you can activate and deactivate effects. The PEDAL ASSIGN button lets you assign individual parameters of your amp to the WAH WAH pedal. This lets you control the given parameter in real time.
CONTROL FEATURES
VOLUME
You can control the master volume level and the
WAH WAH
The WAH WAH pedal can perform two functions:
1)It controls the
2)In MODE 2, the pedal can also control an amp parameter that has been assigned to it, for example, gain, bass, mid, treble, preset volume as well as effect parameters. (for more info, see the section below entitled PEDAL ASSIGN).
BANK UP
In Preset mode, it switches to the next higher sound bank (= group of five presets), in MODE 2, to the next higher preset.
BANK DOWN
in Preset mode, it switches to the next lower sound bank, in MODE 2 to the next lower preset.
1/6 – 5/10 and PRE FX, MOD FX, DELAY, REVERB, PEDAL ASSIGN These buttons carry out two functions:
In Preset mode, buttons 1/6 - 5/10 serve to select a preset, that is to say, to switch the desired preset of the activated sound bank on. The red LEDs indicate the selected preset.
In MODE 2, the PRE FX, MOD FX, DELAY, and REVERB buttons serve to switch effects off and on. The red LEDs indicate the selected effects.
The PEDAL ASSIGN button performs a special function in MODE 2. When it is activate (the red LED lights up), you can assign various amp parameters such as gain, bass, mid, treble, etc. or effect, parameters such as delay time, chorus rate, reverb volume, etc. to the WAH WAH pedal.
All it takes to select a parameter is a slight twist of the corresponding knob on the amp. Assign it to the pedal by pressing the PEDAL ASSIGN button again.
MODE 2
Switches back and forth between Preset mode and MODE 2 (effect mode).
DISPLAY
It shows the currently selected Preset or, when the Tuner function is activated, the pitch of the plucked string. The following table provides an overview of the notes that appear in the display when you are tuning.
International scale | German scale | Display |
C | C |
|
D flat | Des |
|
D | D |
|
E flat | Es |
|
E | E |
|
F | F |
|
G flat | Ges |
|
G | G |
|
A flat | As |
|
A | A |
|
B flat | B |
|
B | H |
|
TAP TEMPO/TUNER
This button lets you determine delay time. Simply tap in the desired delay time with your foot. The red LED will flash at the tempo you determine.
Note: This of course will only work if you have activated a delay effect.
To activate the TUNER function, press and hold the button for |
|
a bit longer. |
|
The note of the plucked string is indicated in the display. |
|
The actual pitch for tuning is indicated by the LEDs above the |
|
1/6 - 5/10 buttons. When the 3/8 button’s red LED lights up, the |
|
string is tuned to the proper pitch. | 11 |
|
ENGLISH