Transducer Switch
6.Insert the threaded shaft of the switch through the hole and hold it in place with one hand, making sure that the pivot of the switch is aligned with the letters A and B.
7.Push the rubber boot over the top of the switch and tighten onto the shaft.
8.Fully tighten the nut using an adjustable wrench.
CAUTION: Use care when tightening the nut to avoid damaging the rubber boot.
3.Connecting the Transducers to the Switch and the Control Head
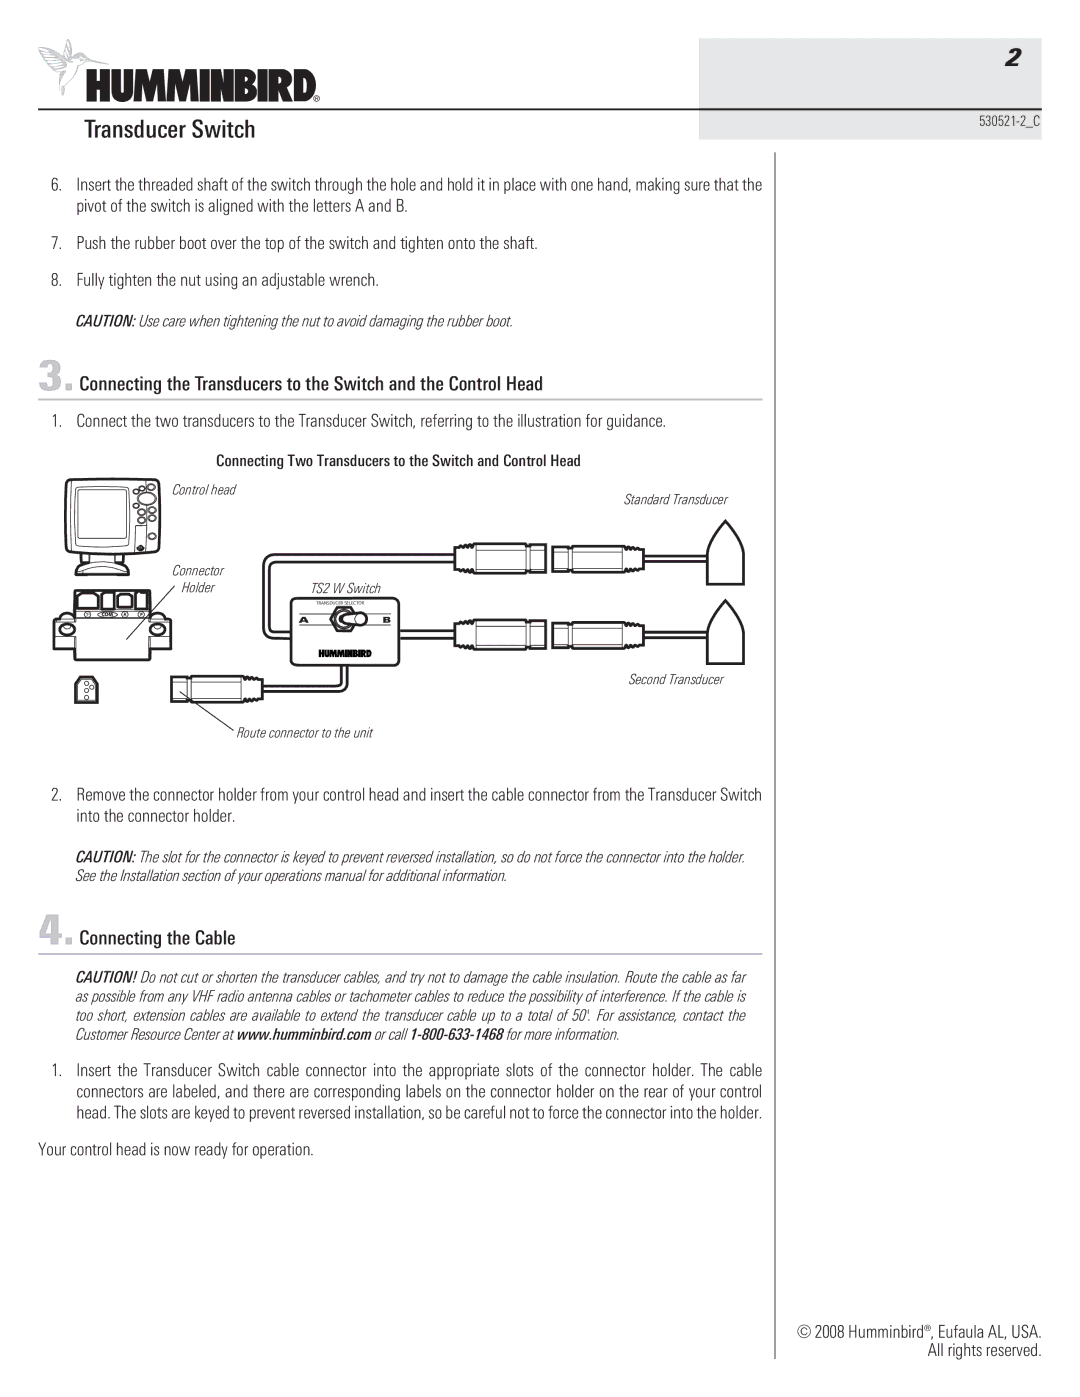
1. Connect the two transducers to the Transducer Switch, referring to the illustration for guidance.
Connecting Two Transducers to the Switch and Control Head
Control head
Standard Transducer
Connector |
|
Holder | TS2 W Switch |
TRANSDUCER SELECTOR
A ![]() B
B
Second Transducer
Route connector to the unit
2.Remove the connector holder from your control head and insert the cable connector from the Transducer Switch into the connector holder.
CAUTION: The slot for the connector is keyed to prevent reversed installation, so do not force the connector into the holder. See the Installation section of your operations manual for additional information.
4.Connecting the Cable
CAUTION! Do not cut or shorten the transducer cables, and try not to damage the cable insulation. Route the cable as far as possible from any VHF radio antenna cables or tachometer cables to reduce the possibility of interference. If the cable is too short, extension cables are available to extend the transducer cable up to a total of 50'. For assistance, contact the Customer Resource Center at www.humminbird.com or call
1.Insert the Transducer Switch cable connector into the appropriate slots of the connector holder. The cable connectors are labeled, and there are corresponding labels on the connector holder on the rear of your control head. The slots are keyed to prevent reversed installation, so be careful not to force the connector into the holder.
Your control head is now ready for operation.
2
© 2008 Humminbird®, Eufaula AL, USA. All rights reserved.