Humminbird 5, 4 Understanding the On-screen Images, Accessing Menu Features, Light, Sensitivity

Models: 4

1 5
Download 5 pages 2.99 Kb
Page 2
Image 2
Understanding the On-screen Images

Understanding the On-screen Images

As the boat moves, terrain and bottom composition variations are displayed
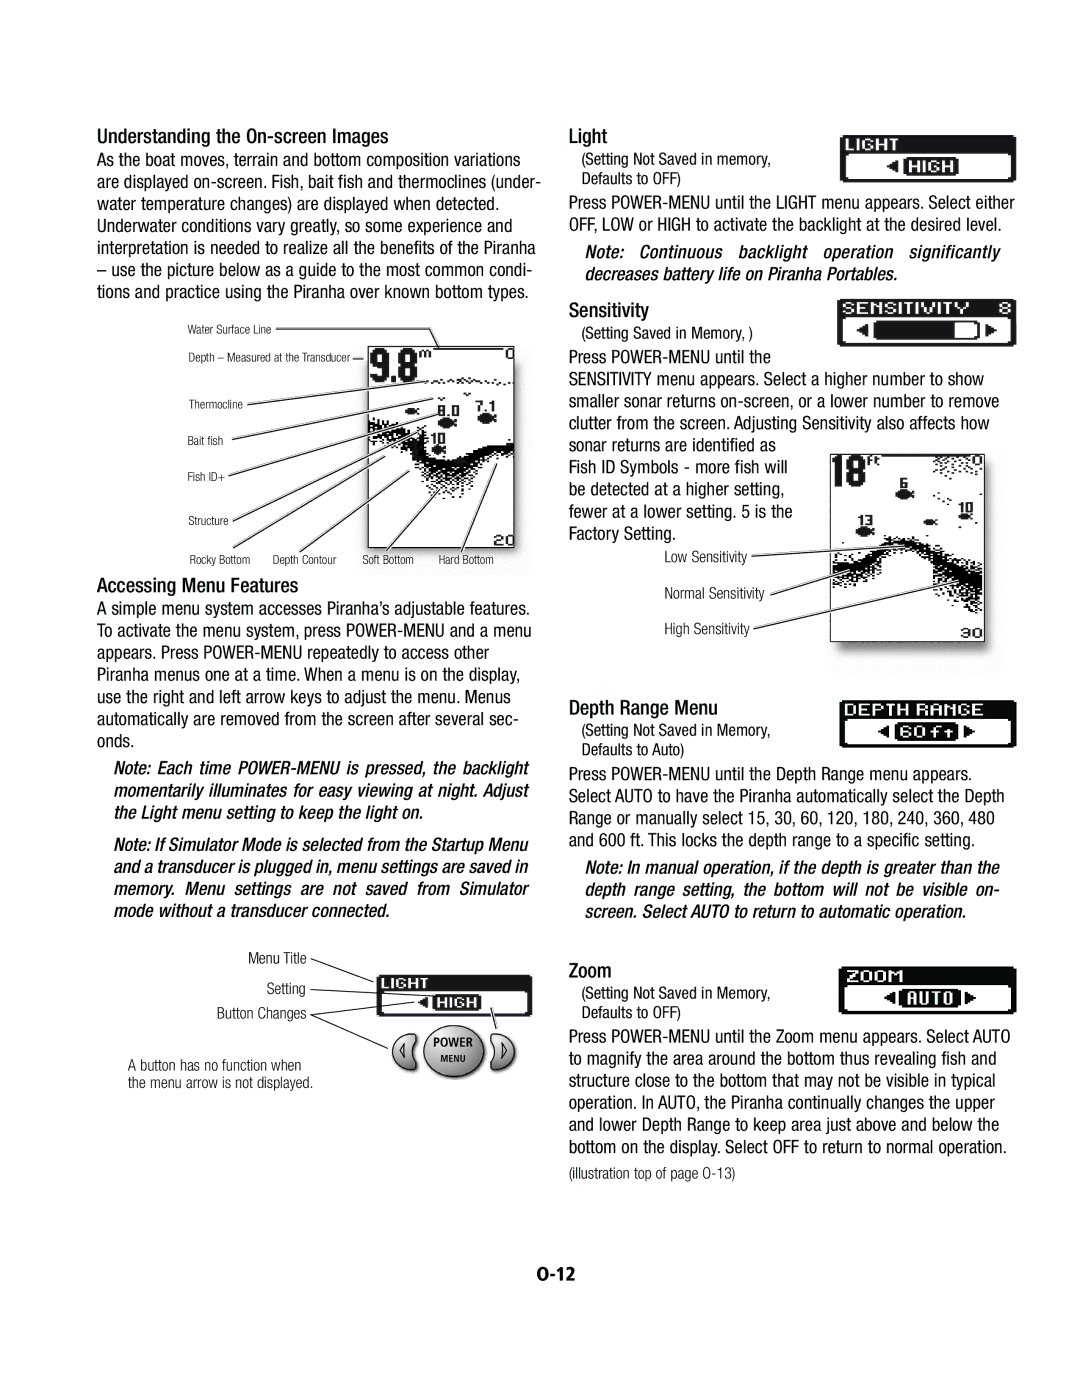
 on-screen. Fish, bait fish and thermoclines (under- water temperature changes) are displayed when detected. Underwater conditions vary greatly, so some experience and interpretation is needed to realize all the benefits of the Piranha

use the picture below as a guide to the most common condi- tions and practice using the Piranha over known bottom types.

Water Surface Line Accessing Menu Features

Depth – Measured at the Transducer Light

Thermocline

Bait fish

Fish ID+

Structure

Rocky Bottom

Depth Contour

Soft Bottom

Hard Bottom

Accessing Menu Features

A simple menu system accesses Piranha’s adjustable features. To activate the menu system, press POWER-MENU and a menu appears. Press POWER-MENU repeatedly to access other Piranha menus one at a time. When a menu is on the display, use the right and left arrow keys to adjust the menu. Menus automatically are removed from the screen after several sec- onds.

Note: Each time POWER-MENU is pressed, the backlight momentarily illuminates for easy viewing at night. Adjust the Light menu setting to keep the light on.

Note: If Simulator Mode is selected from the Startup Menu and a transducer is plugged in, menu settings are saved in memory. Menu settings are not saved from Simulator mode without a transducer connected.

Menu Title

Setting

Button Changes

A button has no function when the menu arrow is not displayed.

Light

(Setting Not Saved in memory, Defaults to OFF)

Press POWER-MENU until the LIGHT menu appears. Select either OFF, LOW or HIGH to activate the backlight at the desired level.

Note: Continuous backlight operation significantly decreases battery life on Piranha Portables.

Sensitivity

(Setting Saved in Memory, )

Press POWER-MENU until the

SENSITIVITY menu appears. Select a higher number to show smaller sonar returns on-screen, or a lower number to remove clutter from the screen. Adjusting Sensitivity also affects how sonar returns are identified as

Fish ID Symbols - more fish will be detected at a higher setting, fewer at a lower setting. 5 is the Factory Setting.

Low Sensitivity Sensitivity

Normal Sensitivity (Setting Saved in Memory, )

High Sensitivity

Depth Range Menu

(Setting Not Saved in Memory, Defaults to Auto)

Press POWER-MENU until the Depth Range menu appears. Select AUTO to have the Piranha automatically select the Depth Range or manually select 15, 30, 60, 120, 180, 240, 360, 480 and 600 ft. This locks the depth range to a specific setting.

Note: In manual operation, if the depth is greater than the depth range setting, the bottom will not be visible on- screen. Select AUTO to return to automatic operation.

Zoom

(Setting Not Saved in Memory, Defaults to OFF)

Press POWER-MENU until the Zoom menu appears. Select AUTO to magnify the area around the bottom thus revealing fish and structure close to the bottom that may not be visible in typical operation. In AUTO, the Piranha continually changes the upper and lower Depth Range to keep area just above and below the bottom on the display. Select OFF to return to normal operation.

(illustration top of page O-13)

O-12

Page 2
Image 2
Humminbird 5 Understanding the On-screen Images, Accessing Menu Features, Light, Sensitivity, Depth Range Menu, Zoom, O-12