
20727 specifications
The Hunter Fan 20727, a standout model in the renowned Hunter ceiling fan lineup, combines style, functionality, and advanced technology to deliver an exceptional indoor cooling experience. Designed with the user in mind, this ceiling fan is perfect for both contemporary and traditional settings, making it a versatile choice for any home.One of the defining features of the Hunter Fan 20727 is its impressive design. The fan boasts a sleek, modern look with a polished nickel finish, complemented by elegant blades that add a touch of class to any room. This aesthetic appeal ensures that the fan not only serves a functional purpose but also enhances the overall decor of your living space.
Equipped with a powerful motor, the Hunter Fan 20727 delivers superior airflow, ensuring that your rooms remain comfortably cool during hot summer months. The whisper-quiet operation of this fan ensures that it can be used in various settings—whether it be a bedroom, living room, or office—without causing distractions or disturbances. This makes it an ideal choice for those who value peace and quiet while still wanting to maintain a comfortable environment.
One of the standout technologies featured in the Hunter Fan 20727 is its reversible motor. This allows users to switch the fan's direction, enabling effective airflow for both cooling in the summer and warm air circulation in the winter. This year-round functionality helps improve the energy efficiency of your home, potentially reducing heating and cooling costs.
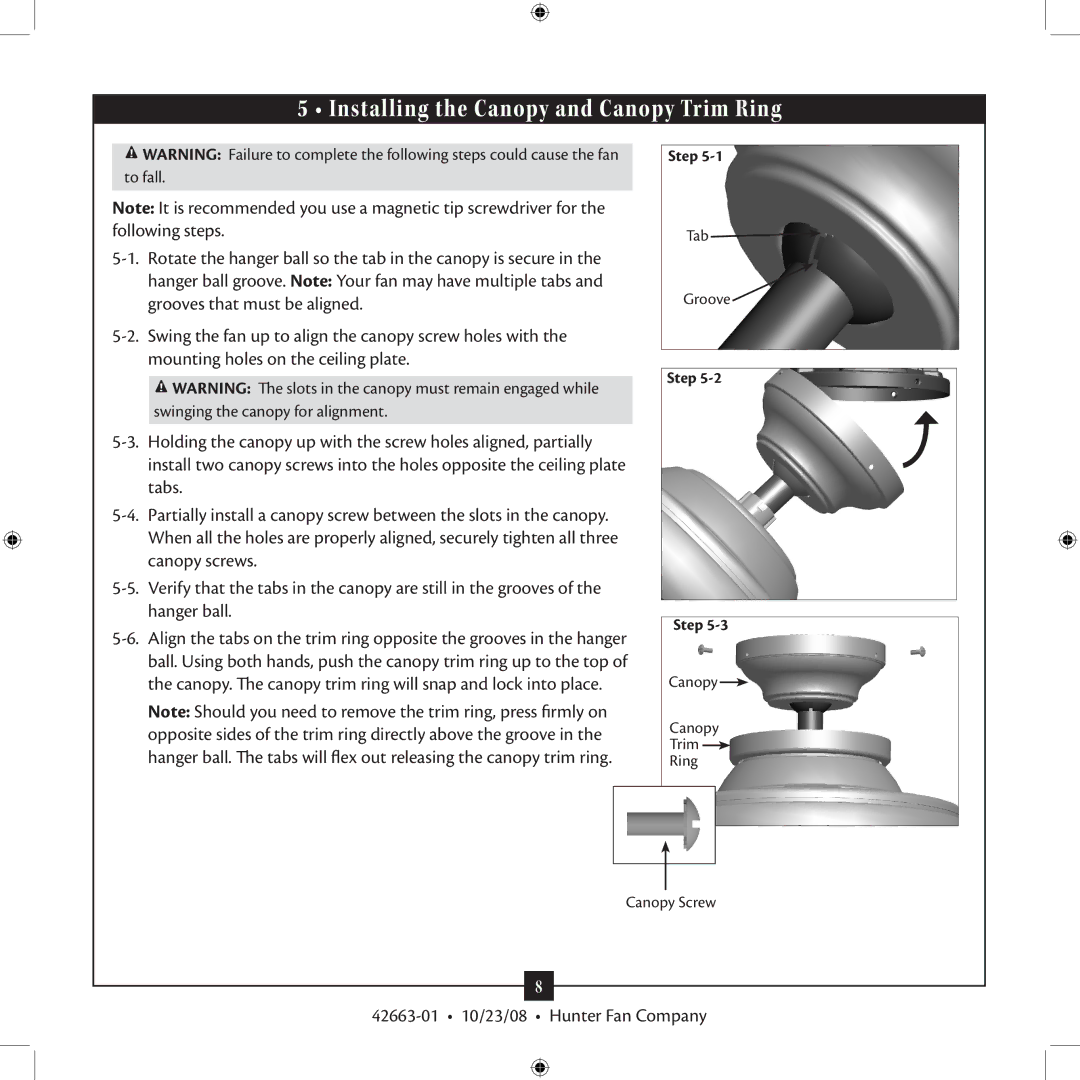
Another notable characteristic of the Hunter Fan 20727 is its easy installation process. With a user-friendly design and clear instructions, homeowners can quickly mount the fan themselves without the need for professional assistance. Furthermore, the fan is compatible with Hunter's own light kits, adding the option for additional lighting in your space, which enhances functionality and ambiance.
The Hunter Fan 20727 also features remote control operation, allowing for easy adjustments to speed and direction without needing to get up from your seat. This modern convenience aligns with the contemporary needs of today's homeowners, who often seek integrated solutions for comfort and control.
In conclusion, the Hunter Fan 20727 is much more than an ordinary ceiling fan. With its stylish design, effective airflow, reversible motor, easy installation, and remote control features, it stands out as a top choice for anyone looking to enhance their home's comfort and aesthetics. Whether you're seeking a stylish accessory or an efficient cooling solution, the Hunter Fan 20727 excels in providing both.