SERVICE AND ADJUSTMENTS

WARNING: To avoid serious injury, before performing any service or adjustments:

1.Be sure throttle is in STOP position.

2.Remove safety ignition key.

3.Make sure the augers and all moving

parts have completely stopped.

4.Disconnect spark plug wire from spark plug and place wire where it cannot come in contact with plug.

SNOW THROWER

TO ADJUST SNOW THROWER HEIGHT

See “TO ADJUST SKID PLATES” and “SCRAPER BAR” in the Operation section of this manual.

CHUTE DEFLECTOR

The chute deflector, attached to the top of the discharge chute, is provided to direct discharging snow away from the operator. If the deflector becomes damaged, it should be replaced.

WARNING: To avoid serious injury, never operate your snow thrower with the deflector removed or damaged.

To change direction and/or distance snow is discharged, see “TO CONTROL SNOW DISCHARGE” in the Op- eration section of this manual.

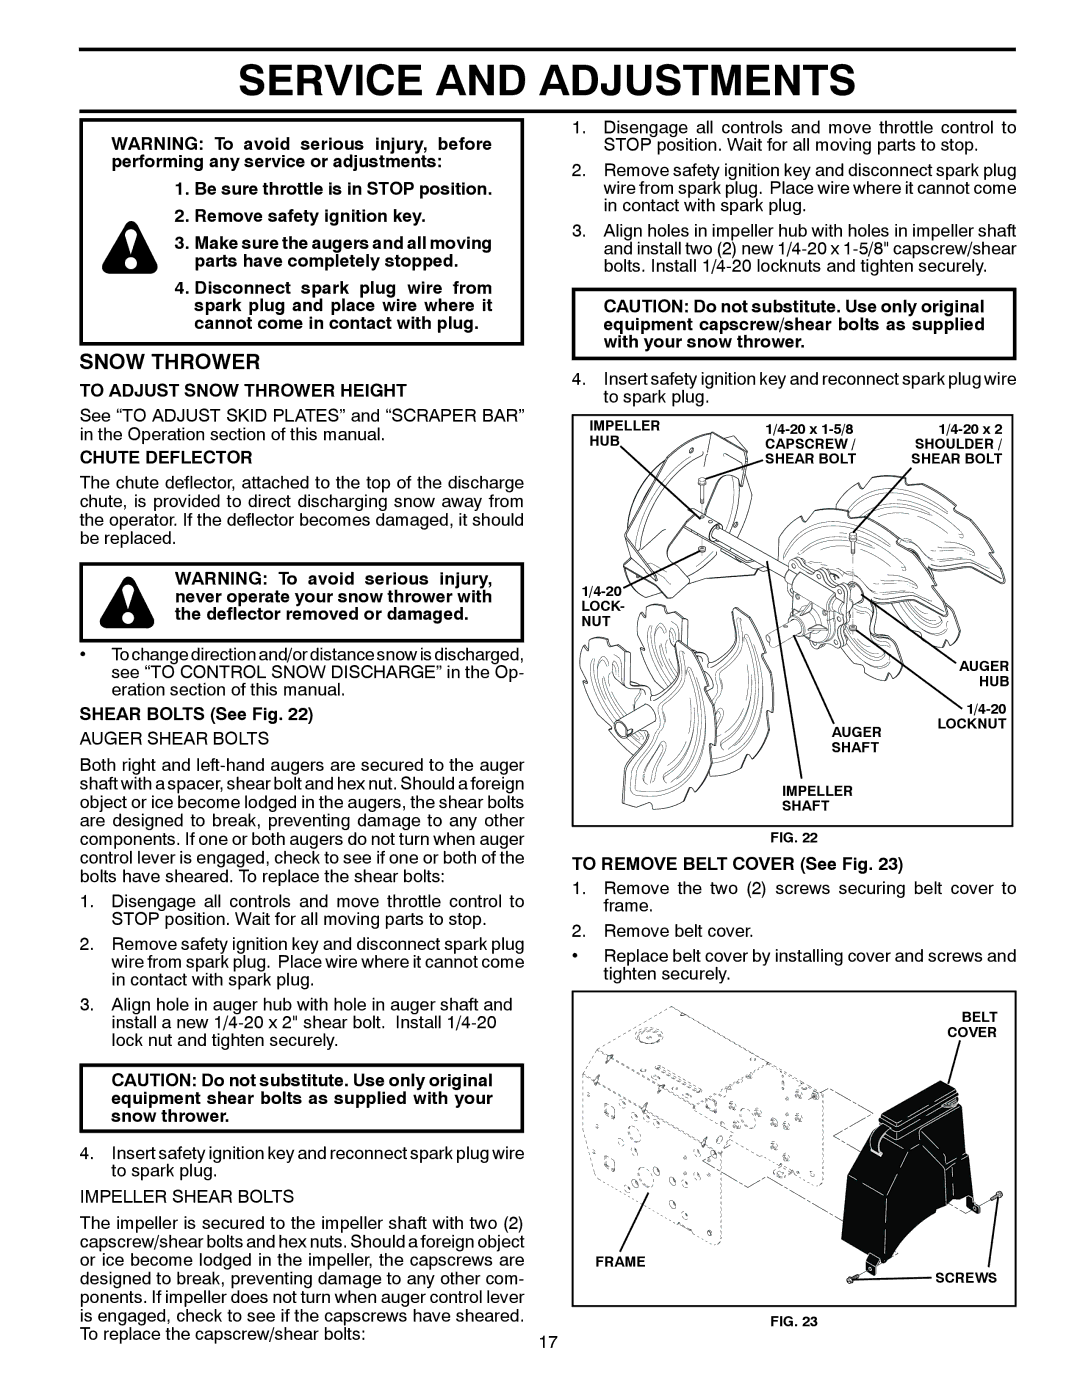
SHEAR BOLTS (See Fig. 22)

AUGER SHEAR BOLTS

Both right and left-hand augers are secured to the auger shaft with a spacer, shear bolt and hex nut. Should a foreign object or ice become lodged in the augers, the shear bolts are designed to break, preventing damage to any other components. If one or both augers do not turn when auger control lever is engaged, check to see if one or both of the bolts have sheared. To replace the shear bolts:

1.Disengage all controls and move throttle control to STOP position. Wait for all moving parts to stop.

2.Remove safety ignition key and disconnect spark plug wire from spark plug. Place wire where it cannot come in contact with spark plug.

3.Align hole in auger hub with hole in auger shaft and install a new 1/4-20 x 2" shear bolt. Install 1/4-20 lock nut and tighten securely.

CAUTION: Do not substitute. Use only original equipment shear bolts as supplied with your snow thrower.

4.Insert safety ignition key and reconnect spark plug wire to spark plug.

IMPELLER SHEAR BOLTS

The impeller is secured to the impeller shaft with two (2) capscrew/shear bolts and hex nuts. Should a foreign object or ice become lodged in the impeller, the capscrews are designed to break, preventing damage to any other com- ponents. If impeller does not turn when auger control lever is engaged, check to see if the capscrews have sheared.

To replace the capscrew/shear bolts:

17


1.Disengage all controls and move throttle control to STOP position. Wait for all moving parts to stop.

2.Remove safety ignition key and disconnect spark plug wire from spark plug. Place wire where it cannot come in contact with spark plug.

3.Align holes in impeller hub with holes in impeller shaft and install two (2) new 1/4-20 x 1-5/8" capscrew/shear bolts. Install 1/4-20 locknuts and tighten securely.

CAUTION: Do not substitute. Use only original equipment capscrew/shear bolts as supplied with your snow thrower.

4.Insert safety ignition key and reconnect spark plug wire to spark plug.

IMPELLER

1/4-20 x 1-5/8

1/4-20 x 2

HUB

CAPSCREW /

SHOULDER /


SHEAR BOLT

SHEAR BOLT

1/4-20


LOCK-


NUT


AUGER


HUB


1/4-20


AUGER

LOCKNUT


SHAFT


IMPELLER


SHAFT


FIG. 22

TO REMOVE BELT COVER (See Fig. 23)

1.Remove the two (2) screws securing belt cover to frame.

2.Remove belt cover.

Replace belt cover by installing cover and screws and tighten securely.

BELT

COVER

FRAME

SCREWS

FIG. 23

Page 17
Image 17
Husqvarna 96193006600, 11524E Service and Adjustments, To Adjust Snow Thrower Height, Chute Deflector, Shear Bolts See Fig

96193006600, 11524E specifications

The Husqvarna 11524E (model number 96193006600) is a robust, reliable snow blower designed to tackle winter's worst conditions with ease. As part of its commitment to quality engineering and performance, Husqvarna has integrated advanced features and technologies that set this machine apart from competitors.

One of the standout characteristics of the Husqvarna 11524E is its powerful 24-inch clearing width, which allows for efficient snow removal on driveways, sidewalks, and large areas. Powered by a reliable Husqvarna engine, the snow blower delivers ample power to handle heavy, compacted snow. The electric start feature ensures that starting the machine is a breeze, even in frigid temperatures.

The 11524E is equipped with an impressive two-stage snow throwing system. Its first stage consists of an auger that breaks up and collects snow, while the second stage uses an impeller to discharge snow conveniently up to 40 feet away. This dual system efficiently moves large volumes of snow, making quick work of even the heaviest snowfalls.

Another notable feature of this model is its 180-degree rotating chute, allowing users to easily direct the snow where they want it. This level of control makes it suitable for use in tight spaces, ensuring that snow is not thrown onto walkways or back onto areas that have already been cleared.

The Husqvarna 11524E also prioritizes user comfort and ergonomics. The adjustable handle height, along with the heated grips, provides comfort during prolonged use in cold conditions. The heavy-duty tires ensure excellent traction and mobility on snowy surfaces, even on inclines or uneven terrain.

Durability is a key consideration in the design of the 11524E. The materials used in its construction are robust, ensuring that it can withstand the rigors of winter use. In addition, the design incorporates features that simplify maintenance, such as easily accessible belts and other components.

Overall, the Husqvarna 11524E (96193006600) stands out for its combination of power, performance, and user-friendly features. Designed to meet the demands of winter snow removal, it is a valuable asset for homeowners looking to maintain clear pathways and driveways during the snowy season. Whether handling light flurries or heavy snowfalls, this snow blower is equipped to deliver reliable results every time.