ASSEMBLY
Fitting the trimmer guard and trimmer head Trimmy SII
CAUTION! If the machine is to be used with a trimmer head, the fast idle speed must be reduced by
•Fit the correct trimmer guard (A) for use with the trimmer head. Secure the trimmer guard using the 4 screws (L) and the support plate (M) as shown.
•Fit the drive disc (B) on the output shaft.
•Turn the blade shaft until one of the holes in the drive disc aligns with the corresponding hole in the gear housing.
•Insert the locking pin (C) in the hole to lock the shaft.
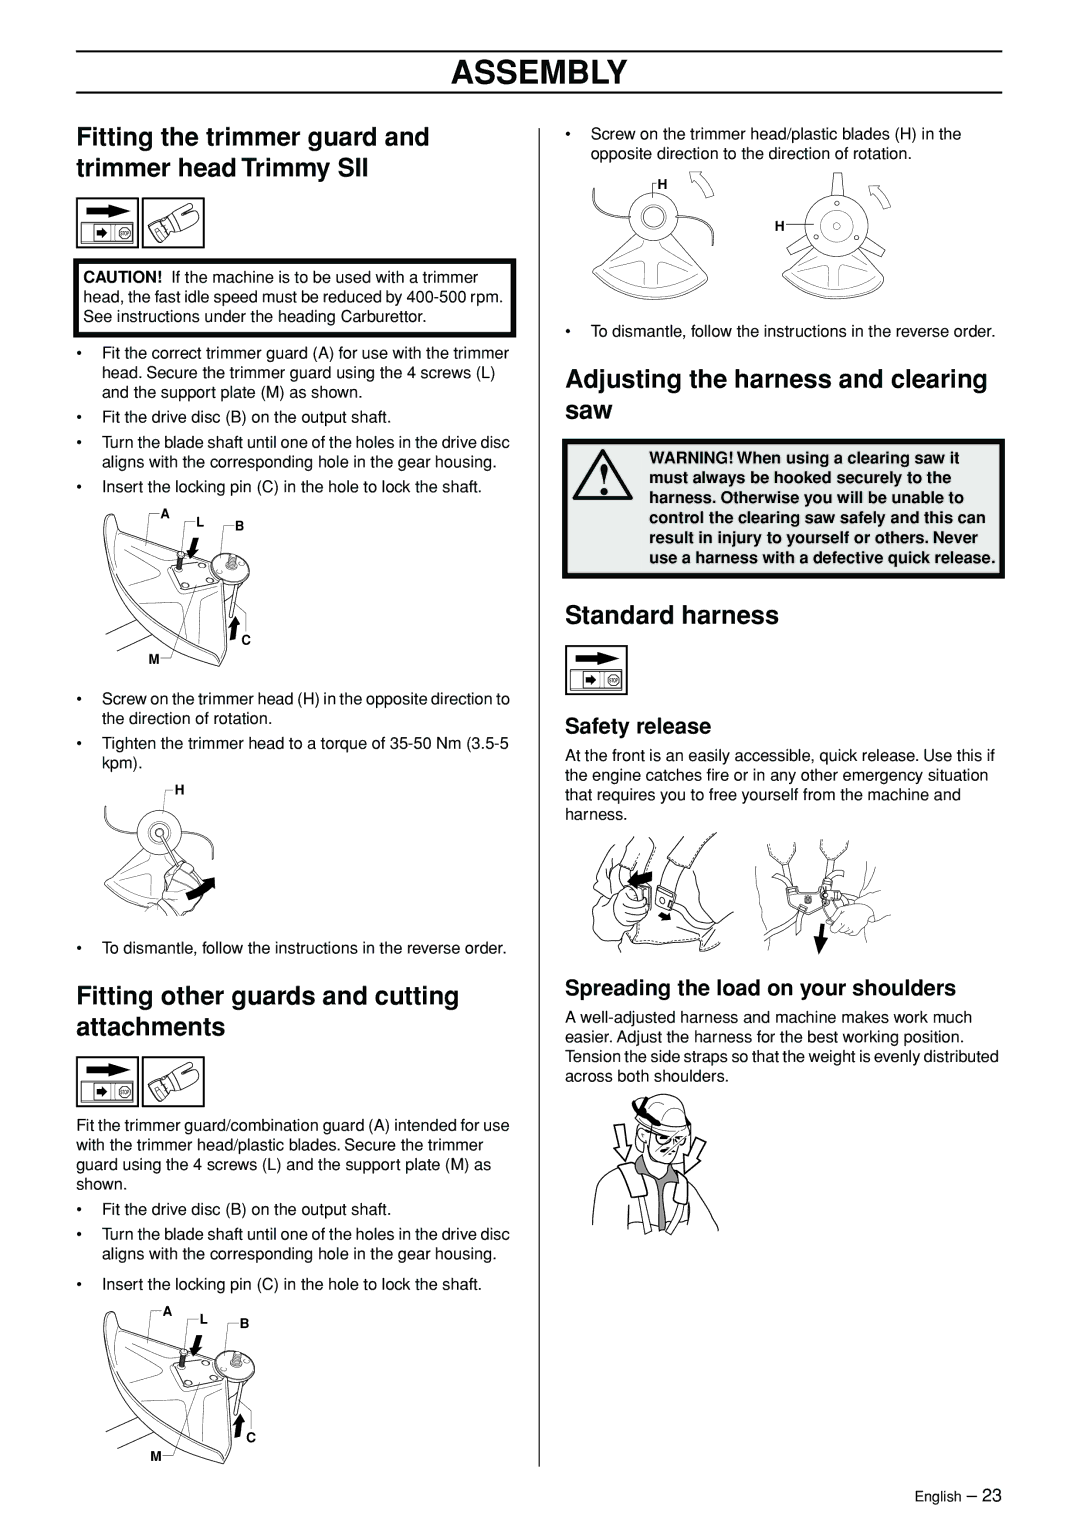
•Screw on the trimmer head/plastic blades (H) in the opposite direction to the direction of rotation.
![]() H
H
H
•To dismantle, follow the instructions in the reverse order.
Adjusting the harness and clearing saw
WARNING! When using a clearing saw it
! | must always be hooked securely to the |
harness. Otherwise you will be unable to |
A
M
L B
![]() C
C
control the clearing saw safely and this can |
result in injury to yourself or others. Never |
use a harness with a defective quick release. |
Standard harness
•Screw on the trimmer head (H) in the opposite direction to the direction of rotation.
•Tighten the trimmer head to a torque of
H
•To dismantle, follow the instructions in the reverse order.
Fitting other guards and cutting attachments
Fit the trimmer guard/combination guard (A) intended for use with the trimmer head/plastic blades. Secure the trimmer guard using the 4 screws (L) and the support plate (M) as shown.
•Fit the drive disc (B) on the output shaft.
•Turn the blade shaft until one of the holes in the drive disc aligns with the corresponding hole in the gear housing.
•Insert the locking pin (C) in the hole to lock the shaft.
Safety release
At the front is an easily accessible, quick release. Use this if the engine catches fire or in any other emergency situation that requires you to free yourself from the machine and harness.
Spreading the load on your shoulders
A
A
M
L B
![]() C
C
English – 23