ASSEMBLY

Fitting the J-handle

Clip the loop handle onto the shaft. Note that the loop handle must be fitted between the arrows on the shaft.

Slide the spacer into the slot in the loop handle.

Fit the nut, knob and screw. Do not overtighten.

Attach the J-handle to the loop handle using the three screws, as shown.

Now adjust the trimmer to give a comfortable working position. Tighten the bolt/knob.

WARNING! Only grass blades/grass cutters

!or trimmer heads/plastic blades may be used when the J-handle is fitted. Saw blades must never be used with the J-handle.

Fitting blades and trimmer heads

When fitting the cutting attachment it is extremely important that the raised section on the drive disc/support flange engages correctly in the centre hole of the cutting attachment. If the cutting attachment is fitted incorrectly it can result in serious and/or fatal personal injury.

WARNING! Never use a cutting attachment

!without an approved guard. See the chapter on Technical data. If an incorrect or faulty guard is fitted this can cause serious personal injury.

Fitting a trimmer guard and Superauto II trimmer head

K

G


F

B


I


C

J

I


K


A

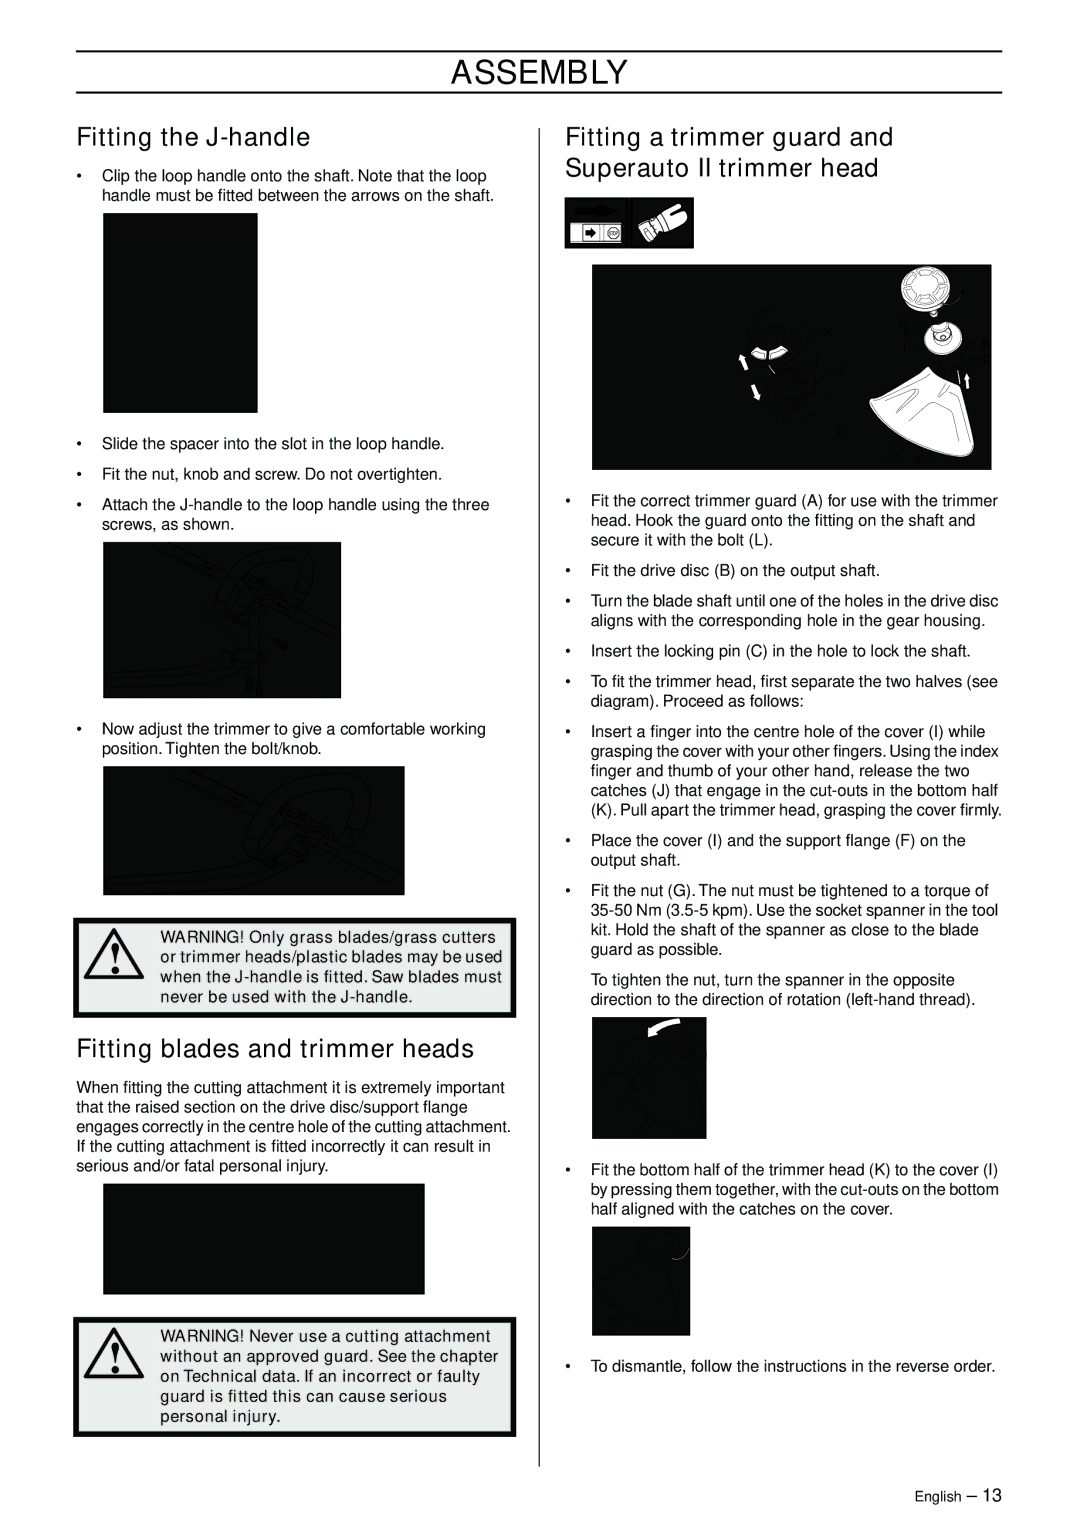
Fit the correct trimmer guard (A) for use with the trimmer head. Hook the guard onto the fitting on the shaft and secure it with the bolt (L).

Fit the drive disc (B) on the output shaft.

Turn the blade shaft until one of the holes in the drive disc aligns with the corresponding hole in the gear housing.

Insert the locking pin (C) in the hole to lock the shaft.

To fit the trimmer head, first separate the two halves (see diagram). Proceed as follows:

Insert a finger into the centre hole of the cover (I) while grasping the cover with your other fingers. Using the index finger and thumb of your other hand, release the two catches (J) that engage in the cut-outs in the bottom half

(K). Pull apart the trimmer head, grasping the cover firmly.

Place the cover (I) and the support flange (F) on the output shaft.

Fit the nut (G). The nut must be tightened to a torque of 35-50 Nm (3.5-5 kpm). Use the socket spanner in the tool kit. Hold the shaft of the spanner as close to the blade guard as possible.

To tighten the nut, turn the spanner in the opposite direction to the direction of rotation (left-hand thread).

Fit the bottom half of the trimmer head (K) to the cover (I) by pressing them together, with the cut-outs on the bottom half aligned with the catches on the cover.

To dismantle, follow the instructions in the reverse order.

English – 13

Page 13
Image 13
Husqvarna 325RJ manual Assembly, Fitting the J-handle, Fitting blades and trimmer heads

325RJ specifications

The Husqvarna 325RJ is a powerful and versatile trimmer designed for both professionals and avid gardeners alike. With its robust construction and innovative technologies, this model stands out in the competitive landscape of outdoor power equipment.

At the heart of the 325RJ is a reliable 28cc engine that delivers impressive performance. This lightweight engine not only ensures efficient fuel consumption but also provides high torque output, enabling users to complete their trimming tasks with ease. The engine is designed with Smart Start technology, which reduces the resistance in the starter cord by up to 40%. This makes it easier to start the trimmer, allowing users to get to work quickly without fussing over difficult starts.

One of the key features of the Husqvarna 325RJ is its balanced design, which enhances maneuverability and reduces user fatigue during extended use. The trimmer is equipped with an ergonomic handle that provides a comfortable grip, allowing for optimal control and precision while trimming. Additionally, the adjustable front handle allows users to customize their grip position according to their height or working style, ensuring comfort and efficiency.

This model is equipped with a 2-in-1 trimmer head that facilitates easy transitions between trimming and edging. The double line cutting system features a Tap 'n Go mechanism, which allows the user to extend the cutting line simply by tapping the trimmer head on the ground. This convenient feature ensures continuous operation without the need for lengthy line replacement.

Moreover, the Husqvarna 325RJ incorporates an anti-vibration system that minimizes vibrations transmitted to the user's hands, further enhancing comfort during extended trimming sessions. This feature is particularly beneficial for professional landscapers who rely on their equipment for prolonged periods.

In terms of build quality, the Husqvarna 325RJ is constructed from durable materials that withstand the rigors of outdoor use. This durability combined with a solid warranty gives users peace of mind, knowing that they are investing in a long-lasting piece of equipment.

Overall, the Husqvarna 325RJ is an excellent choice for anyone looking for a reliable, efficient, and user-friendly trimmer. With its robust engine, ergonomic features, and innovative technologies, this model supports a wide range of trimming tasks, making it an essential tool for maintaining a pristine landscape.