ASSEMBLY
NOTE: This tool is shipped completely assembled. No assembly time or tools are required.
OPERATION
INSTALLING THE QUICK RELEASE DRUM SYSTEM
DISCONNECT TOOL FROM POWER SOURCE.
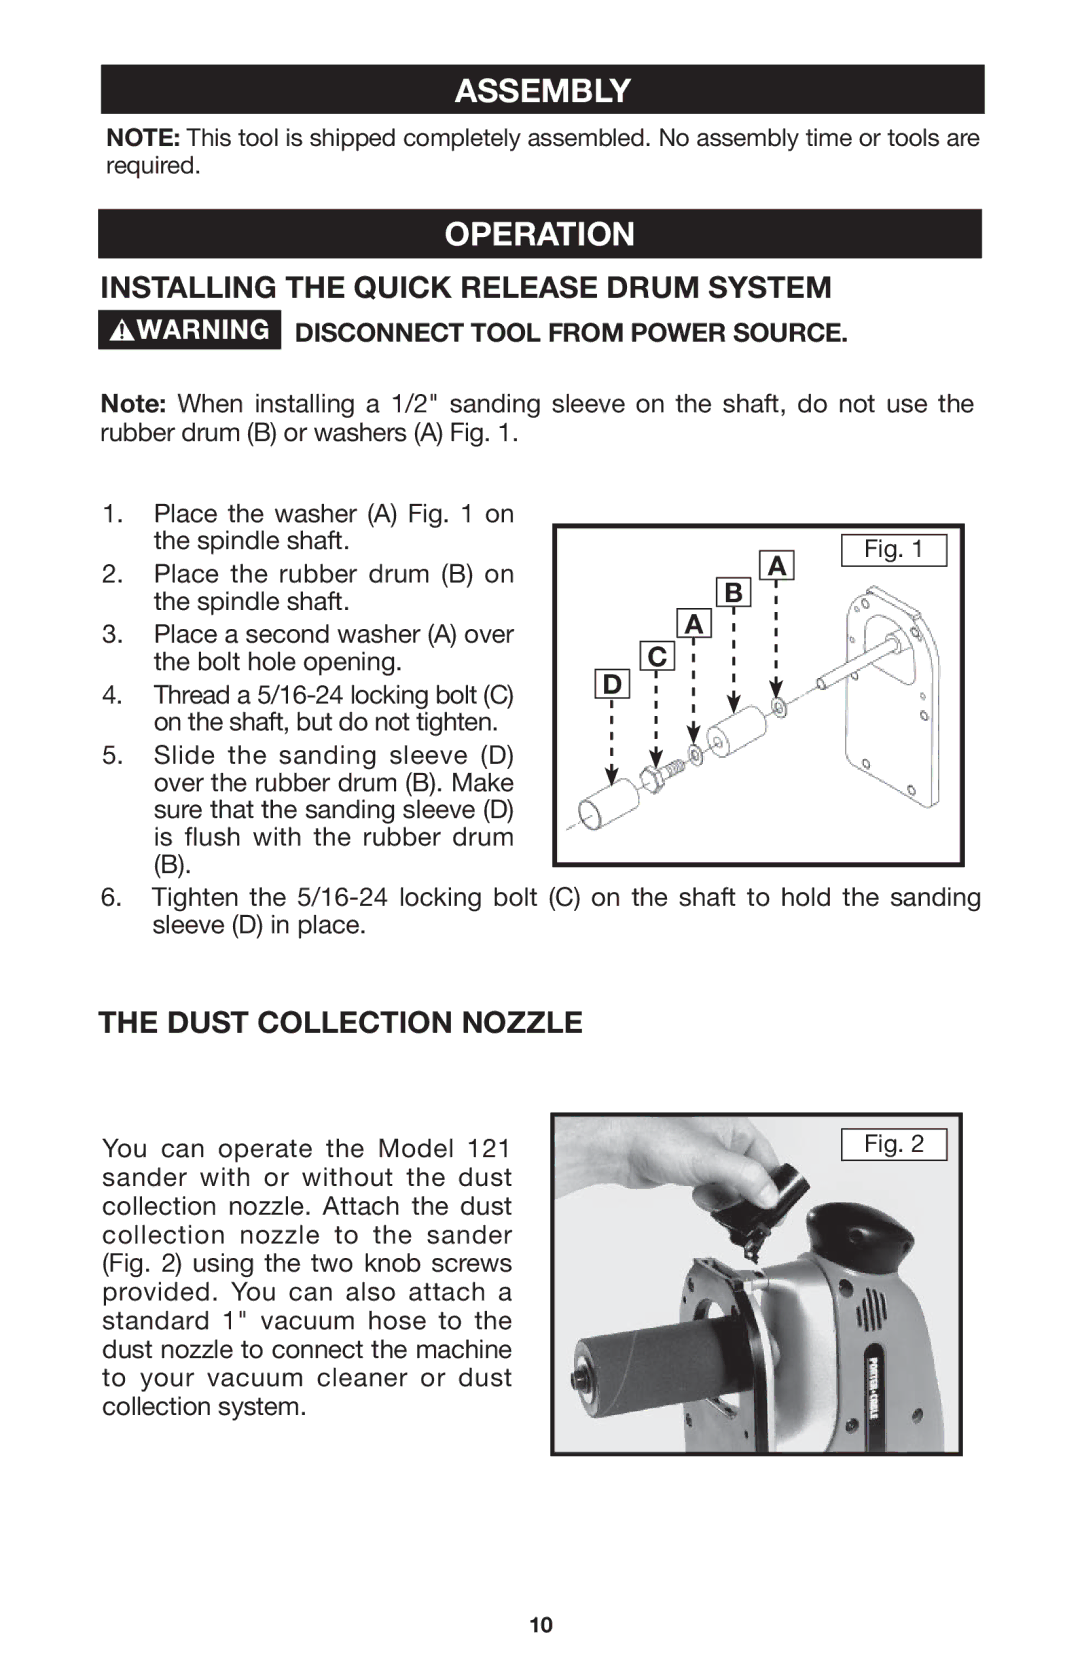
Note: When installing a 1/2" sanding sleeve on the shaft, do not use the rubber drum (B) or washers (A) Fig. 1.
1.Place the washer (A) Fig. 1 on the spindle shaft.
2.Place the rubber drum (B) on the spindle shaft.
3.Place a second washer (A) over the bolt hole opening.
4.Thread a
5.Slide the sanding sleeve (D) over the rubber drum (B). Make sure that the sanding sleeve (D) is flush with the rubber drum
(B).
A
B
A
C
D
Fig. 1
6.Tighten the
THE DUST COLLECTION NOZZLE
You can operate the Model 121 sander with or without the dust collection nozzle. Attach the dust collection nozzle to the sander (Fig. 2) using the two knob screws provided. You can also attach a standard 1" vacuum hose to the dust nozzle to connect the machine to your vacuum cleaner or dust collection system.
Fig. 2
10