ASSEMBLY
Assembling the blow pipe and control handle
•Loosen the two screws on the fan’s outlet pipe and remove the two wear ring halves located on the outlet pipe.
•Place these on the pipe bend so that the guide on the wear ring halves aligns with the slot on the pipe bend.
•Refit the pipe bend with the wear halves in the fan’s outlet pipe.
Make sure the holes in the wear ring halves align with the screws that are used to secure the halves in the pipe bend.
Also pay attention to the stops located on the pipe bend and the fan’s outlet pipe. Ensure that the stop on the pipe bend comes in front of the stop on the outlet pipe.
•Refit the bolts and tighten well.
Check that the control pipe is in the right position and can rotate equally in both directions.
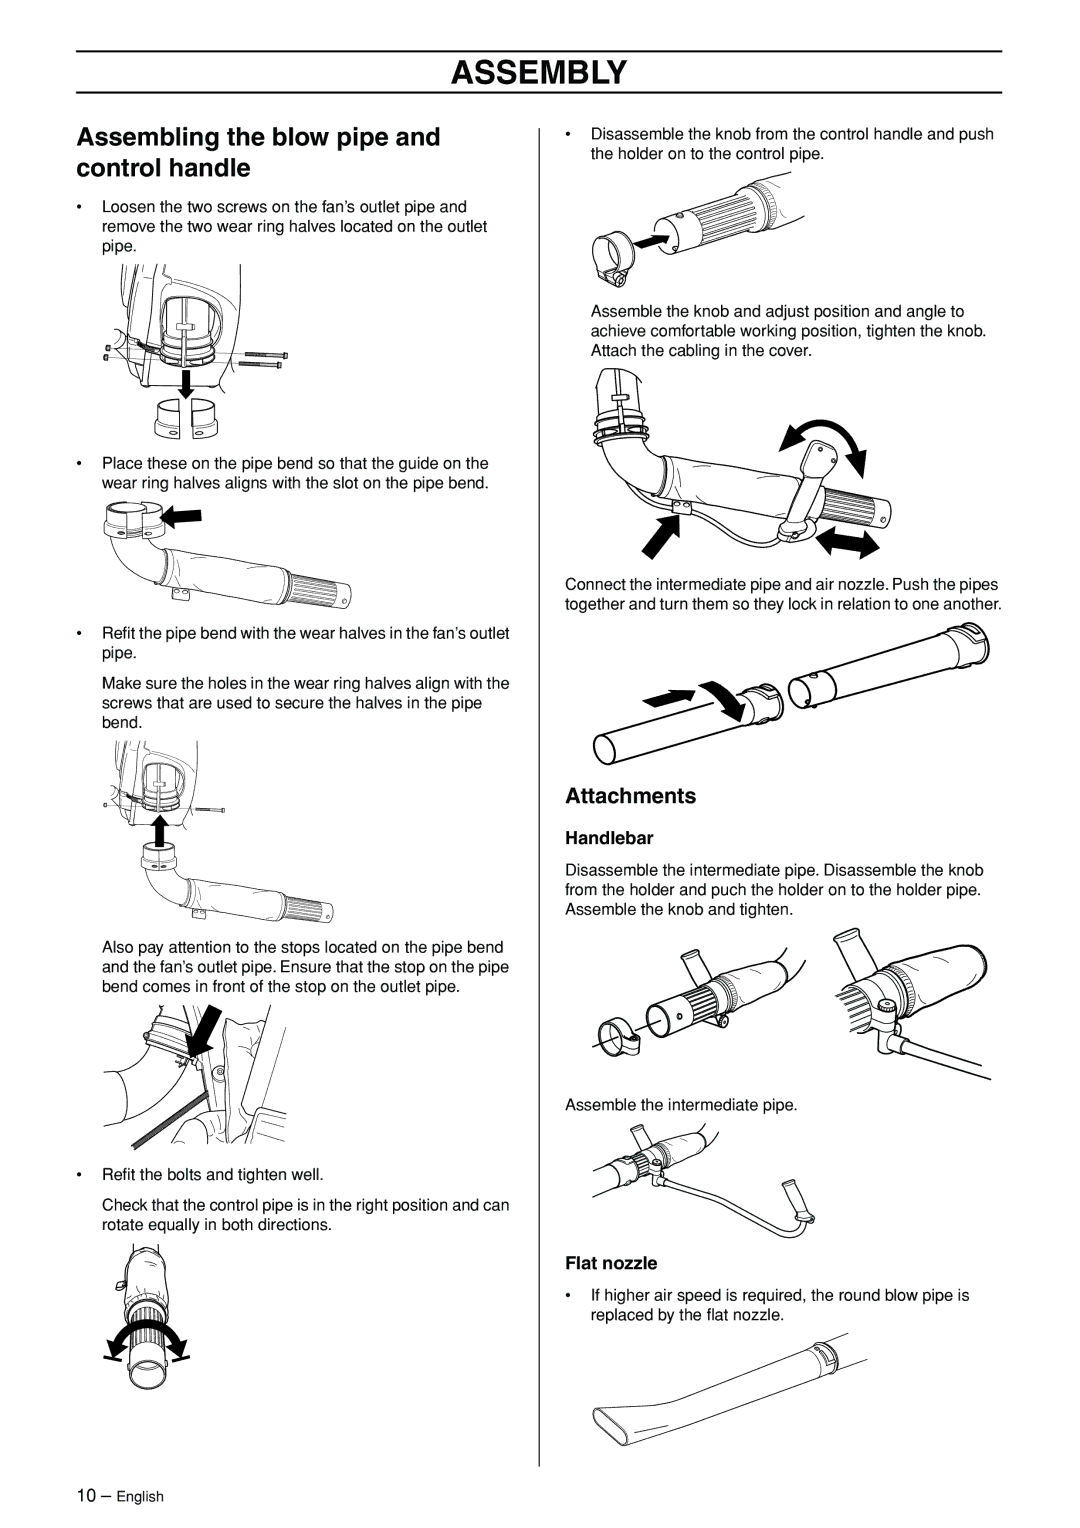
•Disassemble the knob from the control handle and push the holder on to the control pipe.
Assemble the knob and adjust position and angle to achieve comfortable working position, tighten the knob. Attach the cabling in the cover.
Connect the intermediate pipe and air nozzle. Push the pipes together and turn them so they lock in relation to one another.
Attachments
Handlebar
Disassemble the intermediate pipe. Disassemble the knob from the holder and puch the holder on to the holder pipe. Assemble the knob and tighten.
Assemble the intermediate pipe.
Flat nozzle
•If higher air speed is required, the round blow pipe is replaced by the flat nozzle.
10 – English