QN 4021 / QN 4039 |
|
|
|
| t |
|
|
|
|
|
|
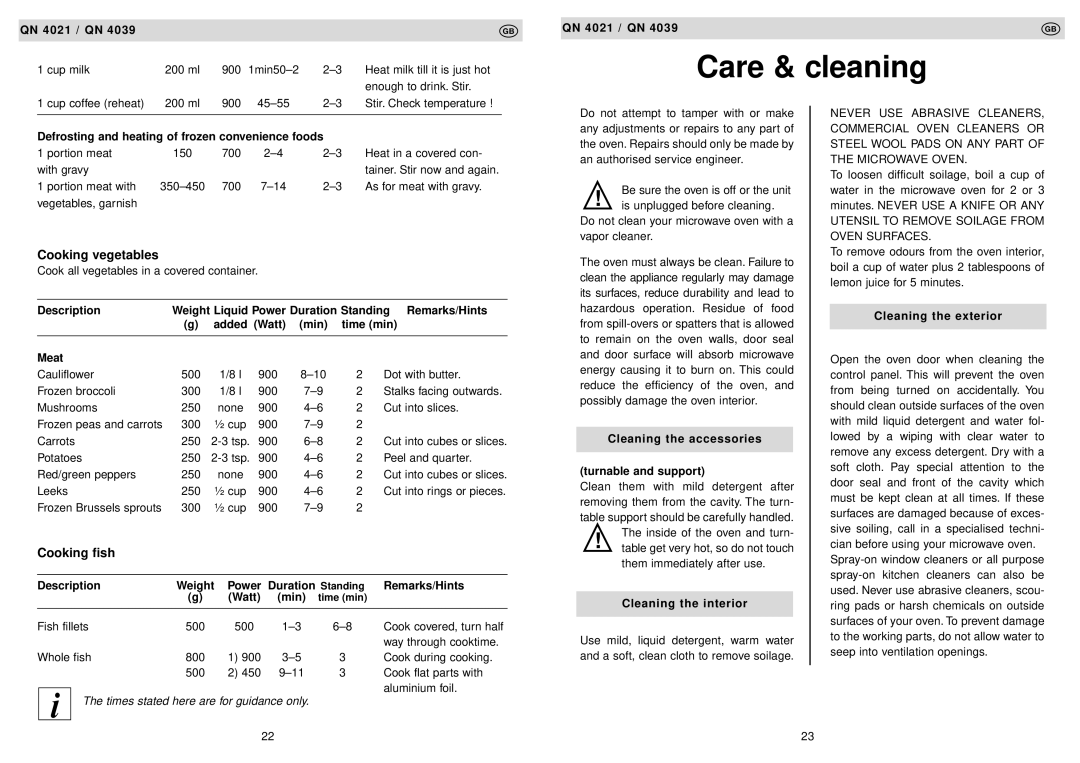
1 cup milk | 200 ml | 900 | Heat milk till it is just hot | ||
|
|
|
|
| enough to drink. Stir. |
1 cup coffee (reheat) | 200 ml | 900 | Stir. Check temperature ! |
QN 4021 / QN 4039 | t |
|
|
Care & cleaning
Defrosting and heating of frozen convenience foods |
| ||||
1 portion meat | 150 | 700 | Heat in a covered con- | ||
with gravy |
|
|
|
| tainer. Stir now and again. |
1 portion meat with | 700 | As for meat with gravy. | |||
vegetables, garnish |
|
|
|
|
|
Cooking vegetables
Cook all vegetables in a covered container.
Description | Weight Liquid Power Duration Standing Remarks/Hints | |||||
| (g) | added (Watt) | (min) | time (min) | ||
|
|
|
|
|
|
|
Meat |
|
|
|
|
|
|
Cauliflower | 500 | 1/8 l | 900 | 2 | Dot with butter. | |
Frozen broccoli | 300 | 1/8 l | 900 | 2 | Stalks facing outwards. | |
Mushrooms | 250 | none | 900 | 2 | Cut into slices. | |
Frozen peas and carrots | 300 | ½ cup | 900 | 2 |
| |
Carrots | 250 | 900 | 2 | Cut into cubes or slices. | ||
Potatoes | 250 | 900 | 2 | Peel and quarter. | ||
Red/green peppers | 250 | none | 900 | 2 | Cut into cubes or slices. | |
Leeks | 250 | ½ cup | 900 | 2 | Cut into rings or pieces. | |
Frozen Brussels sprouts | 300 | ½ cup | 900 | 2 |
| |
Cooking fish
Description | Weight | Power Duration Standing | Remarks/Hints | |||
|
| (g) | (Watt) | (min) | time (min) |
|
|
|
|
|
|
|
|
Fish fillets | 500 | 500 | Cook covered, turn half | |||
|
|
|
|
|
| way through cooktime. |
Whole fish | 800 | 1) 900 | 3 | Cook during cooking. | ||
|
| 500 | 2) 450 | 3 | Cook flat parts with | |
|
|
|
|
|
| aluminium foil. |
i | The times stated here are for guidance only. |
| ||||
|
| |||||
Do not attempt to tamper with or make any adjustments or repairs to any part of the oven. Repairs should only be made by an authorised service engineer.
Be sure the oven is off or the unit ! is unplugged before cleaning.
Do not clean your microwave oven with a vapor cleaner.
The oven must always be clean. Failure to clean the appliance regularly may damage its surfaces, reduce durability and lead to hazardous operation. Residue of food from
Cleaning the accessories
(turnable and support)
Clean them with mild detergent after removing them from the cavity. The turn- table support should be carefully handled.
The inside of the oven and turn- ! table get very hot, so do not touch
them immediately after use.
Cleaning the interior
Use mild, liquid detergent, warm water and a soft, clean cloth to remove soilage.
NEVER USE ABRASIVE CLEANERS, COMMERCIAL OVEN CLEANERS OR STEEL WOOL PADS ON ANY PART OF THE MICROWAVE OVEN.
To loosen difficult soilage, boil a cup of water in the microwave oven for 2 or 3 minutes. NEVER USE A KNIFE OR ANY UTENSIL TO REMOVE SOILAGE FROM OVEN SURFACES.
To remove odours from the oven interior, boil a cup of water plus 2 tablespoons of lemon juice for 5 minutes.
Cleaning the exterior
Open the oven door when cleaning the control panel. This will prevent the oven from being turned on accidentally. You should clean outside surfaces of the oven with mild liquid detergent and water fol- lowed by a wiping with clear water to remove any excess detergent. Dry with a soft cloth. Pay special attention to the door seal and front of the cavity which must be kept clean at all times. If these surfaces are damaged because of exces- sive soiling, call in a specialised techni- cian before using your microwave oven.
22 | 23 |
