
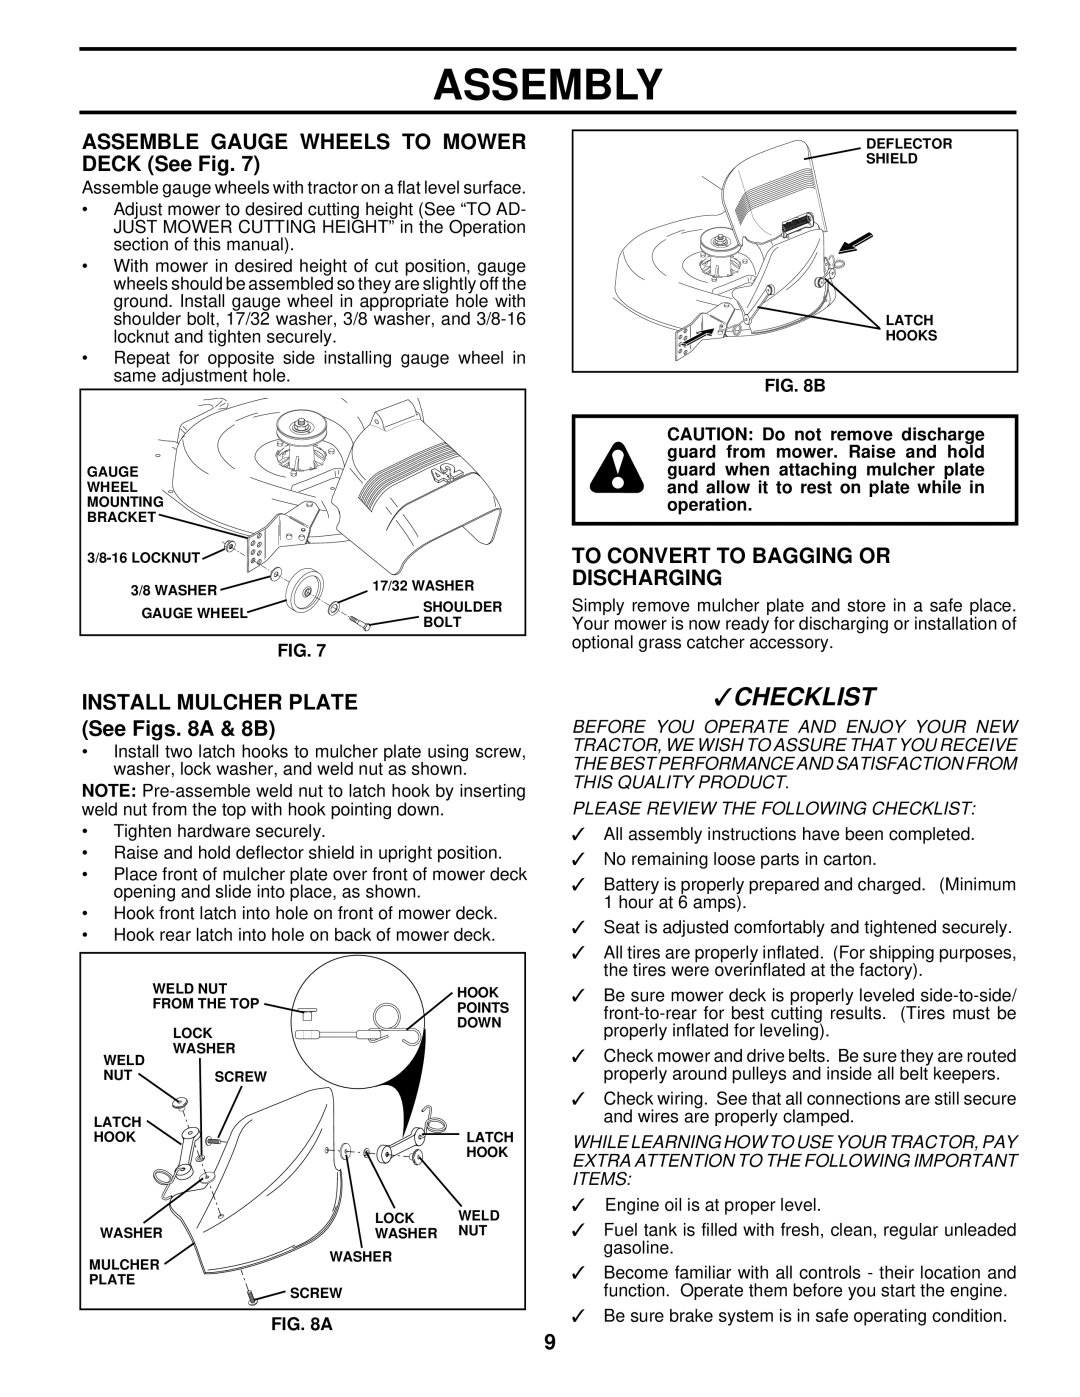
YT180 specifications
The Husqvarna YT180 is a standout lawn tractor, designed for residential homeowners looking for a reliable, efficient, and user-friendly solution for maintaining their lawn. With its powerful performance, ergonomic design, and advanced features, the YT180 delivers an exceptional mowing experience.At the heart of the YT180 is a robust 18.5 horsepower Briggs & Stratton engine, providing ample power for tackling various terrains and grass lengths. The engine is designed for easy starting and smooth operation, making it an ideal choice for both seasoned users and beginners alike. The cutting deck measures 42 inches, allowing for efficient mowing of medium to large yards while ensuring a clean and precise cut.
One of the key features of the Husqvarna YT180 is its Hydrostatic transmission, which allows for easy speed and direction changes without the need for shifting gears. This seamless operation offers great maneuverability, especially when navigating around obstacles like trees and flowerbeds. The pedal-operated transmission system also helps ensure comfort during operation, reducing fatigue during long mowing sessions.
In addition to its powerful engine and reliable transmission, the YT180 is equipped with an adjustable cutting height feature, which offers a range of settings to suit different grass types and cutting preferences. This versatility makes it easier to achieve the perfect look for your lawn, whether you prefer a clean cut or a more natural look.
The design of the YT180 also prioritizes user comfort and convenience. With an ergonomic seat, easy-access controls, and a spacious foot area, operators will find it easy to maintain a comfortable position while mowing. Moreover, the tractor's sturdy construction ensures durability and longevity, making it a worthwhile investment for homeowners.
Safety features are another priority for Husqvarna, and the YT180 is no exception. It includes a safety switch that stops the blades when the operator leaves the seat, minimizing the risk of accidents. Additionally, the tractor has a reinforced chassis and is compatible with a range of accessories, such as baggers and tow-behind trailers, enhancing its versatility for various lawn care tasks.
In conclusion, the Husqvarna YT180 is a well-rounded lawn tractor that combines power, comfort, and advanced technology. With its impressive engine performance, user-friendly features, and emphasis on safety, it provides homeowners with an effective and enjoyable solution for maintaining their lawns. Whether mowing, bagging, or simply enjoying the ride, the YT180 is designed to meet and exceed the expectations of residential lawn care enthusiasts.