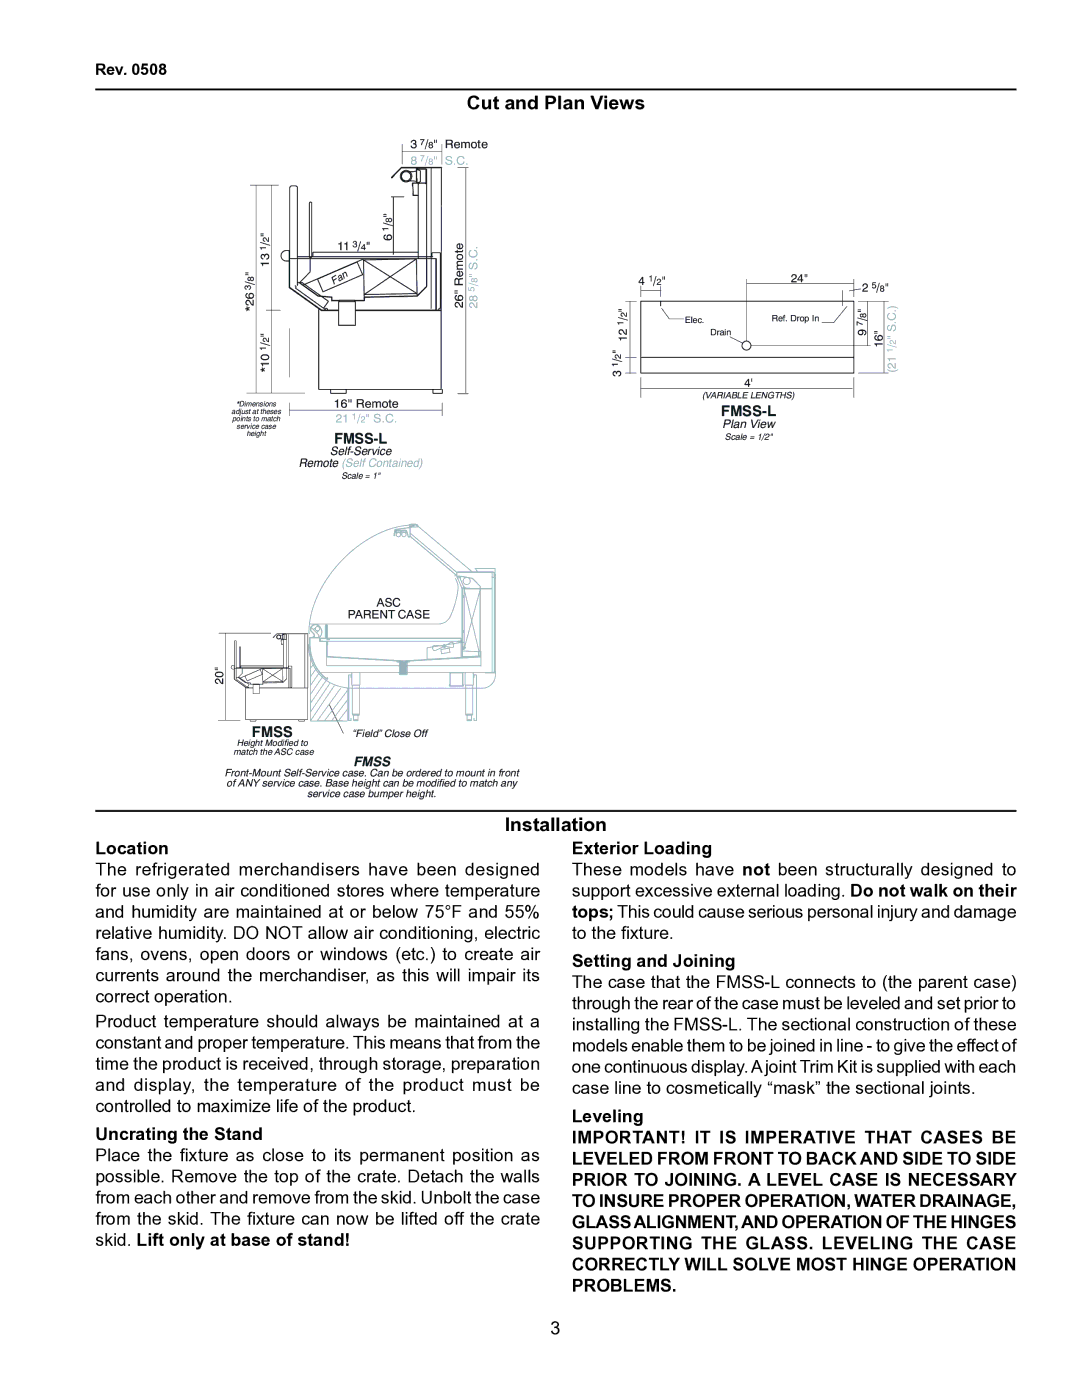
FMSS-L specifications
The Hussman FMSS-L is a state-of-the-art commercial refrigeration display case, specifically designed to meet the needs of grocery stores, convenience retailers, and foodservice establishments. Known for its advanced features and innovative technologies, the FMSS-L provides an ideal solution for merchandising fresh food products while ensuring optimal temperature control and energy efficiency.One of the main features of the FMSS-L is its impressive visibility. Engineered with a low front profile and curved glass design, this model maximizes product exposure, enticing customers and enhancing the shopping experience. The spacious interior layout allows for ample product display, taking full advantage of the vertical space available in retail environments.
The FMSS-L incorporates advanced refrigeration technology, ensuring that food items are kept at safe temperatures while minimizing energy consumption. Its well-insulated case construction is designed for enhanced energy efficiency and durability. This is complemented by smart refrigeration controls and variable-speed fans, which adjust airflow based on cooling requirements, further optimizing energy use.
Hussman's commitment to energy efficiency is evident in the use of eco-friendly refrigerants. The FMSS-L is designed to comply with the latest environmental regulations, ensuring that businesses can operate sustainably without sacrificing performance. Additionally, energy-efficient LED lighting enhances product visibility while using significantly less energy than traditional lighting options.
Other notable characteristics of the FMSS-L include adjustable shelving, which allows retailers to customize the display according to their specific needs. The shelves can be easily repositioned to accommodate various product sizes and shapes, promoting flexibility in merchandising. Furthermore, the case is equipped with a self-closing glass door system that provides easy access while also reducing energy loss.
Maintenance is straightforward with the FMSS-L, thanks to its accessible components and user-friendly design. Hussman prioritizes serviceability, allowing for prompt repairs and reduced downtime, which are critical for busy retail environments.
Overall, the Hussman FMSS-L is a well-engineered refrigeration solution that combines aesthetic appeal, advanced technology, and energy efficiency, making it an excellent choice for retailers looking to showcase fresh food products effectively while maintaining operational sustainability. With its blend of innovative features and practicality, the FMSS-L stands out as a reliable partner in the competitive retail food landscape.

