TRACETone™
Tone Generator and Amplifier Probe
Operating Instructions
WARNING! |
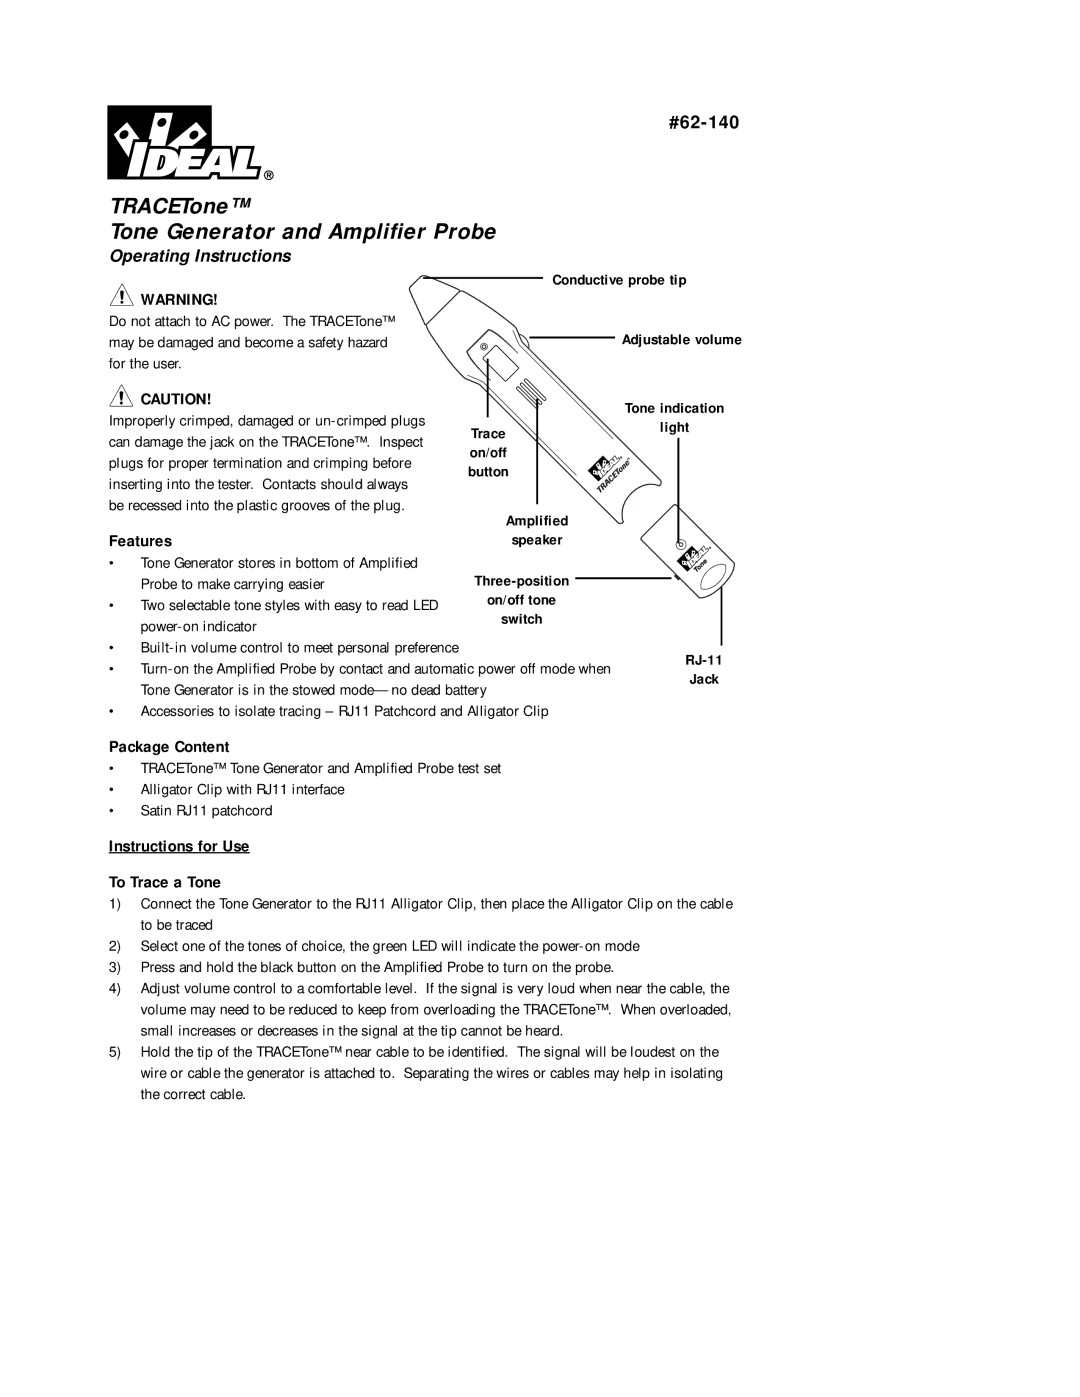
| Conductive probe tip | |
|
| ||
Do not attach to AC power. The TRACETone™ |
| Adjustable volume | |
may be damaged and become a safety hazard |
| ||
for the user. |
|
| |
CAUTION! |
| Tone indication | |
Improperly crimped, damaged or |
| ||
Trace | light | ||
can damage the jack on the TRACETone™. Inspect | |||
| |||
on/off |
| ||
plugs for proper termination and crimping before |
| ||
button |
| ||
inserting into the tester. Contacts should always |
| ||
|
| ||
be recessed into the plastic grooves of the plug. |
|
|
Features
• Tone Generator stores in bottom of Amplified Probe to make carrying easier
• Two selectable tone styles with easy to read LED
•
• | |||
Jack | |||
| Tone Generator is in the stowed | ||
|
| ||
• | Accessories to isolate tracing – RJ11 Patchcord and Alligator Clip |
|
Package Content
•TRACETone™ Tone Generator and Amplified Probe test set
•Alligator Clip with RJ11 interface
•Satin RJ11 patchcord
Instructions for Use
To Trace a Tone
1)Connect the Tone Generator to the RJ11 Alligator Clip, then place the Alligator Clip on the cable to be traced
2)Select one of the tones of choice, the green LED will indicate the
3)Press and hold the black button on the Amplified Probe to turn on the probe.
4)Adjust volume control to a comfortable level. If the signal is very loud when near the cable, the volume may need to be reduced to keep from overloading the TRACETone™. When overloaded, small increases or decreases in the signal at the tip cannot be heard.
5)Hold the tip of the TRACETone™ near cable to be identified. The signal will be loudest on the wire or cable the generator is attached to. Separating the wires or cables may help in isolating the correct cable.