CAMERA Power On/Off Zoom Lever Focus Exposure Program AE Shutter Speed White Balance Steady Shot Built-in Flash
SETTING
– Camera (On)
– Wide Angle Setting
– Auto Mode
– Auto Mode
– Auto Mode
– 1/60Normal
– Auto Mode (see section)
– Off
– Off

OPTIONAL WIDE ANGLE LENS__________________________________________

The housing’s port accepts optional 67mm threaded waterproof Wide-Angle lenses such as the Ikelite #6420 W-20, Epoque DCL-20 and Inon UWL-100 Type 2 and Sea&Sea (58070). These waterproof lenses secure to the outside of the lens port.

Should you elect to use the optional Ikelite #6420 W-20, Epoque, Inon or Sea&Sea lens, carefully thread the waterproof lens on the front of the lens port. The lens threads are very fine; DO NOT cross thread. It should screw on very easily. If it is difficult to turn, you are cross threading.

INTERNAL WIDE-ANGLE LENS OPTION ________________________________________

Special ports are available for use with the Raynox HD-5050 Pro high definition wide-angle lens. optional ports sold separately as dom e port #9304 or flat len s port #9304.1. Raynox HD-5050 Pro lens not inclu ded. Lens not available for purchase through Ikelit e.

FINAL PREPARATION_________________________________________________________

Remove t he lens cap and cord from the cam era. Otherwise, they may interfere with the housing seal.

The camera's auto focus featu re is utilized und erwater . For best results, mov e in close to your subject and use the wide angle range to s hoot th ru as little water as possible. The full zoom r ange is accessib le underwater.

Turn the camera’s built-in flash OFF. Chart shows recommended initial settings underwater.

WHITE BALANCE_____________________________________________________________

Initially set the white balance to Auto. Use the Joy stick cont rols on the housing to change white balance .

Color Filter: When using the color filter (during the day) , set camera white balance to Indoor for 0 -15 foot depth. For 15-80 foot depth, set whit e balance to Outdoo r. Video-Lite: When using optional Video Lite at NIG HT, set the came ra white balance to the Indoor position. During the DAY, use the Outdoor setting f or subjects beyond 4-5 feet and the Indoor sett ing for closer su bjects.

IN S T A L L A T IO N


CAMERA TRAY________________________________________________________________

The camera mounts to the tray, which extends from the back plate

of the housing. DO NOT remove the tray from the back plate.


O’ring


Position the camera against the two

Internal Lens Shade


Back Plate


stabilizing pins on the tray and secure with


the camera mounting bolt. The camera


should fit easily on the tray and should


be parallel with the sides of the tray.


Make certain that the lens shade has been


threaded completely into the camera to avoid


any potential clearance or sealing problems when


the camera is installed and the housing is sealed.

Stabilizing


Camera Tray


INSERTING THE CAMERA

Pins


Camera Mounting Bolt

Check that the o’ring is clean and properly positioned on the lip of the clear housing back plate. Check that the lens shade is completely threaded into the camera.

Once the camera is mounted to the tray as sh own above, pull the housing controls out to provide clearance for installing the camera. Make sure the lens shade on the front of the camera fits into the port recess in the front of the housing.

DO NOT force this installation; the camera and tray should slide easily into place so the housings back plate o’ring is resting against th e main housing body. In this position the lid snaps can be positioned over the lid hooks on the housing back plate and snapped into position to seal the housing.

HOUSING CONTROLS________________________________________________________

Slide the housing controls back in place making sure they properly align with the camera functions.

Operate each control to see how it works with the camera. Some controls such as start/stop will be used frequently. Other controls may seldom be utilized. Refer to your camera owner's manual for the proper function of each camera control. Look thru the back to be sure that you can see into the viewfinder.

When using the housing controls, especially the start/stop,do NOT use excessive force because you could damage the camera.CAUTION

Remove the lens cap and cord from the camera. Otherwise, the cord may interfere with the housing seal.

If the housing controls are not properl y positioned, they could interfere with the hous ing seal.

MANUAL FOCUS OPERATION_______________________________________________

Manual focus may be preferred in low light levels or when the subject possesses little contrast. Set the focus switch to Manual to cancel the auto focus. If yo u want to manually adjust the focus, rotate the manual focus control as d esired. To re acti- vate the auto focus, set the focus switch to Auto .

IKELITE UNDERWATER SYSTEMS

50 West 33rd Street • PO Box 88100 • Indianapolis, IN 46208 USA • 317.923.4523 Email: ikelite@ikelite.com www.ikelite.com

6071-01-0707

Page 2
Image 2
Ikelite HV-20 instruction manual S T a L L a T IO N, Optional Wide Angle Lens, Inserting the Camera

HV-20 specifications

The Ikelite HV-20 underwater housing is a remarkable piece of equipment designed for both amateur and professional videographers who seek to capture stunning underwater footage with the Canon HV-20 camcorder. This housing combines durability, functionality, and convenience, making it a popular choice for those exploring the depths of oceans, lakes, and rivers.

One of the standout features of the Ikelite HV-20 is its robust construction. Made from high-quality materials, the housing is designed to withstand the pressures and conditions of underwater environments. It is crafted from clear, durable polycarbonate, allowing users to monitor the camera's settings easily while ensuring protection against water intrusion up to depths of 200 feet (60 meters). This depth rating opens up many possibilities for underwater shooting, providing the flexibility to explore deeper dive sites.

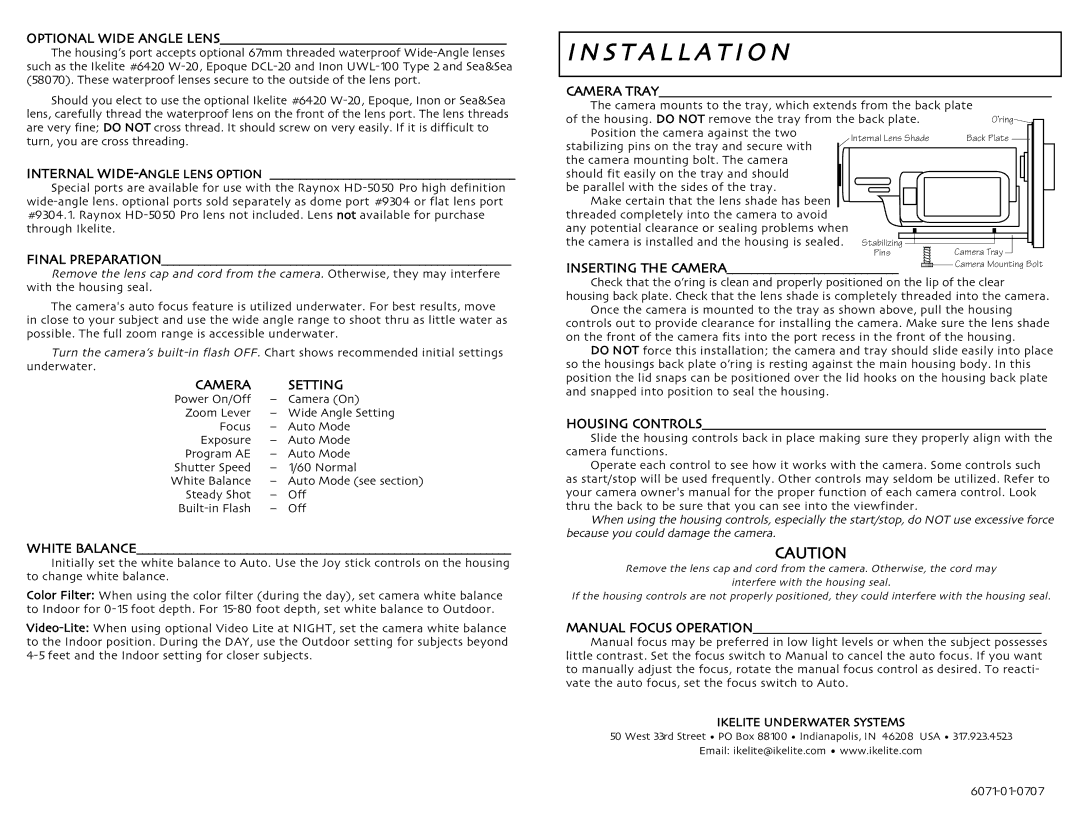
The housing’s design offers easy access to all essential camera controls. The well-placed buttons and controls enable seamless operation, allowing videographers to make adjustments on the fly without having to surface. This convenience is complemented by a user-friendly layout that reduces the learning curve for those new to underwater videography.

In terms of technology, the Ikelite HV-20 supports a wide range of accessories, enhancing overall functionality. Users can attach various lenses and filters to expand their creative options and improve image quality. The housing features a built-in vacuum system that helps ensure a leak-free seal, providing peace of mind for users during their underwater adventures.

Additionally, lighting plays a critical role in underwater videography, and the Ikelite HV-20 caters to this need with its compatibility with Ikelite’s extensive range of underwater strobes and LED lights. By utilizing these lighting options, filmmakers can capture vibrant colors and details that would otherwise be lost in the underwater environment.

The Ikelite HV-20 also emphasizes portability, as it is lightweight and compact, making it easy to transport for both professional shoots and recreational trips. Its design ensures that it is not overly cumbersome, allowing for comfortable handling and operation even during extended use.

In summary, the Ikelite HV-20 underwater housing stands out as an essential tool for anyone looking to produce high-quality underwater video content. With its durability, user-friendly interface, compatibility with accessories, and lighting options, it provides a comprehensive solution for capturing breathtaking underwater scenes. Whether you're a seasoned videographer or a beginner, the Ikelite HV-20 offers the features and reliability needed to create stunning visual stories beneath the waves.