Grilling
GRILLING MUST BE DONE WITH THE GRILL
GB | DOOR OPEN. |
| |
| CONTROL KNOBS MAY BECOME HOT DURING |
| GRILLING. |
| CAUTION: ACCESSIBLE PARTS WILL BECOME |
| HOT WHEN THE GRILL |
| IS USED - CHILDREN SHOULD BE KEPT AWAY. |
To operate the grill proceed as follows:
•Open the grill door and remove the grill pan.
•Press the ignition button and then push in and turn the grill control knob
Grill Pan Handle
•Turn the control knob
•To turn off, turn the control knob fully clockwise to
| the symbol O | |
| ! (only on a few models): | |
A B | ||
when using the grill, the oven | ||
| door must be left open by | |
| positioning the deflector “B” | |
| between control panel and | |
| deflector “A” to prevent the | |
| cooker knobs from | |
| overheating. | |
|
Slide the grill pan along the runner towards the rear of the grill compartment until it stops. An odour may be noticed when first using the grill - this schould cease after a short period of use.
Grill can be started from cold but for the best result preheat for approximately five minutes. Most cooking is done with the heat on full, but it may be necessary after sealing the food to reduce the heat as required.
For au gratin dishes eg. Macaroni Cheese and meringue toppings eg. Baked Alaska place the dish on the floor of the grill compartment. The base of the grill pan can be used for warming fruit garnishes on the reduced setting.
DO NOT cover the grill pan or grid with aluminium foil as this can hold fat, intensify the heat and create a fire hazard.
Relighting‘ the burner
In the event of the burner flames being accidentally extinguished, turn off the burner control and do not attempt to
Fixing the Grill Pan Handle
The grill pan handle is detachable from the pan, to facilitate cleaning and storage. Fix the grill pan handle securely in position before use.
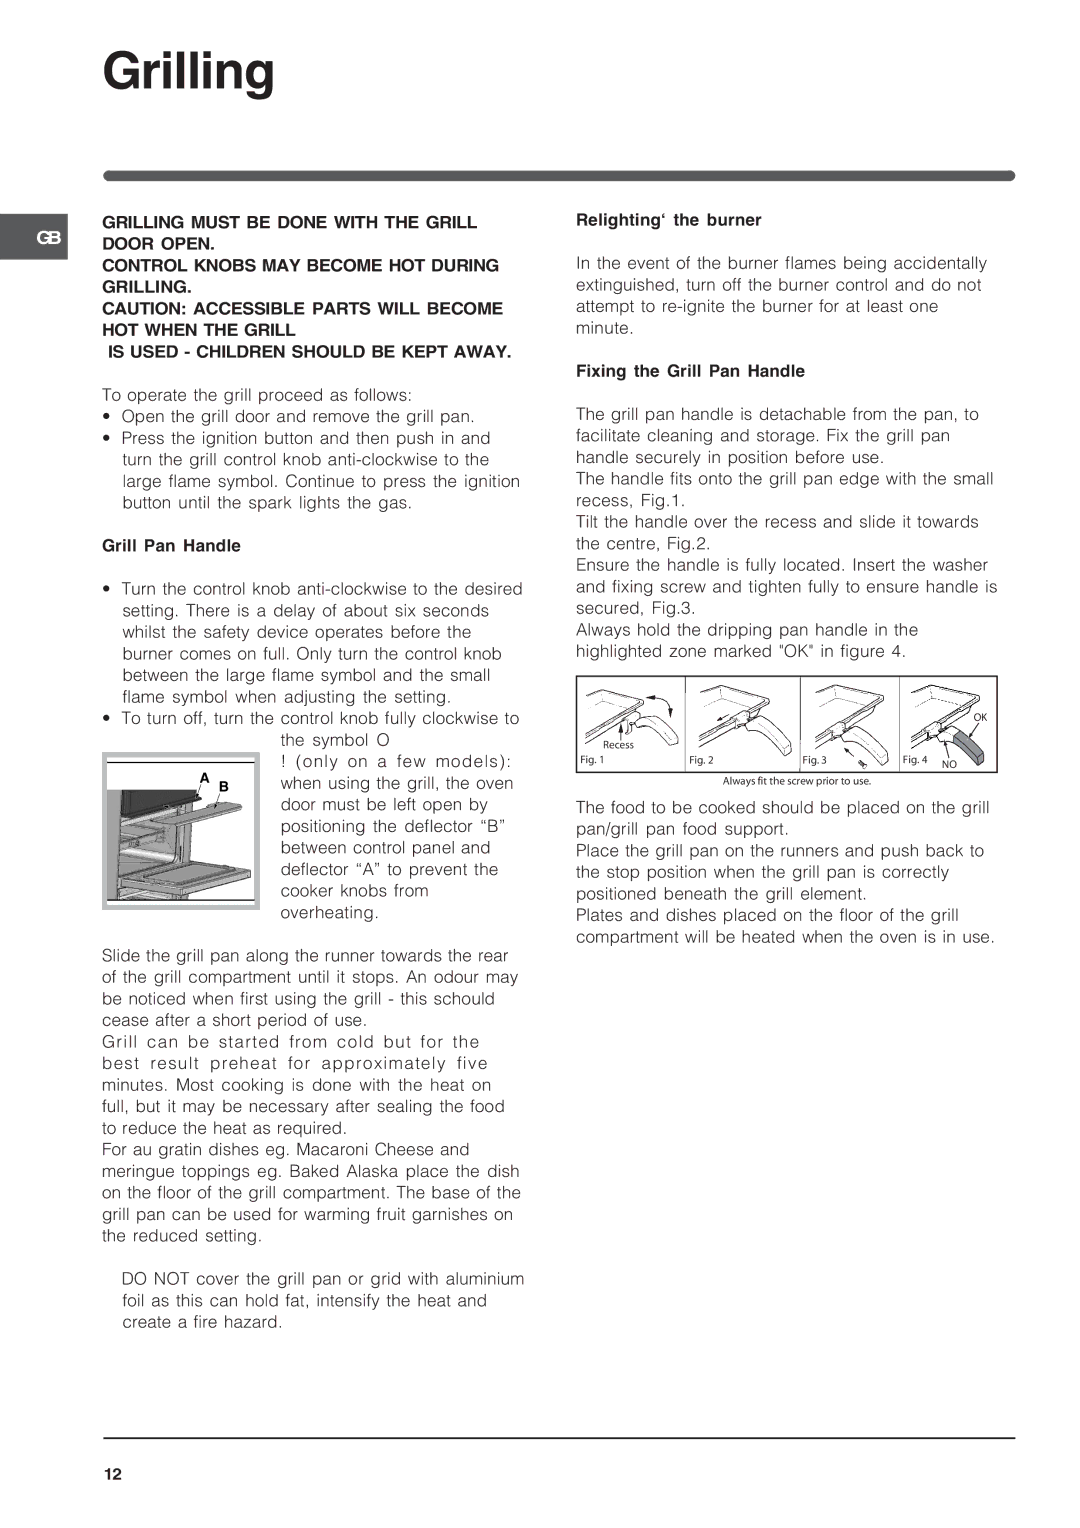
The handle fits onto the grill pan edge with the small recess, Fig.1.
Tilt the handle over the recess and slide it towards the centre, Fig.2.
Ensure the handle is fully located. Insert the washer and fixing screw and tighten fully to ensure handle is secured, Fig.3.
Always hold the dripping pan handle in the highlighted zone marked "OK" in figure 4.
OK
| Recess |
|
|
|
|
Fig. 1 | Fig. 2 | Fig. 3 | Fig. 4 | NO | |
|
|
|
|
| |
Always fit the screw prior to use.
The food to be cooked should be placed on the grill pan/grill pan food support.
Place the grill pan on the runners and push back to the stop position when the grill pan is correctly positioned beneath the grill element.
Plates and dishes placed on the floor of the grill compartment will be heated when the oven is in use.
12
