Step 4

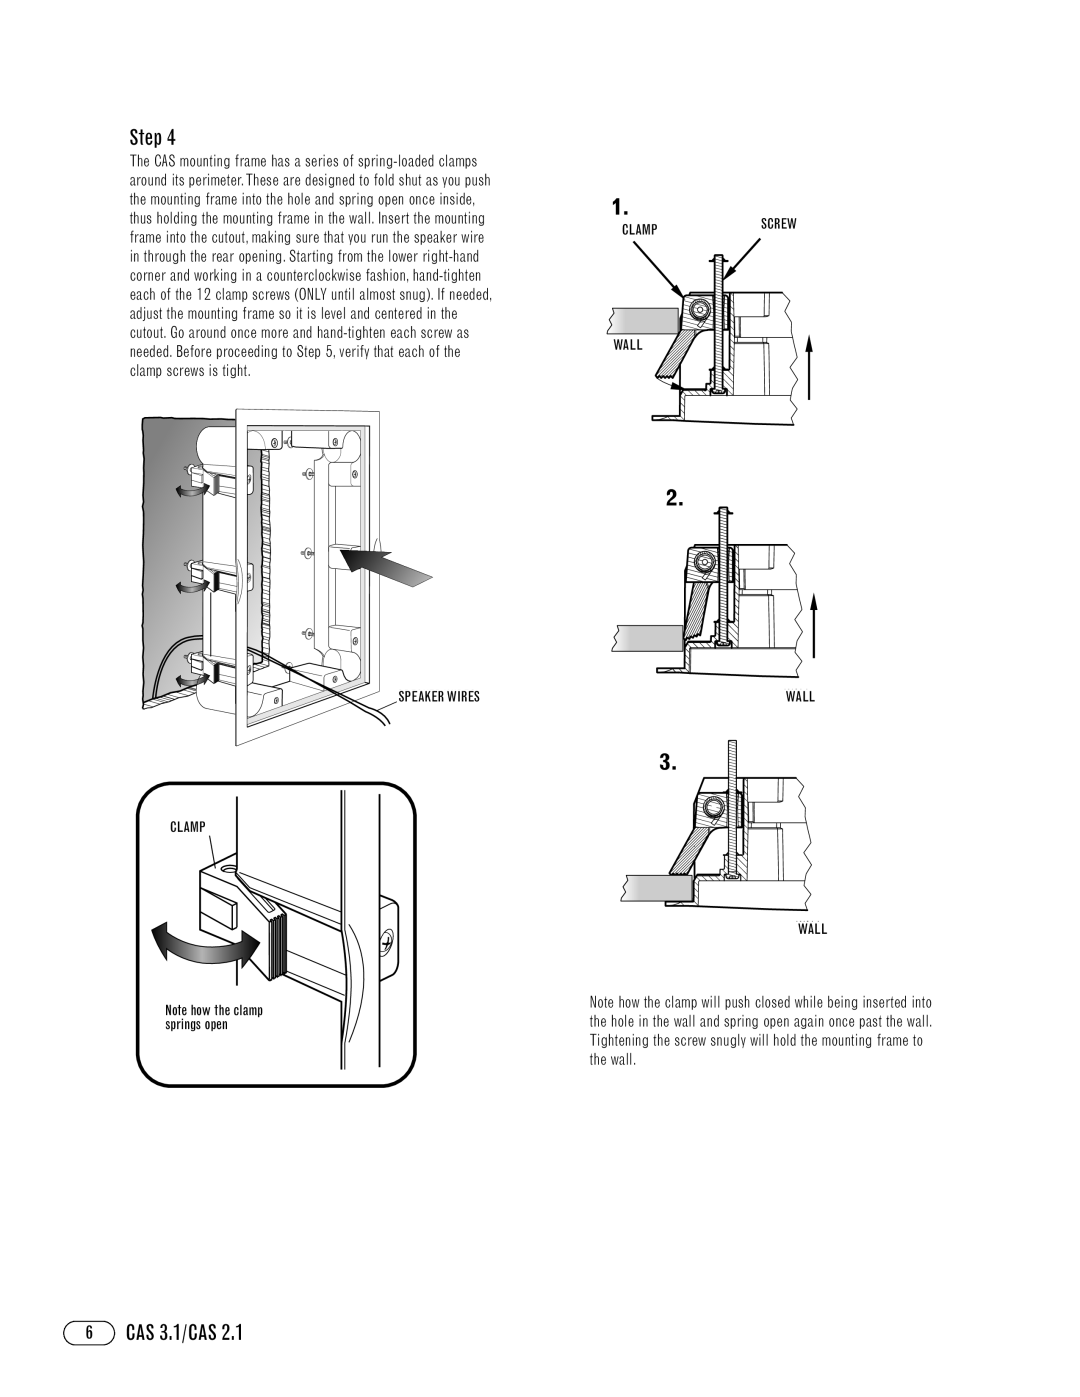
The CAS mounting frame has a series of spring-loaded clamps around its perimeter. These are designed to fold shut as you push the mounting frame into the hole and spring open once inside, thus holding the mounting frame in the wall. Insert the mounting frame into the cutout, making sure that you run the speaker wire in through the rear opening. Starting from the lower right-hand corner and working in a counterclockwise fashion, hand-tighten each of the 12 clamp screws (ONLY until almost snug). If needed, adjust the mounting frame so it is level and centered in the cutout. Go around once more and hand-tighten each screw as needed. Before proceeding to Step 5, verify that each of the clamp screws is tight.

1.

CLAMPSCREW

WALL

CLAMP

Note how the clamp springs open

2.

SPEAKER WIRES

WALL

3.

WALL

Note how the clamp will push closed while being inserted into the hole in the wall and spring open again once past the wall. Tightening the screw snugly will hold the mounting frame to the wall.

6CAS 3.1/CAS 2.1

Page 6
Image 6
Infinity CAS 3.1, CAS 2.1 manual Clampscrew Wall