Powered Subwoofer
A | B |
AB
AB
IMPORTANT – DO NOT THROW THIS AWAY
Mounting Template
for
THE PERFORATED INNER LINE ON THE TEMPLATE MEASURES
Please Note the molded bezel that mounts in front of this frame measures 11" x
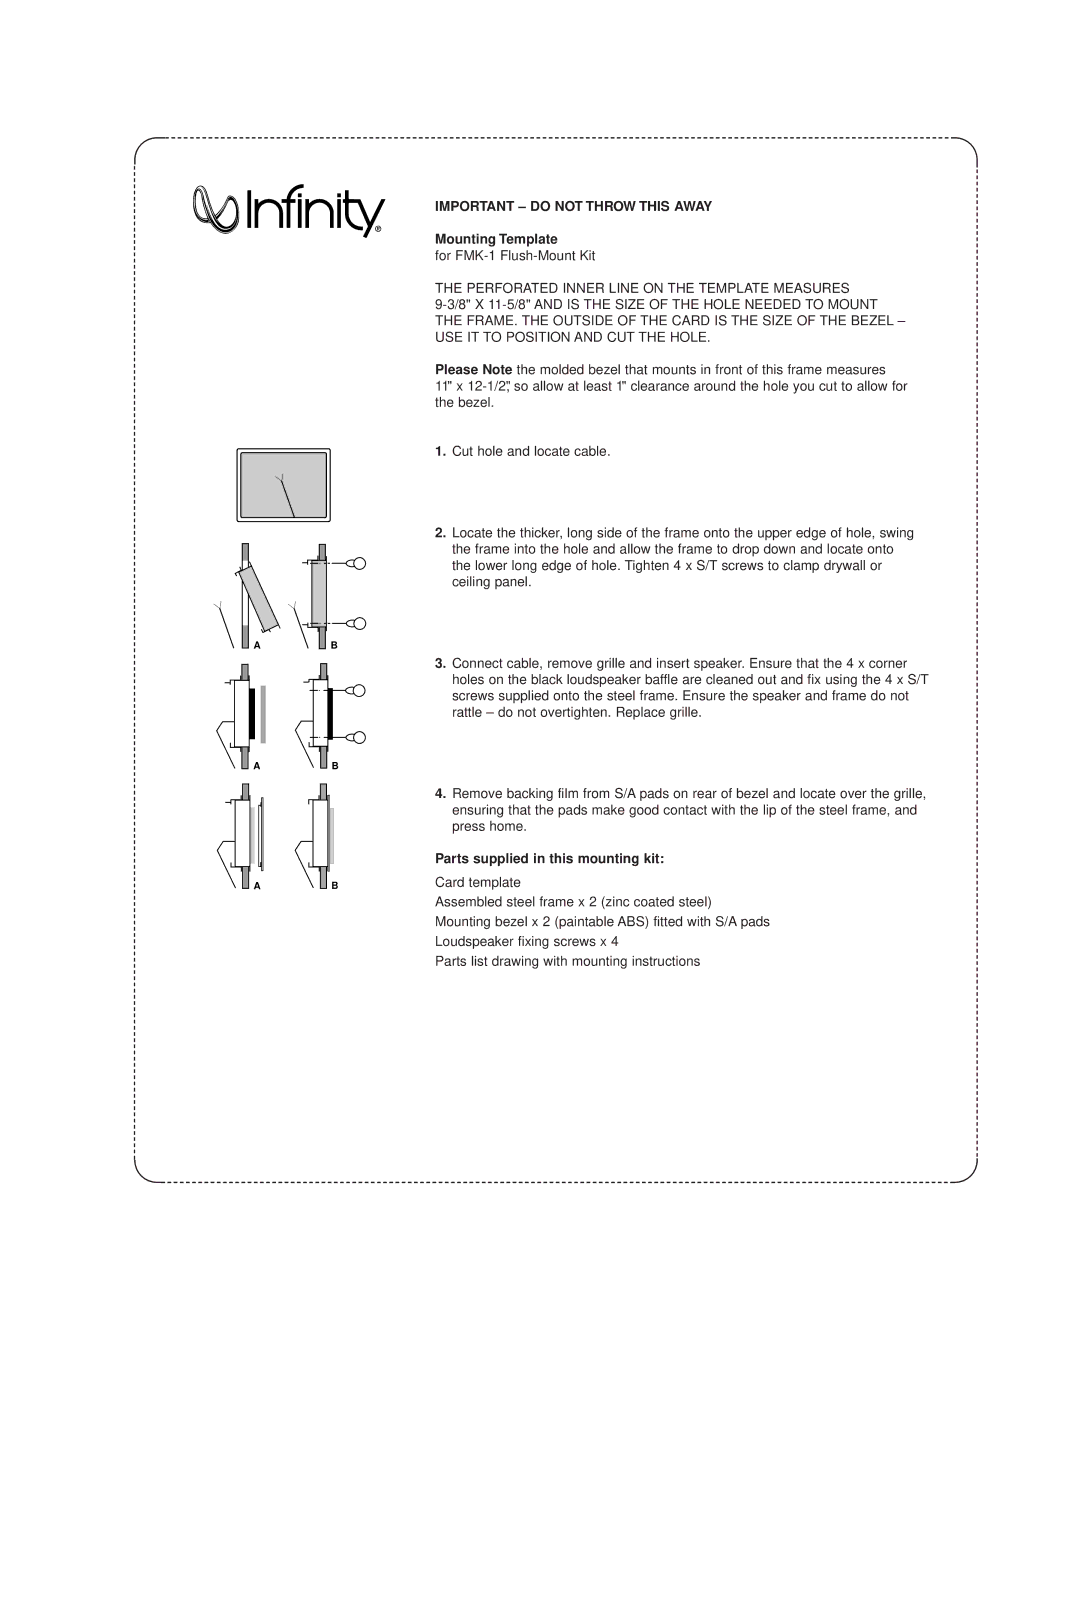
1.Cut hole and locate cable.
2.Locate the thicker, long side of the frame onto the upper edge of hole, swing the frame into the hole and allow the frame to drop down and locate onto the lower long edge of hole. Tighten 4 x S/T screws to clamp drywall or ceiling panel.
3.Connect cable, remove grille and insert speaker. Ensure that the 4 x corner holes on the black loudspeaker baffle are cleaned out and fix using the 4 x S/T screws supplied onto the steel frame. Ensure the speaker and frame do not rattle – do not overtighten. Replace grille.
4.Remove backing film from S/A pads on rear of bezel and locate over the grille, ensuring that the pads make good contact with the lip of the steel frame, and press home.
Parts supplied in this mounting kit:
Card template
Assembled steel frame x 2 (zinc coated steel)
Mounting bezel x 2 (paintable ABS) fitted with S/A pads
Loudspeaker fixing screws x 4
Parts list drawing with mounting instructions