Quick Installation Guide
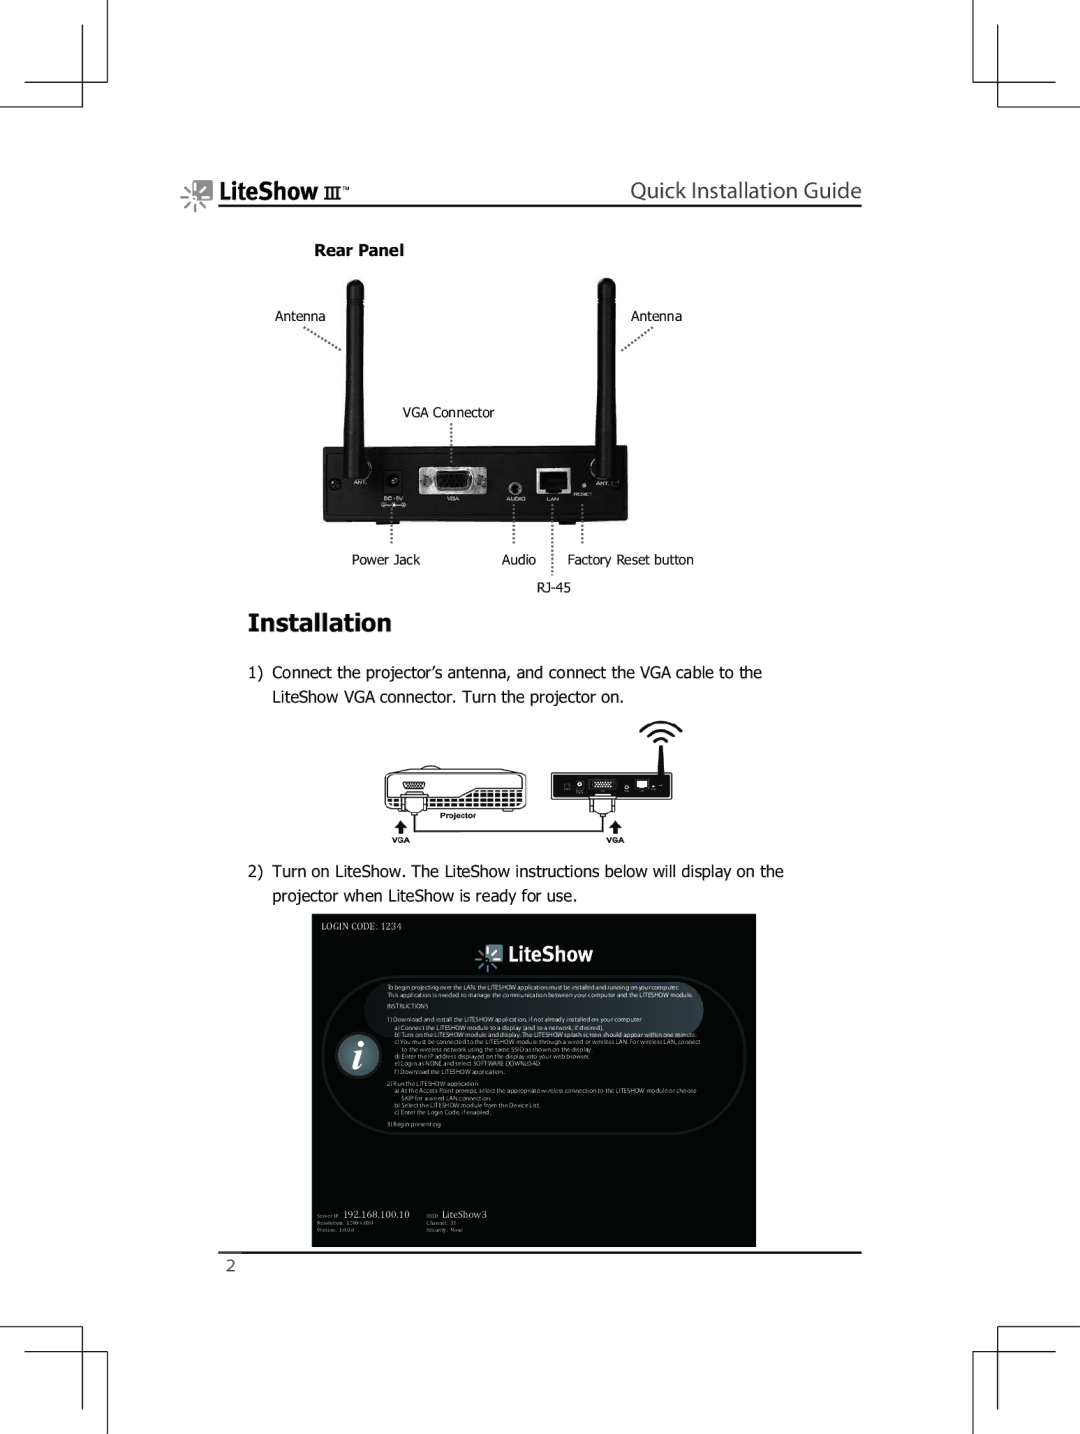
Rear Panel
Antenna |
| Antenna |
|
|
|
VGA Connector
Power Jack | Audio | Factory Reset button |
Installation
1)Connect the projector’s antenna, and connect the VGA cable to the LiteShow VGA connector. Turn the projector on.
2)Turn on LiteShow. The LiteShow instructions below will display on the projector when LiteShow is ready for use.
LOGIN CODE: 1234
To begin projecting over the LAN, the LITESHOW application must be installed and running on your computer.
This application is needed to manage the communication between your computer and the LITESHOW module.
INSTRUCTIONS
1)Download and install the LITESHOW application, if not already installed on your computer
a)Connect the LITESHOW module to a display (and to a network, if desired).
b)Turn on the LITESHOW module and display. The LITESHOW splash screen should appear within one minute.
c)You must be connected to the LITESHOW module through a wired or wireless LAN. For wireless LAN, connect to the wireless network using the same SSID as shown on the display.
d) Enter the IP address displayed on the display into your web browser.
e)Login as NONE and select SOFTWARE DOWNLOAD.
f)Download the LITESHOW application.
2)Run the LITESHOW application
a)At the Access Point prompt, select the appropriate wireless connection to the LITESHOW module or choose SKIP for a wired LAN connection.
b)Select the LITESHOW module from the Device List.
c)Enter the Login Code, if enabled.
3)Begin presenting
Server IP: 192.168.100.10 | SSID: LiteShow3 |
Resolution: 1280 x 800 | Channel: 11 |
Version: 1.0.0.0 | Security: None |
2