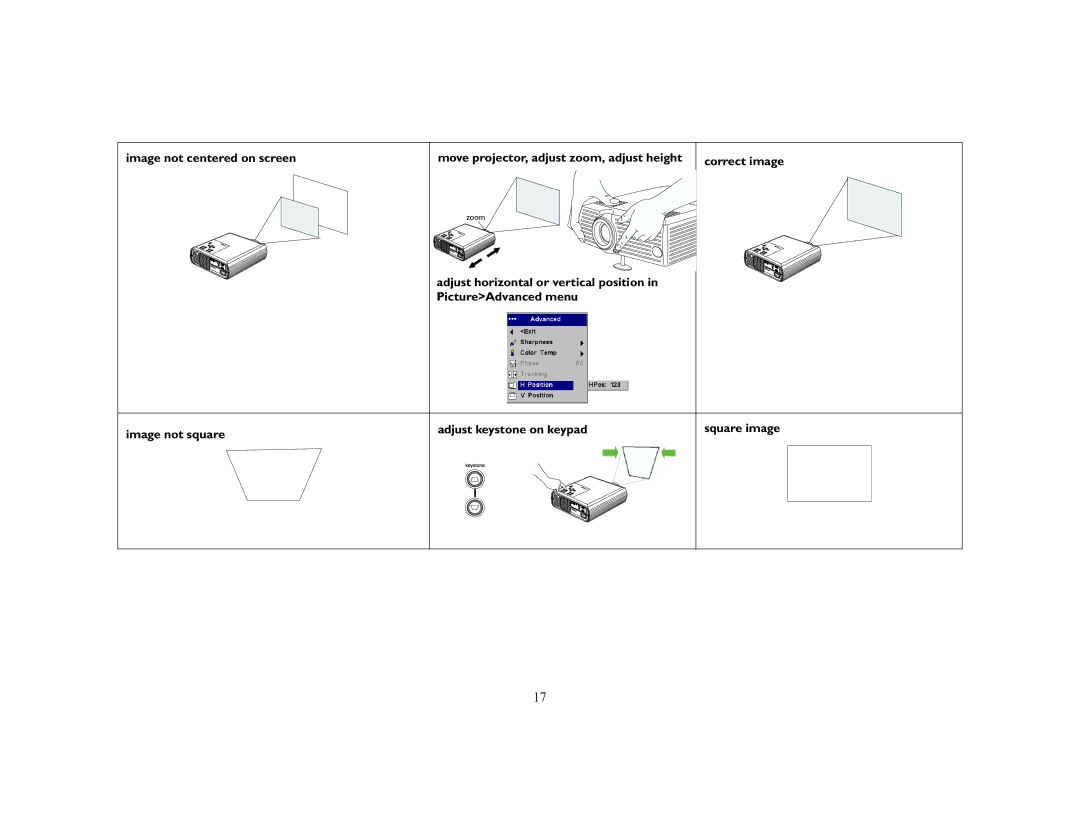
image not centered on screen
move projector, adjust zoom, adjust height
zoom
adjust horizontal or vertical position in Picture>Advanced menu
correct image
image not square
adjust keystone on keypad
square image
17
image not centered on screen
move projector, adjust zoom, adjust height
adjust horizontal or vertical position in Picture>Advanced menu
correct image
image not square
adjust keystone on keypad
square image
17