Hand Chain Adjustment or Replacement
![]()
![]() CAUTION
CAUTION
•When cutting the weld side of a hand chain link, do not cut or nick the opposite side. A damaged link must be replaced to prevent premature failure. A falling hand chain could cause injury.
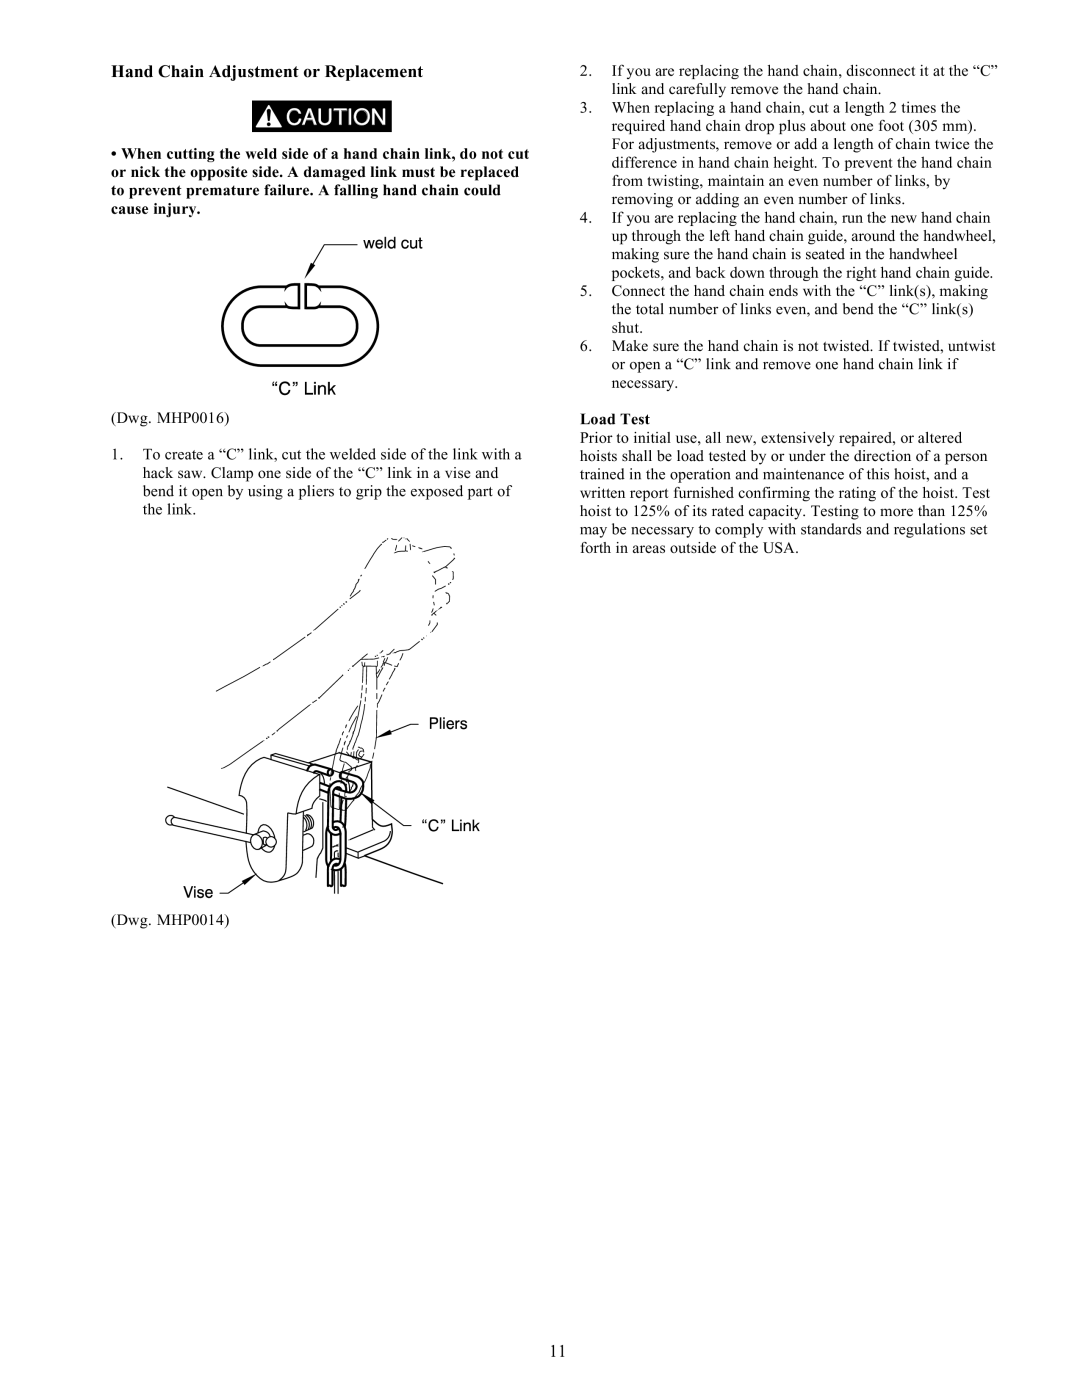
(Dwg. MHP0016)
1.To create a “C” link, cut the welded side of the link with a hack saw. Clamp one side of the “C” link in a vise and bend it open by using a pliers to grip the exposed part of the link.
(Dwg. MHP0014)
2.If you are replacing the hand chain, disconnect it at the “C” link and carefully remove the hand chain.
3.When replacing a hand chain, cut a length 2 times the required hand chain drop plus about one foot (305 mm). For adjustments, remove or add a length of chain twice the difference in hand chain height. To prevent the hand chain from twisting, maintain an even number of links, by removing or adding an even number of links.
4.If you are replacing the hand chain, run the new hand chain up through the left hand chain guide, around the handwheel, making sure the hand chain is seated in the handwheel pockets, and back down through the right hand chain guide.
5.Connect the hand chain ends with the “C” link(s), making the total number of links even, and bend the “C” link(s) shut.
6.Make sure the hand chain is not twisted. If twisted, untwist or open a “C” link and remove one hand chain link if necessary.
Load Test
Prior to initial use, all new, extensively repaired, or altered hoists shall be load tested by or under the direction of a person trained in the operation and maintenance of this hoist, and a written report furnished confirming the rating of the hoist. Test hoist to 125% of its rated capacity. Testing to more than 125% may be necessary to comply with standards and regulations set forth in areas outside of the USA.
11