STEP 5 - Option 2: Installing on a solid concrete or concrete block wall*
![]() CAUTION: To prevent property damage or personal injury, never drill into mortar between blocks. Mount wall plate directly onto the concrete surface.
CAUTION: To prevent property damage or personal injury, never drill into mortar between blocks. Mount wall plate directly onto the concrete surface.
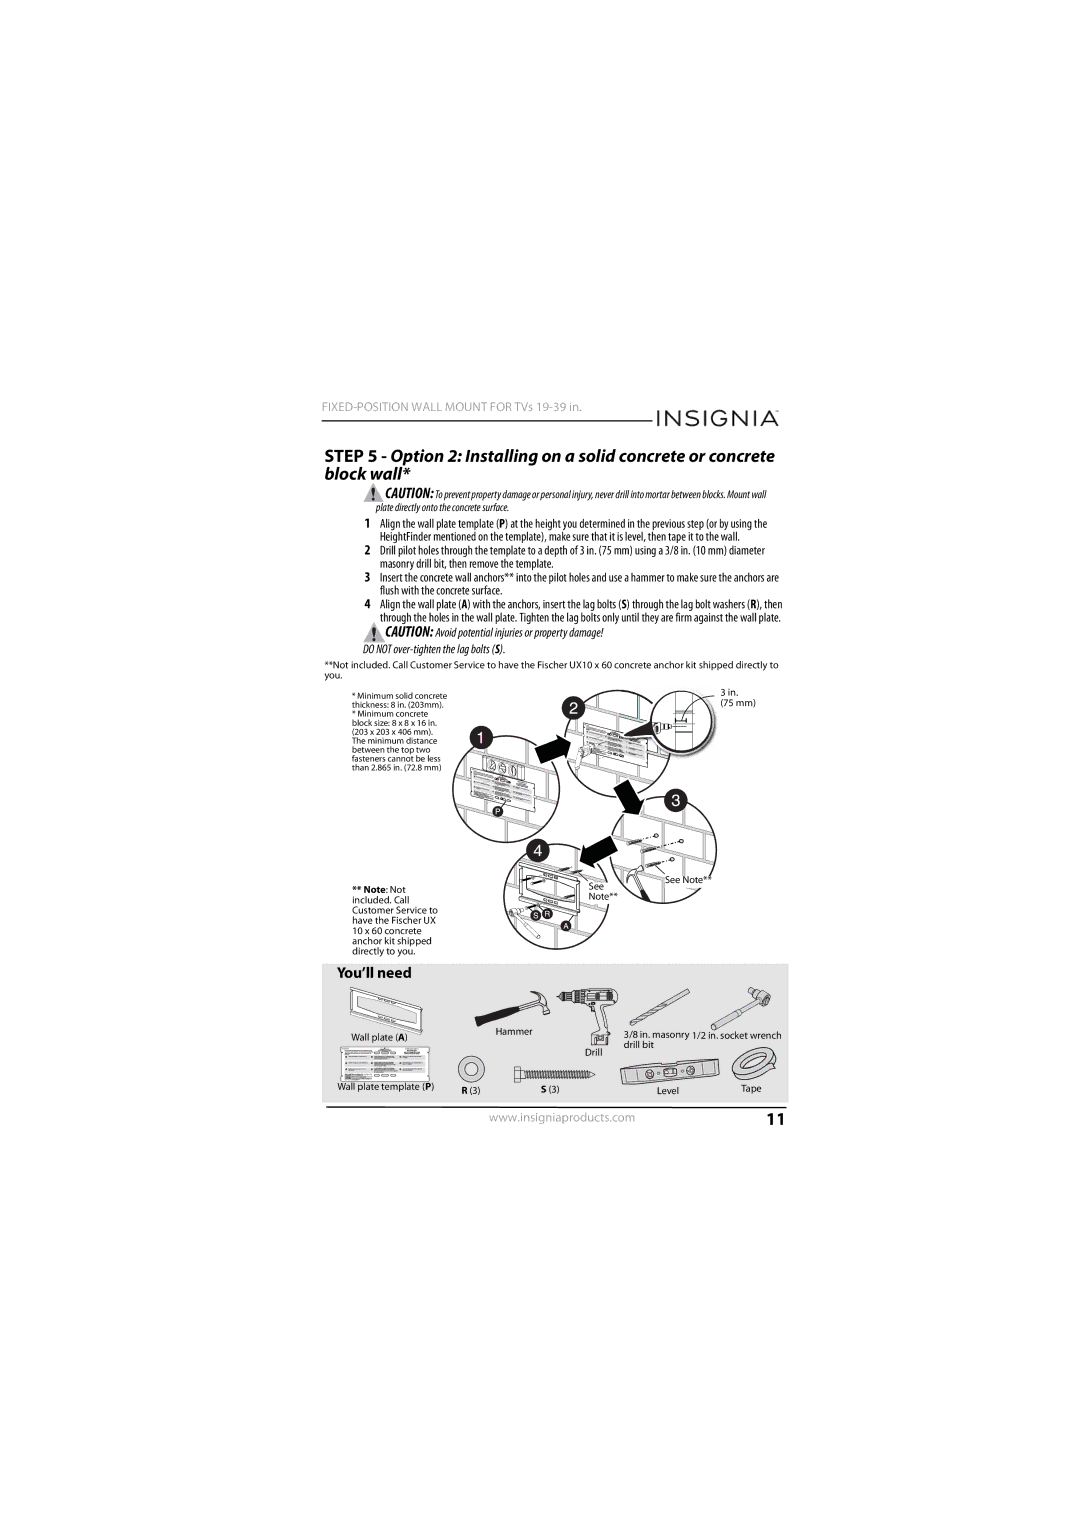
1Align the wall plate template (P) at the height you determined in the previous step (or by using the HeightFinder mentioned on the template), make sure that it is level, then tape it to the wall.
2Drill pilot holes through the template to a depth of 3 in. (75 mm) using a 3/8 in. (10 mm) diameter masonry drill bit, then remove the template.
3Insert the concrete wall anchors** into the pilot holes and use a hammer to make sure the anchors are flush with the concrete surface.
4Align the wall plate (A) with the anchors, insert the lag bolts (S) through the lag bolt washers (R), then through the holes in the wall plate. Tighten the lag bolts only until they are firm against the wall plate.
![]() CAUTION: Avoid potential injuries or property damage!
CAUTION: Avoid potential injuries or property damage!
DO NOT
**Not included. Call Customer Service to have the Fischer UX10 x 60 concrete anchor kit shipped directly to you.
*Minimum solid concrete thickness: 8 in. (203mm).
*Minimum concrete block size: 8 x 8 x 16 in. (203 x 203 x 406 mm). The minimum distance between the top two fasteners cannot be less than 2.865 in. (72.8 mm)
3 in.
(75 mm)
**Note: Not included. Call Customer Service to have the Fischer UX 10 x 60 concrete anchor kit shipped directly to you.
See Note**
See Note**
You’ll need
Wall plate (A) |
| Hammer | 3/8 in. masonry 1/2 in. socket wrench | |
|
|
| drill bit |
|
|
|
| Drill |
|
Wall plate template (P) | R (3) | S (3) | Level | Tape |
www.insigniaproducts.com11