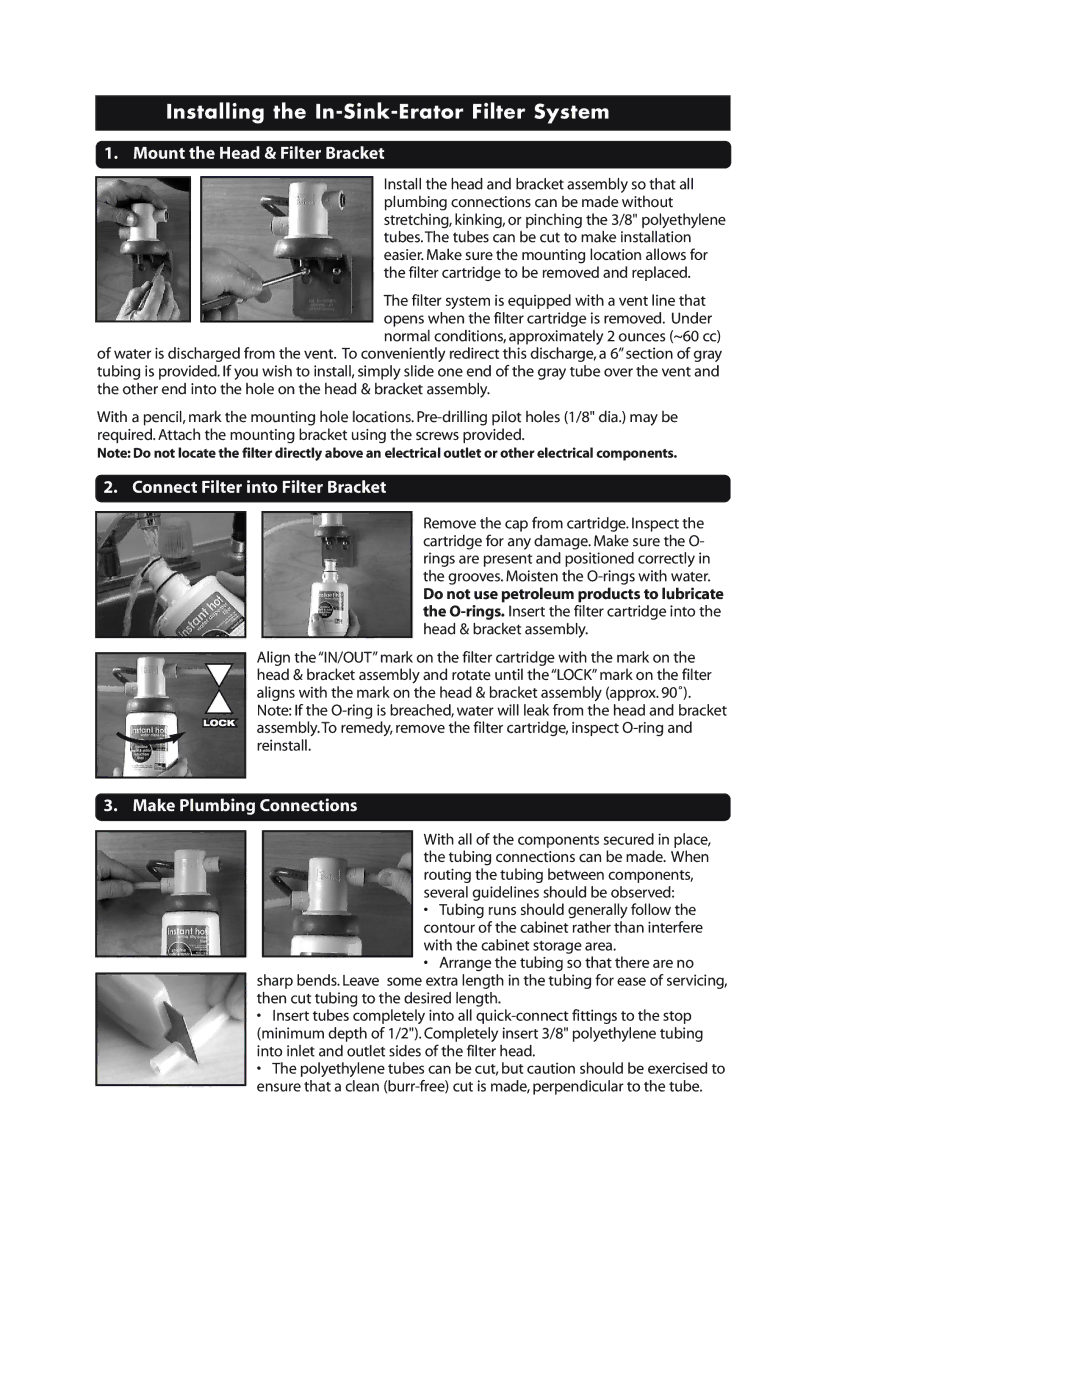
Installing the In-Sink-Erator Filter System

1. Mount the Head & Filter Bracket

Install the head and bracket assembly so that all plumbing connections can be made without stretching, kinking, or pinching the 3/8" polyethylene tubes. The tubes can be cut to make installation easier. Make sure the mounting location allows for the filter cartridge to be removed and replaced.

The filter system is equipped with a vent line that opens when the filter cartridge is removed. Under normal conditions, approximately 2 ounces (~60 cc)

of water is discharged from the vent. To conveniently redirect this discharge, a 6” section of gray tubing is provided. If you wish to install, simply slide one end of the gray tube over the vent and the other end into the hole on the head & bracket assembly.

With a pencil, mark the mounting hole locations. Pre-drilling pilot holes (1/8" dia.) may be required. Attach the mounting bracket using the screws provided.

Note: Do not locate the filter directly above an electrical outlet or other electrical components.

2. Connect Filter into Filter Bracket

Remove the cap from cartridge. Inspect the cartridge for any damage. Make sure the O- rings are present and positioned correctly in the grooves. Moisten the O-rings with water.

Do not use petroleum products to lubricate the O-rings. Insert the filter cartridge into the head & bracket assembly.

Align the “IN/OUT” mark on the filter cartridge with the mark on the head & bracket assembly and rotate until the “LOCK” mark on the filter aligns with the mark on the head & bracket assembly (approx. 90˚). Note: If the O-ring is breached, water will leak from the head and bracket assembly. To remedy, remove the filter cartridge, inspect O-ring and reinstall.

3. Make Plumbing Connections

With all of the components secured in place, the tubing connections can be made. When routing the tubing between components, several guidelines should be observed:

• Tubing runs should generally follow the contour of the cabinet rather than interfere with the cabinet storage area.

• Arrange the tubing so that there are no

sharp bends. Leave some extra length in the tubing for ease of servicing, then cut tubing to the desired length.

Insert tubes completely into all quick-connect fittings to the stop (minimum depth of 1/2"). Completely insert 3/8" polyethylene tubing into inlet and outlet sides of the filter head.

The polyethylene tubes can be cut, but caution should be exercised to ensure that a clean (burr-free) cut is made, perpendicular to the tube.

Page 2
Image 2
InSinkErator Water Dispenser owner manual Installing the In-Sink-Erator Filter System, Mount the Head & Filter Bracket

Water Dispenser specifications

The InSinkErator Water Dispenser is a highly efficient appliance designed to provide instant hot or cool water at the touch of a button, making it an invaluable addition to any modern kitchen. This innovative device combines advanced technology with user-friendly features, ensuring convenience and efficiency for daily cooking, beverage preparation, and more.

One of the standout features of the InSinkErator Water Dispenser is its ability to deliver near-boiling water, which can reach temperatures around 200 degrees Fahrenheit. This is perfect for preparing tea, cooking pasta, or even sanitizing kitchen utensils. The hot water is dispensed rapidly, saving time compared to traditional methods that require boiling water on the stovetop.

The dispenser is equipped with a sleek and compact design, which fits seamlessly into any kitchen decor. Available in various styles and finishes, including chrome, satin nickel, and black, it can complement both traditional and modern kitchen aesthetics. The lever action is smooth and allows for precise control over the amount of water dispensed.

Another significant aspect of the InSinkErator Water Dispenser is its energy-efficient design. The unit is engineered with a powerful yet efficient heating element that maintains water temperature without excessive energy consumption. This not only helps lower energy bills but also reduces the environmental impact of everyday kitchen activities.

Safety is also a top priority in the design of the InSinkErator Water Dispenser. The product includes a child-safe lock feature, preventing accidental hot water dispensing, especially in households with young children. Additionally, the unit is equipped with a built-in filter that ensures the water used is clean and free from impurities, further enhancing its quality and taste.

Installation is straightforward, and the water dispenser can be connected to an existing water supply, making it a practical choice for homeowners looking to upgrade their kitchen. Overall, the InSinkErator Water Dispenser excels in providing efficient, safe, and stylish solutions for instant hot and ambient water needs, fulfilling the demands of today's fast-paced lifestyle.